Conditional Split Transformation in SSIS 2014
This is just like IF condition or CASE statement, checks the given condition and based on the condition, the output will be sent to the appropriate destination path. It has ONE input and MANY outputs.
For example, if we want to store the students in a class who have marks greater than 40 in one Table and the students who score less than 40 to another table then we can use this Conditional Split Transformation to split the data using the condition. Note that Conditional Split is case-sensitive.
Conditional Split Transformation in SSIS 2014 Example
STEP 1: Drag and drop the data flow task from the toolbox to control flow and name it as Conditional Split Transformation.
Double click on it and it will open the data flow tab.
STEP 2: Drag and drop OLE DB Source from toolbox to data flow region. Double click on OLE DB source in the data flow region will open the connection manager settings and provides space to write our SQL statement.
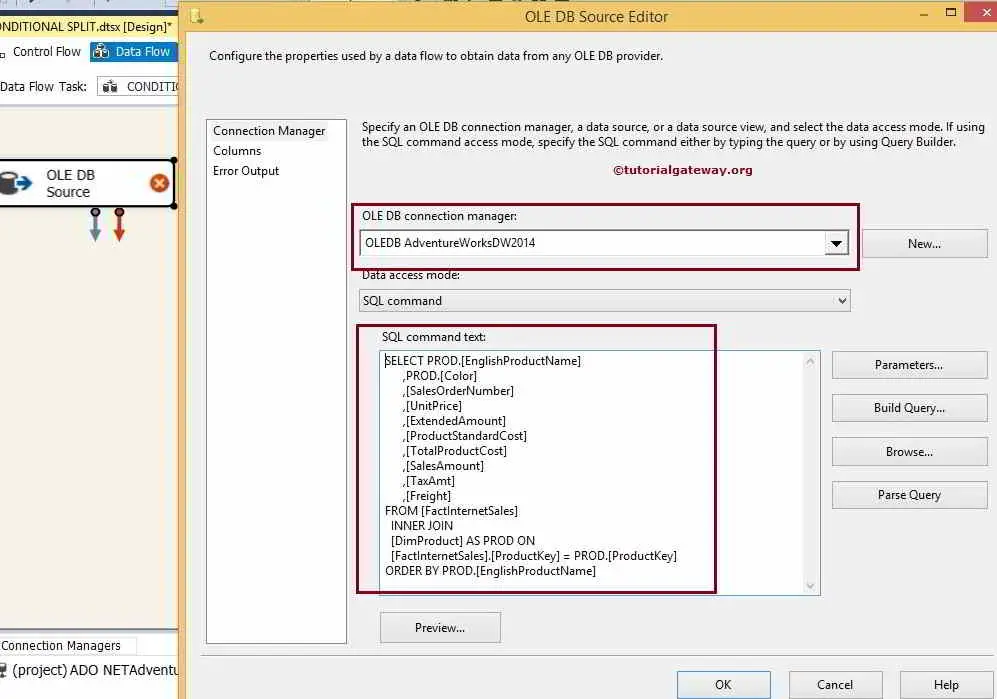
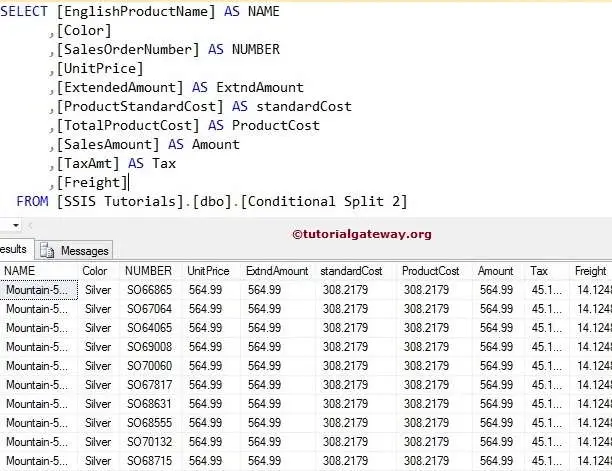
SQL command using for our OLE DB source is
STEP 3: Click on columns tab to verify the columns. In this tab we can uncheck the unwanted columns also.
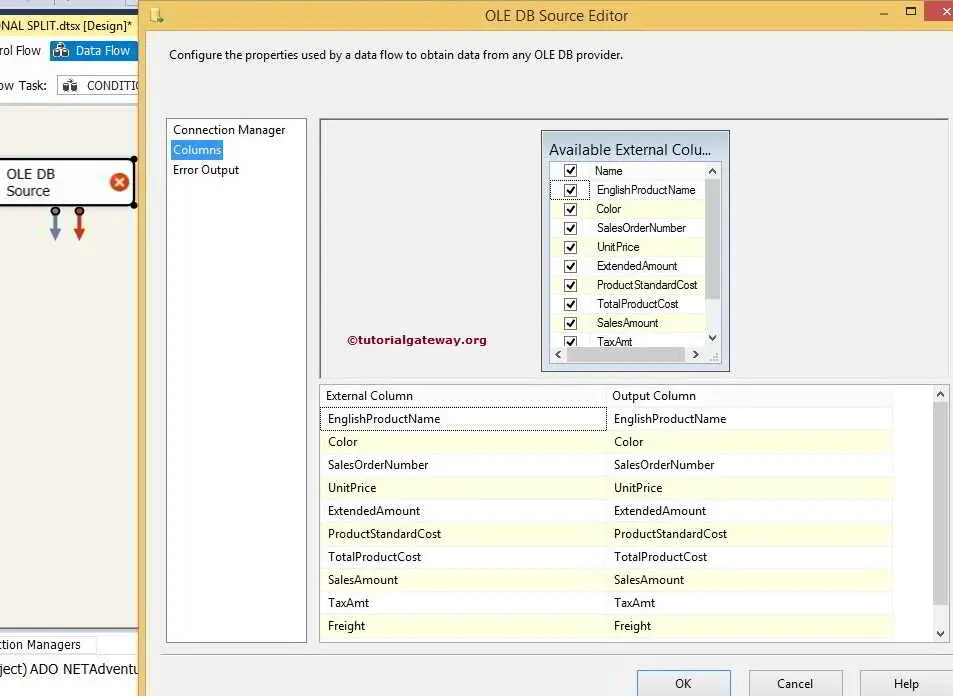
Click ok
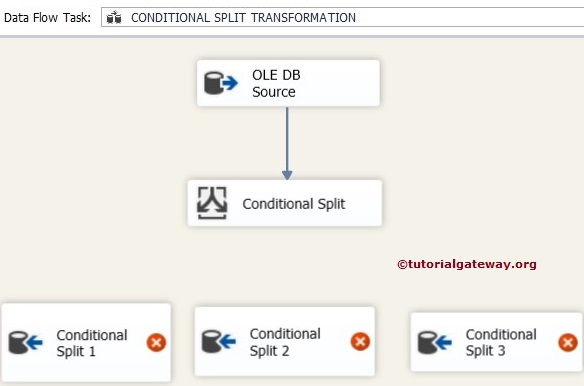
STEP 4: Drag and drop the Conditional Split Transformation from toolbox to data flow region and double-click on it to provide the conditions.

Conditions we used in this transformations are:
- ROWS < 400: SalesAmount < 400
- ROWS BETWEEN 400 TO 2000: SalesAmount >= 400 && SalesAmount < 2000
- Remaining rows will be acted as default output and we named it as [Rows > 2000]
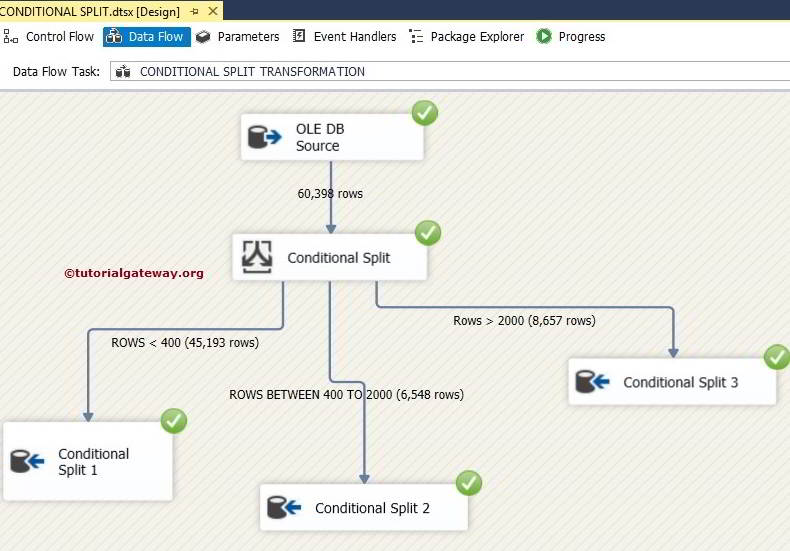
From the above you can observe that, We used 2 conditions and one default output in Conditional Split Transformation So, We get 3 output in total.
STEP 5:Drag and drop three OLE DB Destinations from toolbox to data flow region and rename them as Condition Split 1, Condition Split 2 and Condition Split 3
STEP 6: Drag and drop the arrow from Conditional Split Transformation to OLE DB Destination (Conditional Split 1) will pop up Input Output Selection window to select the appropriate output. Let us select the [Rows <400] output as shown below
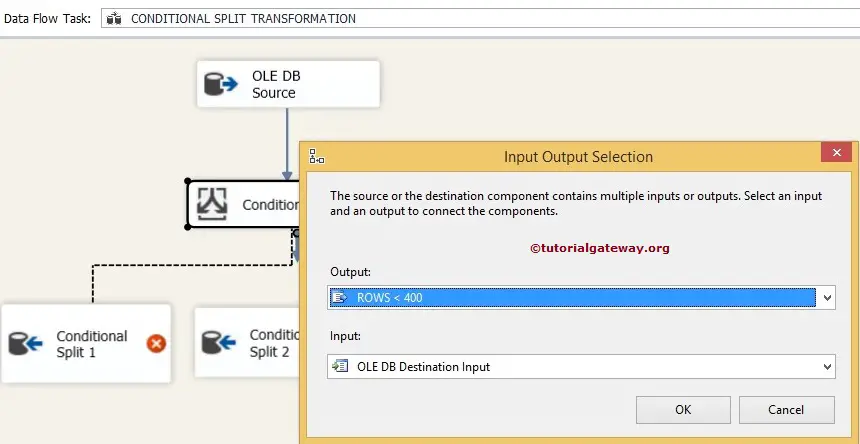
Click ok
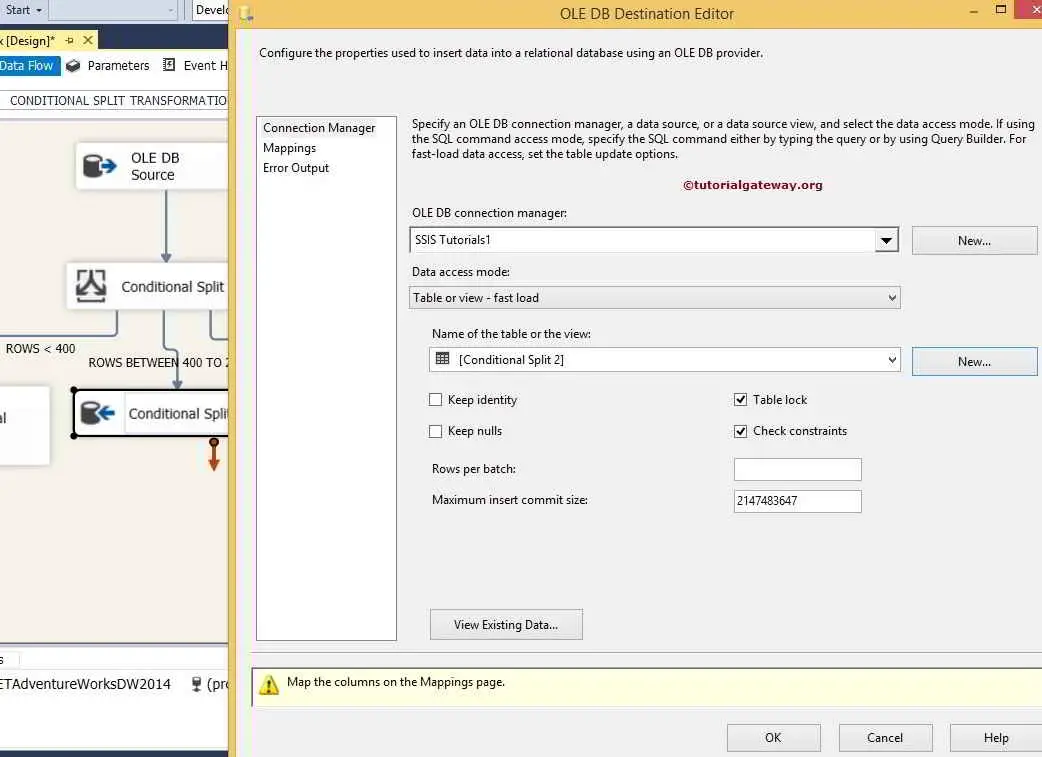
STEP 7: Now we have to provide OLE DB Connection Manager and table details of the Destination. So double-click on the OLE DB Destination (Conditional Split 1) and provide the required information
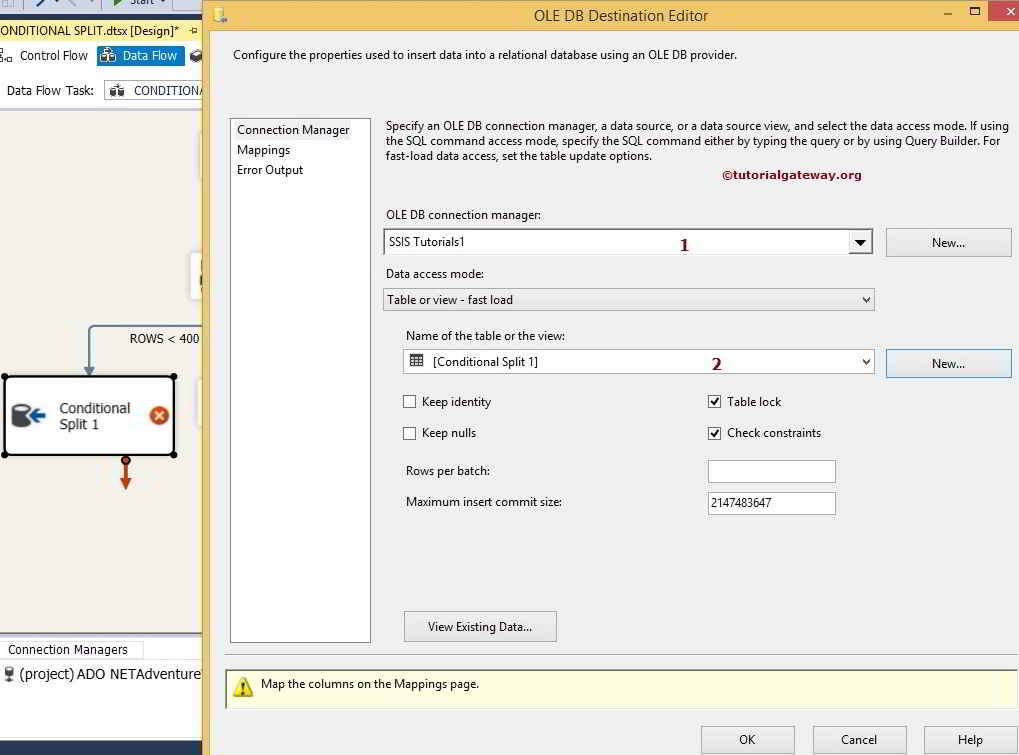
From the above screenshot you can observe that, We selected [Conditional Split 1] inside the SSIS Tutorials Database
STEP 8: Click on Mappings tab to check whether the source columns are exactly mapped to the destination columns.
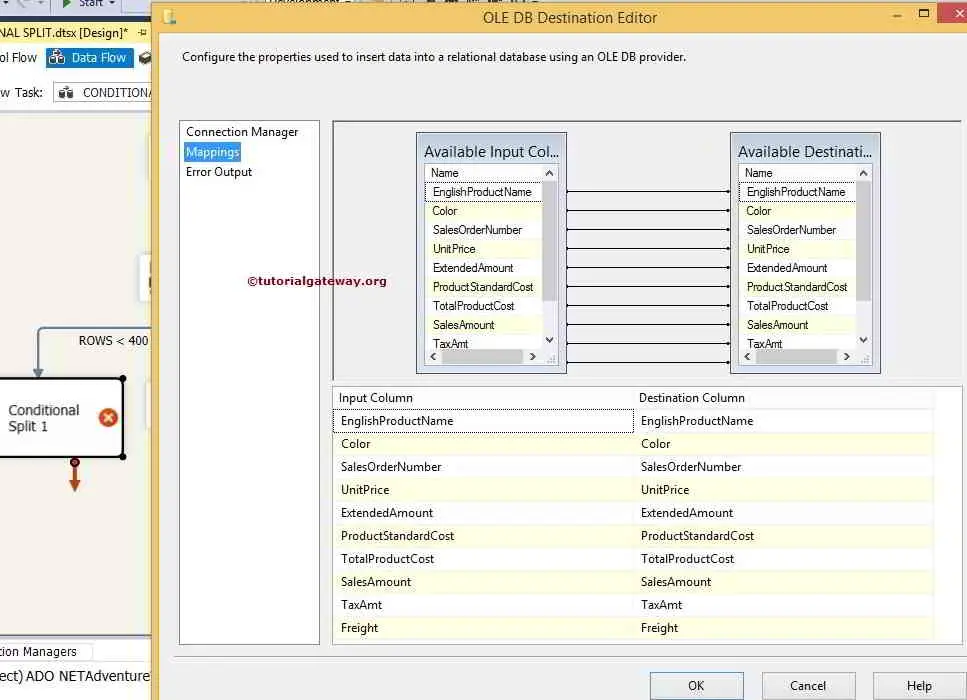
Click ok
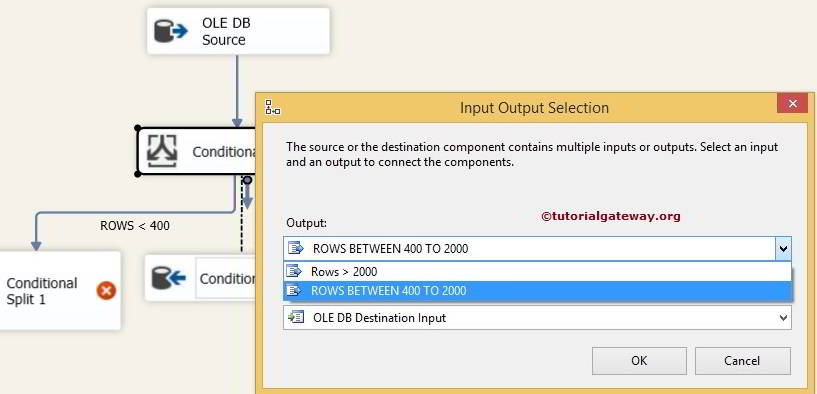
STEP 9: Drag and drop one more arrow from Conditional Split Transformation to OLE DB Destination (Conditional Split 2) will pop up Input Output Selection window to select the output. This time we are going to select [Rows between 400 to 2000] output as shown below
STEP 10: Let us provide OLE DB Connection Manager and table details of the destination for our second output. So double-click on the OLE DB Destination (Conditional Split 2) and provide the required information.
From the above screenshot you can observe that, We selected the [Conditional Split 2] inside the SSIS Tutorials Database
Repeat STEP 8 and Click ok
STEP 11: Drag and drop one more arrow from Conditional Split Transformation to OLE DB Destination (Conditional Split 3). Here we are configuring the default output data so, Double click on the OLE DB Destination and provide the information
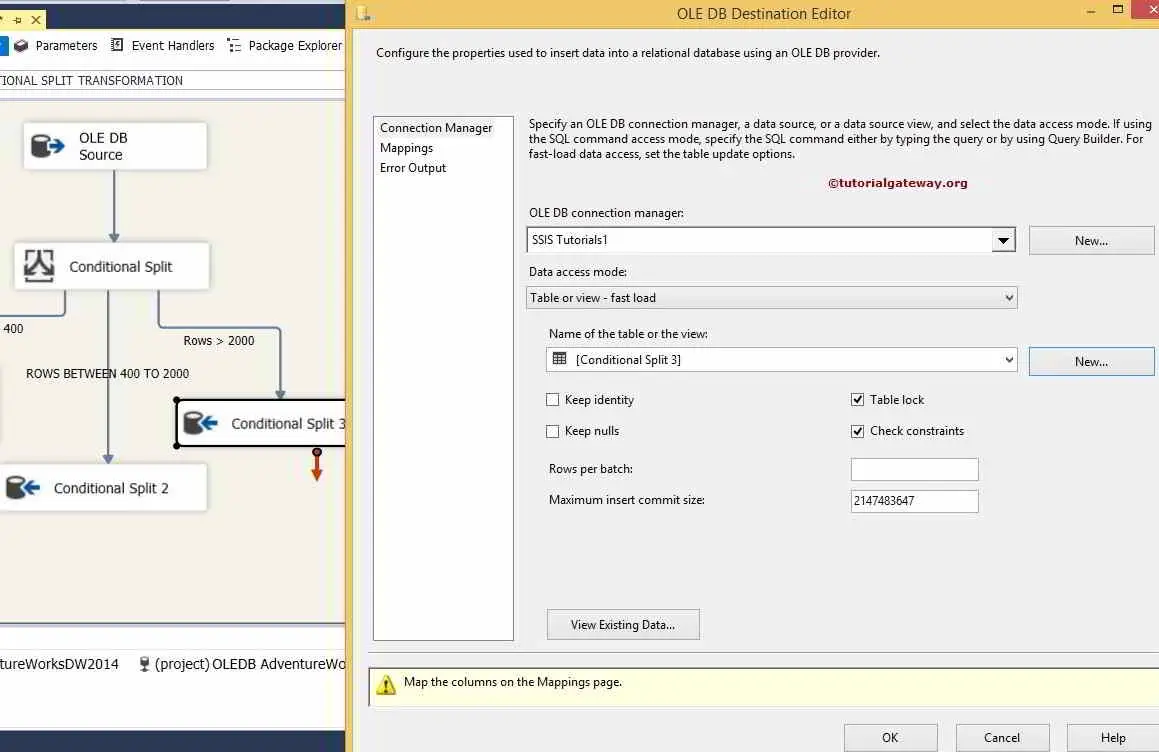
From the above screenshot you can observe that, We selected the [Conditional Split 3] inside the SSIS Tutorials Database
Repeat STEP 8 and Click ok
We finished developing the package. It’s time to run the package
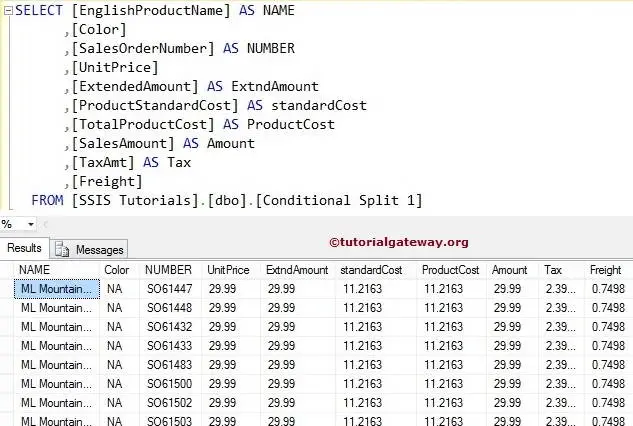
Let’s see the result in [Conditional Split 1] Table in SQL Server. Open the SQL Server Management studio and write the below SQL select statement to check the result
Let’s see the result in [Conditional Split 2] Table in SQL Server. Open the SQL Server Management studio and write the below SQL select statement to check the result
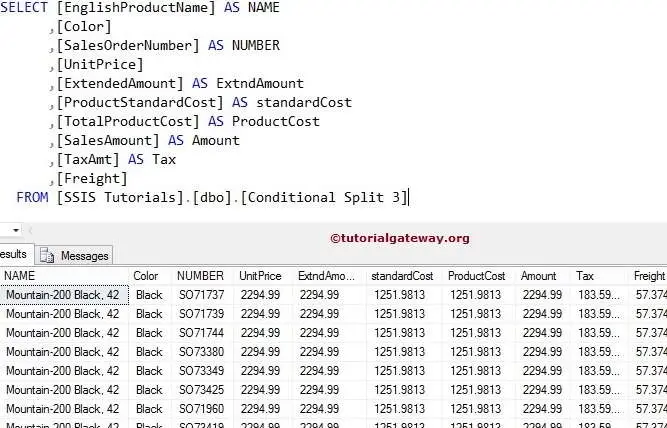
Let’s see the result in [Conditional Split 3] Table in SQL Server. Open the SQL Server Management studio and write the below SQL select statement to check the result
Thank you for Visiting Our Blog
Multicast Transformation in SSIS 2014
Multicast Transformation sends input data to multiple destination paths without applying any sort of conditions or transformations.
(OR)
Takes ONE Input and makes the logical COPY of data and passes the same data to multiple outputs.
Multicast Transformation is very useful when we want to apply different transformations on the same dataset in parallel. For instance, We want to perform 2 types of transformations on same dataset then Multicast Transformation will make 2 copies of same data. On each copy we can perform different transformations.
Multicast Transformation in SSIS 2014 Example
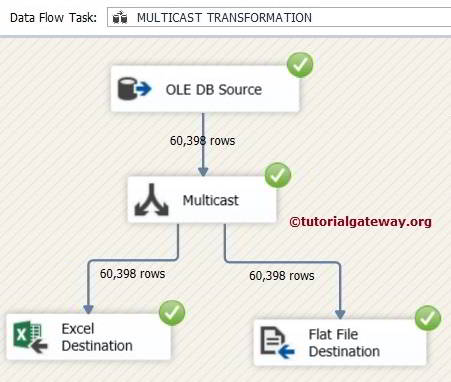
In this example, We are going to use Multicast transformation to send the OLE DB source data (from Dimcustomers and Fact internet sales tables present in Adventure Works DW 2014) to multiple destinations such as Excel file and Text file using Excel destination and Flat File destination.
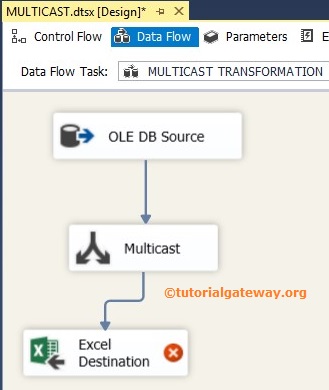
STEP 1: Drag and drop the data flow task from the toolbox to control flow and rename it as Multicast Transformation.
Double click on data flow task will open the data flow tab.
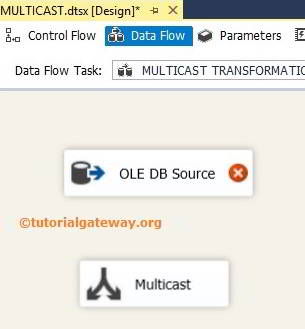
STEP 2: Drag and drop OLE DB Source, Multicast Transformation from toolbox to data flow region
STEP 3: Double click on OLE DB source in the data flow region will open the connection manager settings and provides space to write our SQL statement.

SQL Command Text
For this example we are selecting color, English Product Name, List Price, Dealer Price, English Description from DimProduct table and Sales amount column from Fact Internet Sales table presented in [Adventure Works DW 2014]
STEP 4: Click on columns tab to verify the columns. In this tab we can uncheck the unwanted columns also.
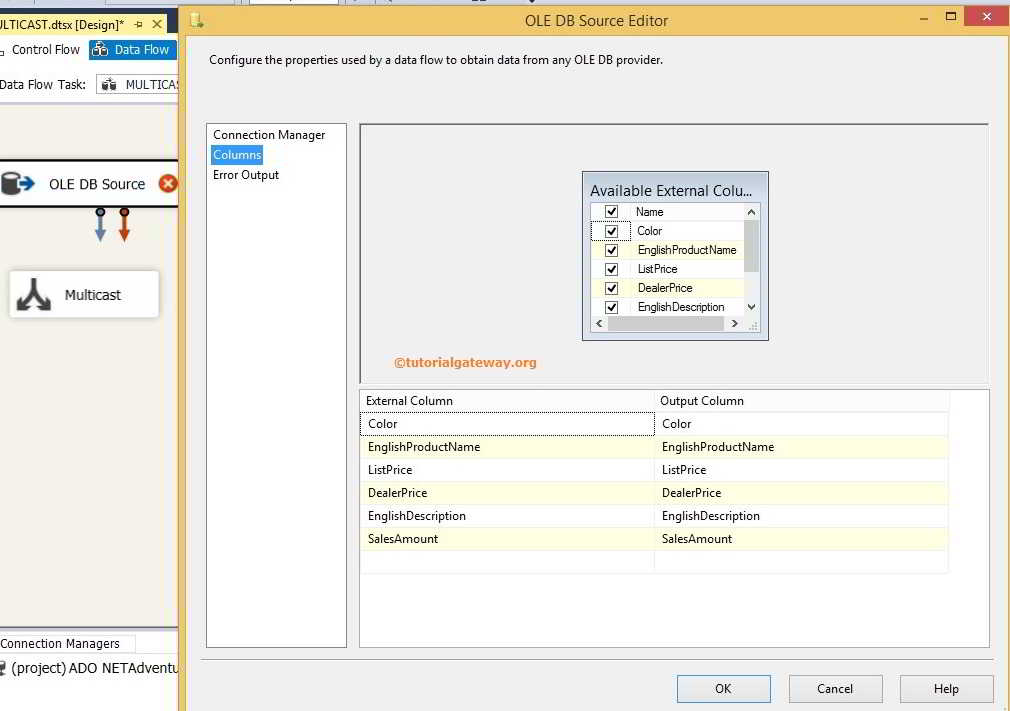
TIP: If we don’t want any column then please don’t add them in your SQL command.
STEP 5: Click ok. Drag the arrow downwards and attach to Multicast. There is nothing to do with Multicast Transformation because it will just transfer the data to multiple outputs. Drag and drop the Excel Destination into data flow region.
STEP 6: Now we have to provide Excel connection manager and table details of the destination. So double click on the Excel Destination and provide the required information

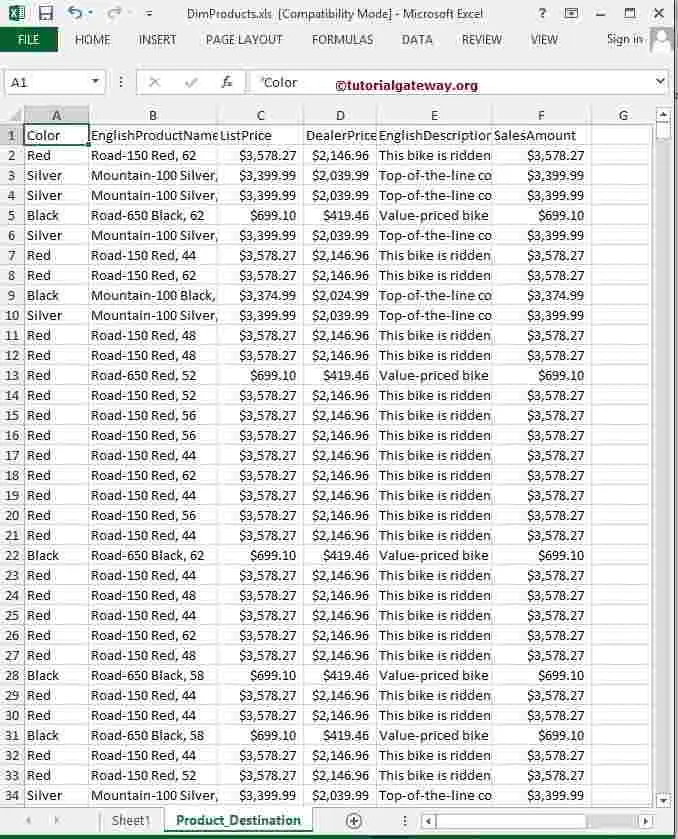
Here we selected the DimProducts.xls as our excel destination sheet
TIP: You have to create the Excel sheet before using it in the Excel Connection Manager. If you check mark the First row has column names option then, Column names will be saved in the first row of the selected Excel sheet.
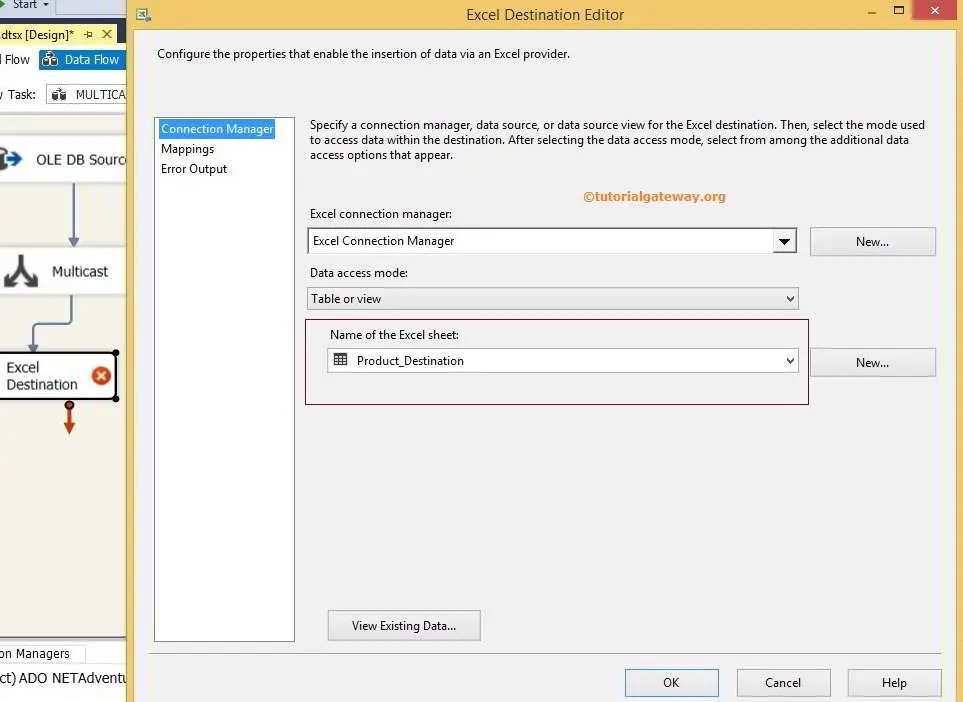
Here we selected the Product_Destination table so, to check the result you have to open the Product_Destination sheet inside the DimProducts.xls
STEP 7: After configuring the table click on Mappings tab to check whether the source columns are exactly mapped to the destination columns.
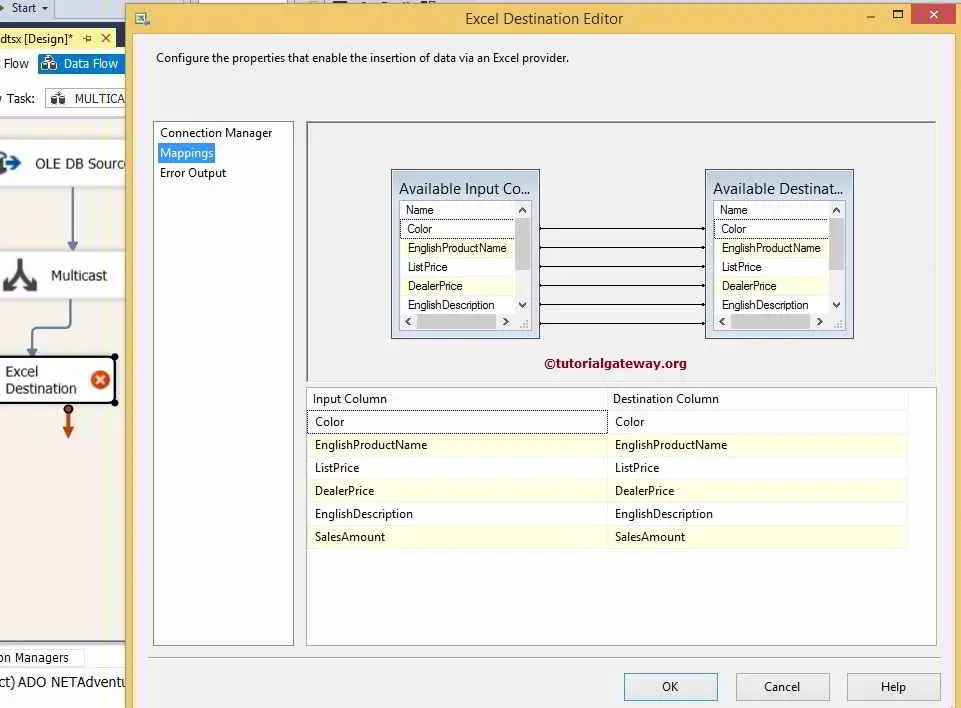
Click ok to finish configuring the excel destination.
STEP 8: Drag and drop the Flat File Destination into data flow region. Now we have to provide Flat File connection manager and file name of the destination. So double click on the Flat File Destination and provide the required information
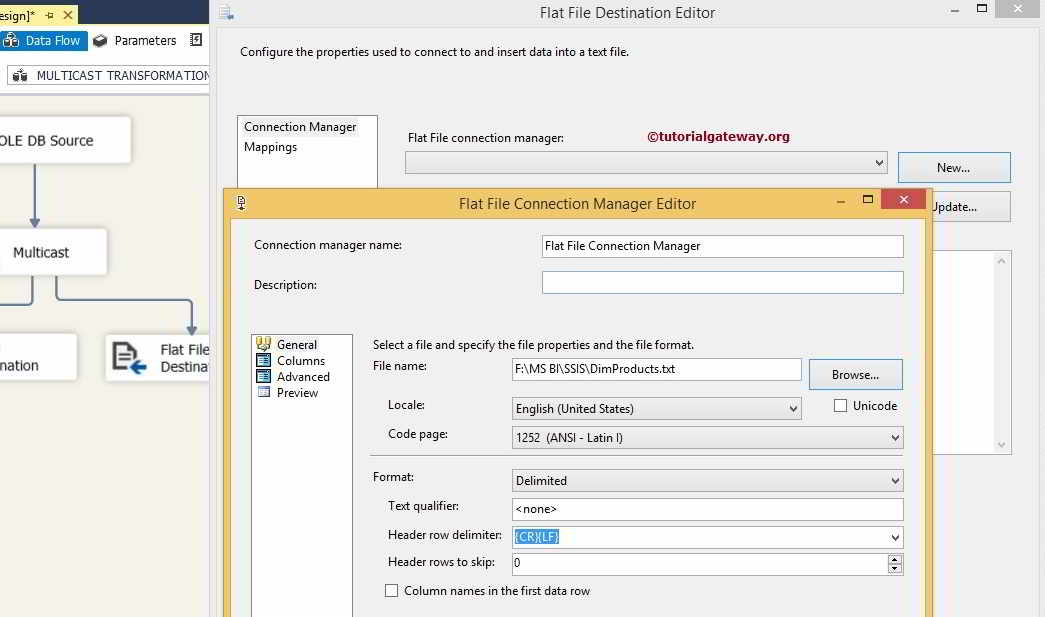
STEP 9: After configuring the table click on Mappings tab to check whether the source columns are exactly mapped to the destination columns.

Click ok to finish the package set up and Run the package
Check the result in Excel sheet
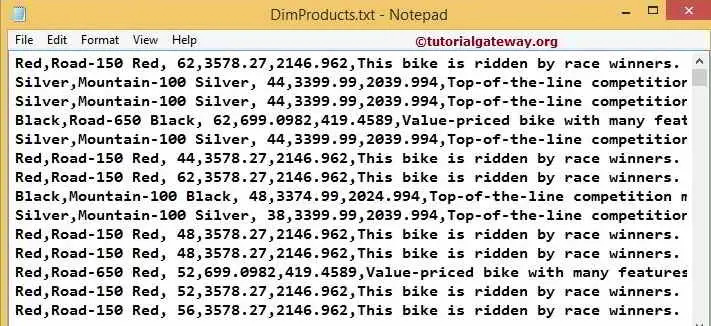
Check the result in Text file
Thank you for Visiting Our Blog
Import Column Transformation in SSIS 2014
Import Column Transformation is used to import data from the text file to the data flow and do some manipulations and then forward the data to the destination. Here data includes binary files, images, media or any sort of document which is huge to transfer. The data type of the output column must be DT_TEXT, DT_NTEXT or DT_IMAGE. Please refer Export Column Transformation in SSIS article to understand How to export images, binary files, media or any sort of large documents from SQL Server to file system.
For example, We are filling the Product details into the table and we have product pictures in the Manufacturing unit and every individual store placed the product reviews in text file. In this situations, We use import column transformation to bring the pictures, Reviews into data flow and merge them with Product details and store them in Data Warehouse. Let’s see one simple example for better understanding
Import Column Transformation in SSIS 2014
In this example, We will transfer few images present in our local hard drive to SQL Server Database column.
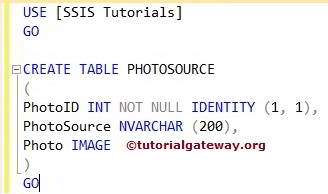
For importing images into a database, we must have a table that hold the image file and the path of the files. Let’s create a table named as PHOTOSOURCE.
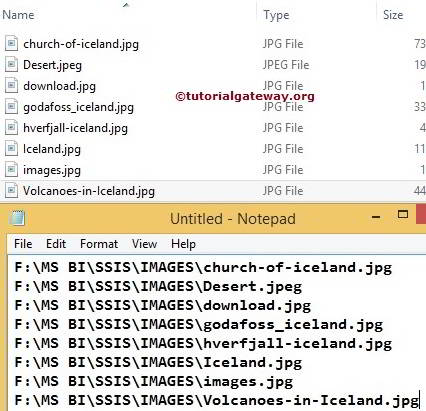
Here we have some JPEG images and file called photo source, where it has all the image paths.
STEP 1: Let start the BIDS and drag and drop the data flow task from the toolbox to control flow and rename it as Import Column Transformation.
Double click on it and it will open the data flow tab.
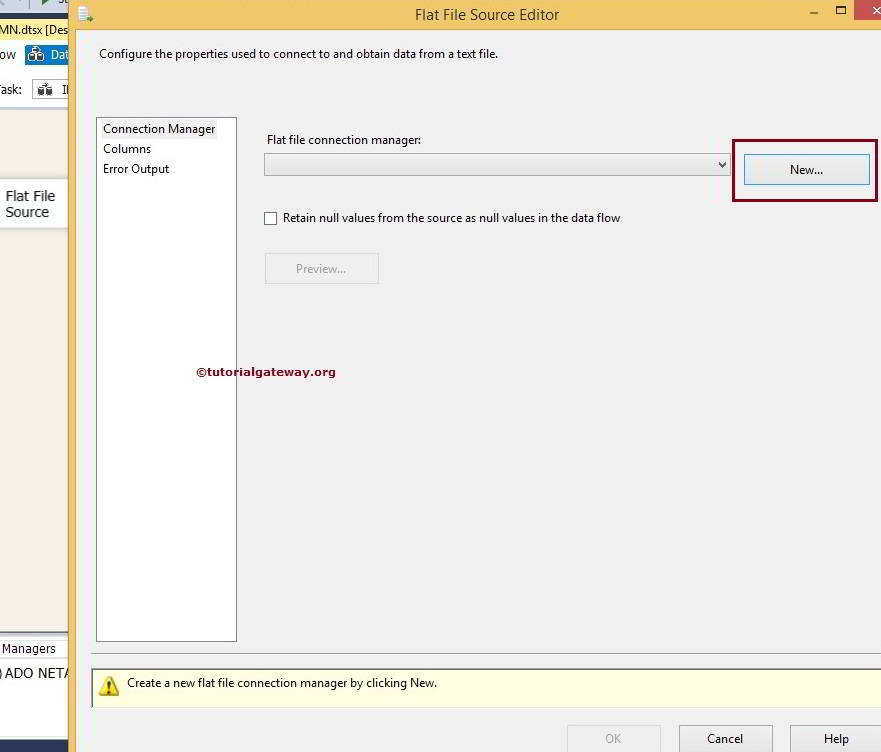
STEP 2: Drag and drop Flat file source from toolbox to data flow region. Double click on Flat file source in the data flow region will open the Flat File Source Editor to select the text file data.
Since we did not create any flat file connection manager before, Click on New button to create one
Once you click on New button Flat File Connection Manager Editor window will be opened to configure the connection manager.
Click on the Browse button to select the text files in local hard drive.
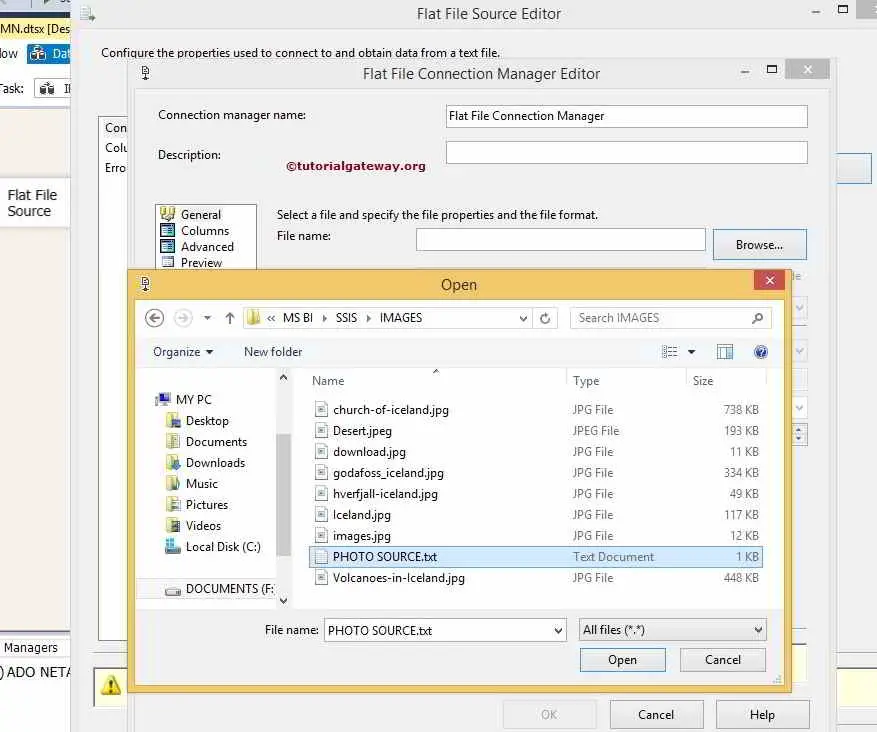
From the above screenshot you can observe that we are selecting the PHOTO SOURCE.txt file located in our local hard drive
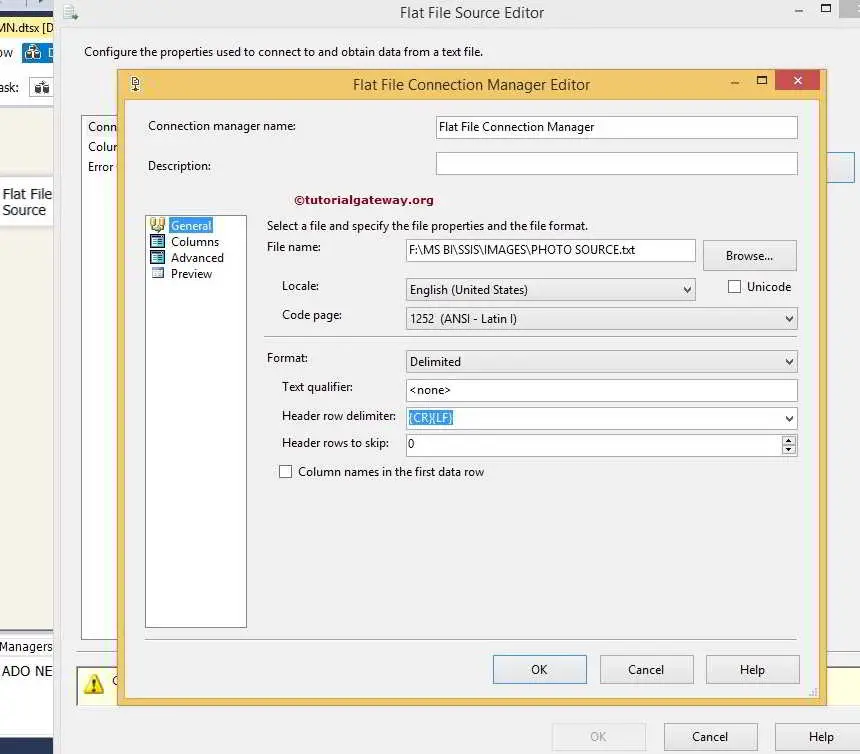
From the above screenshot you can observe that, We unchecked the Column names in the First data row option because we don’t have any column names in the first row
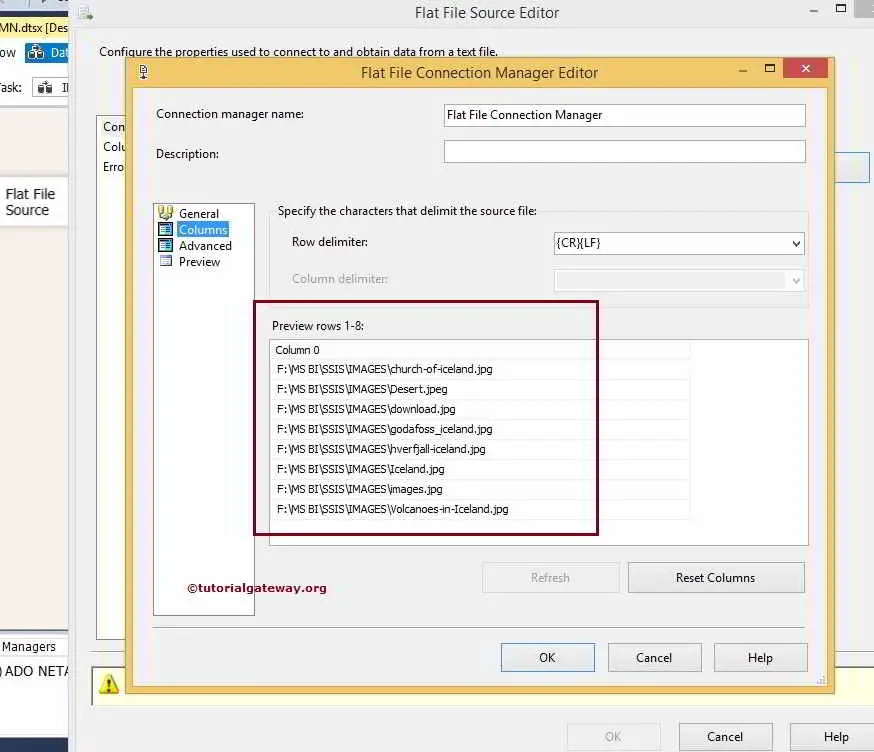
STEP 3: Click on columns tab to verify the columns. Here we have only one column as you can see in below figure
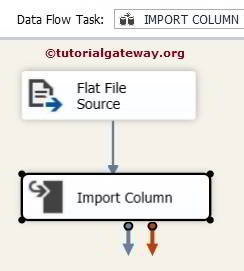
Click ok and then drag and drop the Import column transformation from toolbox to data flow region.
STEP 4: Now drag the blue arrow from Flat File Source to Import Column Transformation to perform transformations on the source data. Double click on the Import Column Transform to configure it
STEP 5: In the first page, it means Component Properties Tab you don’t need to do anything, if you want you can change the name. Select Input Column tab where you will see source available columns check the file path column.

STEP 6: Now select Input column Tab. Import Column Input is already set to the selected source columns input.

From the above screenshot you can observe that, We renamed the column 0 name to Image Column
STEP 7: Now select Input and Output Properties Tab.
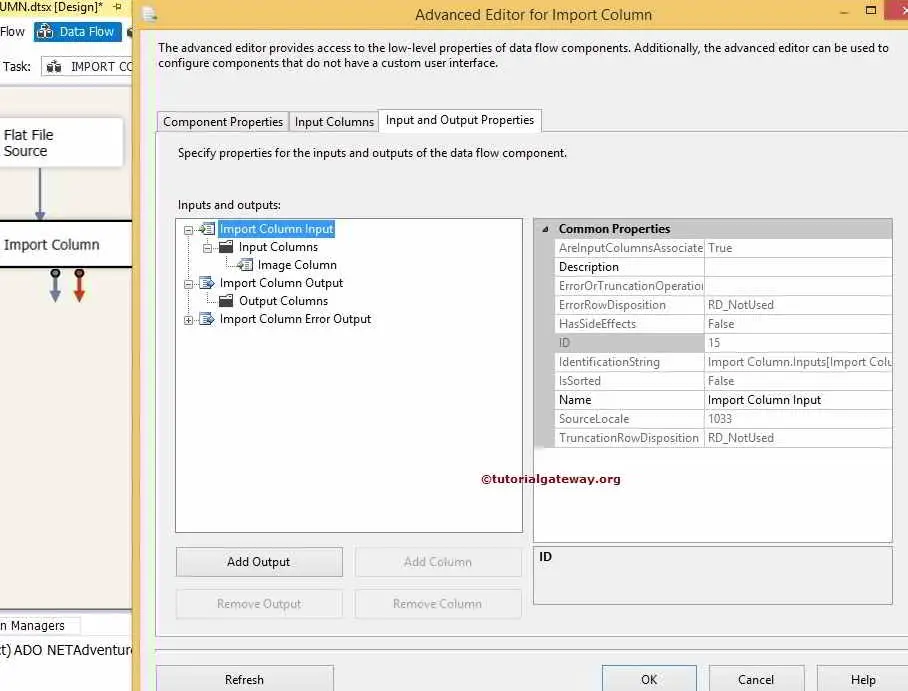
From the above screenshot you can observe that, With in the Import Column input we have the input column (Image Column) but we don’t have any output column. So, Select Import Column Output and add one output column by clicking Add Column.
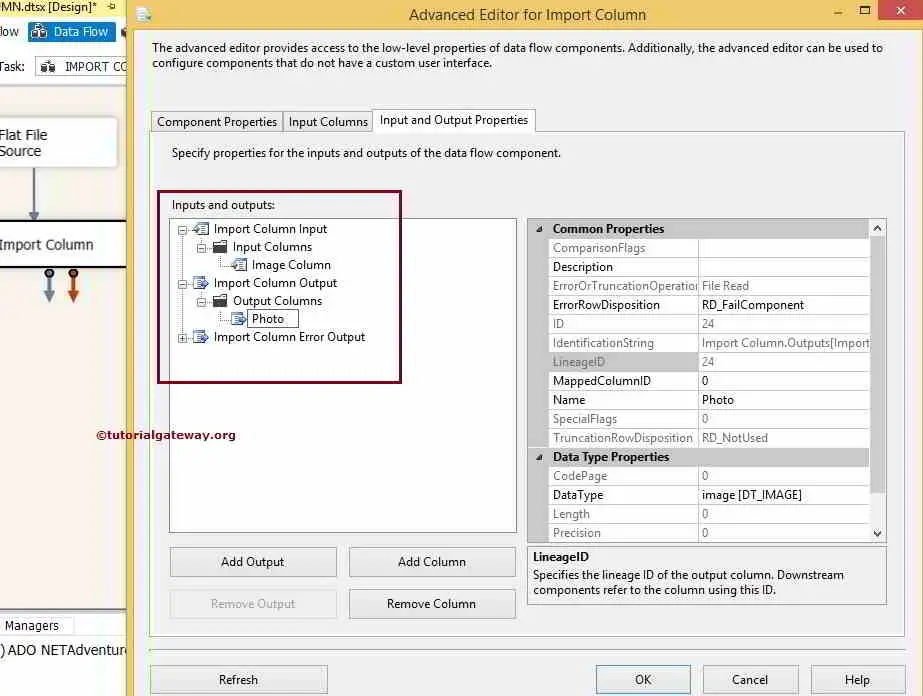
From the above screenshot you can observe that, We created an output column with the name of Photo and the data type is DT_IMAGE.
Select the LineageID of the newly created Output Column name Photo (i.e., 24). For you it may be different value don’t worry J
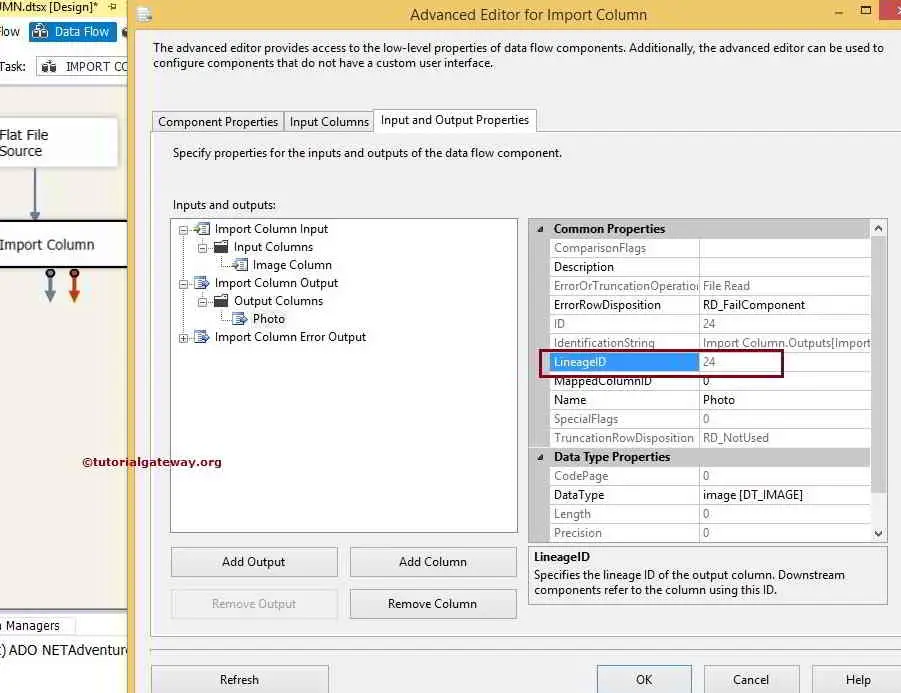
STEP 8: We have to do one important step here, we have to copy this LineageID 24 highlighted in above screenshot. Paste that ID value into the FileDataColumnID property present in the Image Column (Import Column Input). Now press ok.
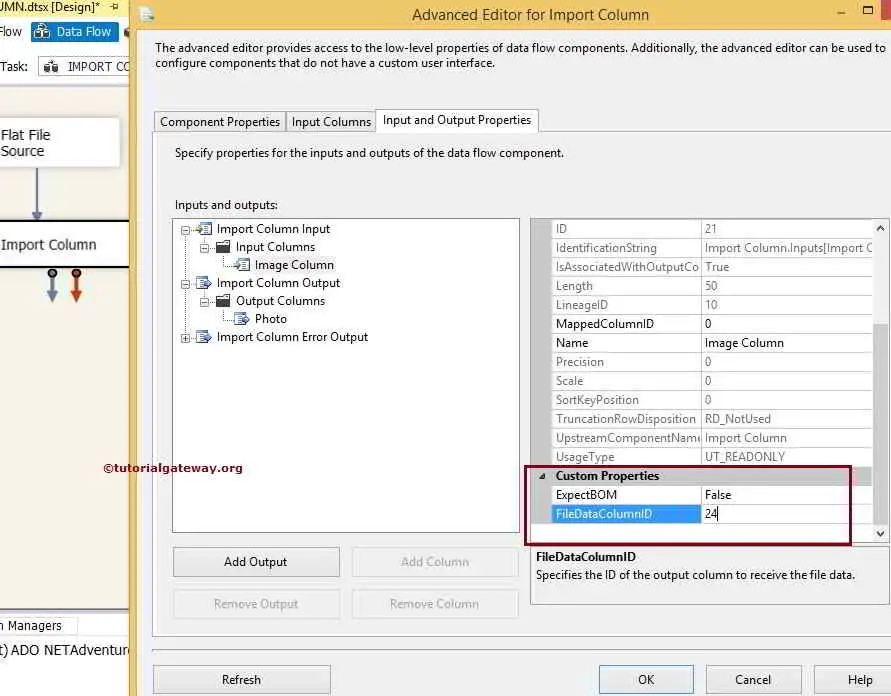
ExpectBOM (Byte-order mark): A BOM is only expected if the data has the DT_NTEXT.
Now let’s configure the OLE DB destination and set the connection to the database where you created a table called PHOTO SOURCE.
STEP 9: Drag and drop the OLE DB Destination from toolbox to data flow region and drag the blue arrow from the Import Column Transformation to OLE DB Destination.
Now we have to provide Server, database and table details of the destination. So double-click on the OLE DB Destination and provide the required information
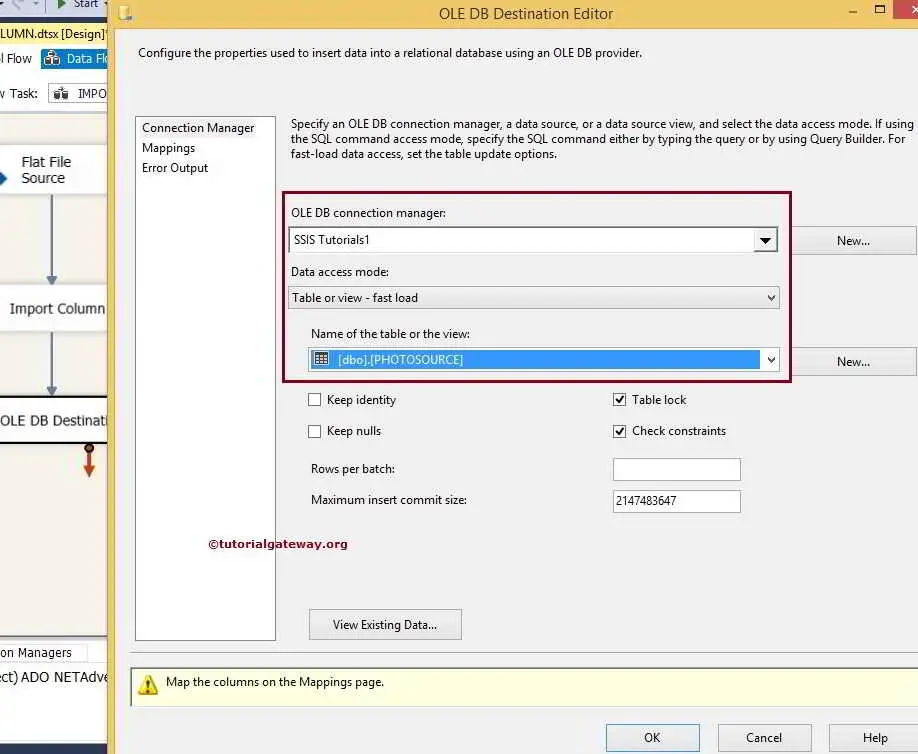
From the above screenshot you can observe that, We selected the previously created table i.e., PHOTOSOURCE table inside the [SSIS Tutorials] data base
STEP 10: Click on the mapping tab to map the input columns to the destination columns.
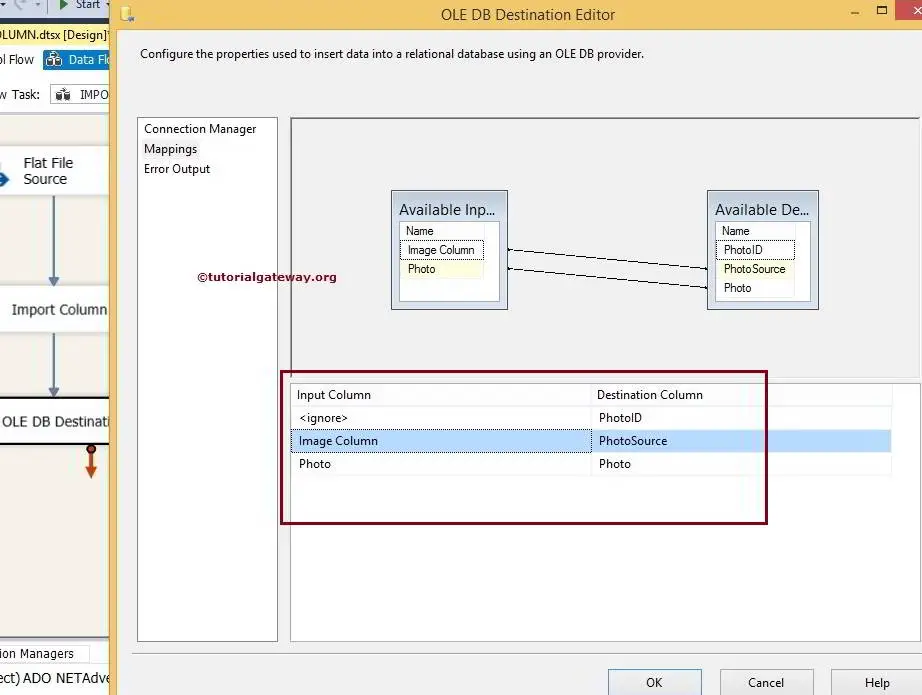
- PhotoID is the identity column so it will automatically inserted.
- Image Column contains the images path so we are storing this path details in the Photosource Column
- Photo is the images located in the local hard drive so we are mapping it to the photo column (Image Data Type)
Now let’s execute the task.
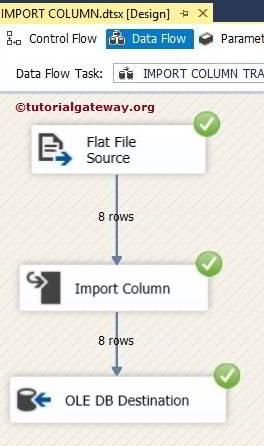
The task executed successfully.
Let’s open the SQL Server Management Studio and write the below T-SQL Statement to check the result.
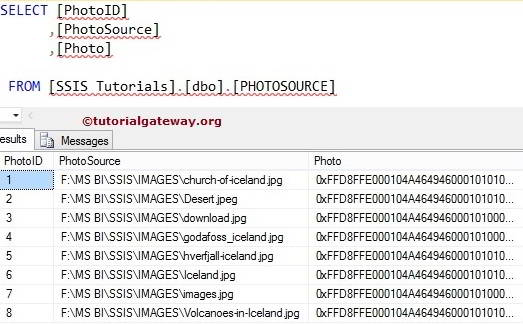
Thank you for Visiting Our Blog
Export Column Transformation in SSIS 2014
Export Column Transformation is exactly opposite to Import Column Transformation, Please refer Import Column Transformation in SSIS article to understand How to Import Images, Text file or any huge file to SQL Server Database.
Export Column Transformation is useful to export images, binary files, media or any sort of large documents from SQL Server to file system. Export Column Transformation reads the path or location present in the source column and transfer the data to that particular path.
For example, if we have product description stored in the text file and the text file is stored in one column. We have a situation to send that product description only to any store then, We can use the Export Column Transformation to transfer and save those text files to the path we specified.
Export Column Transformation in SSIS 2014
In this example, We will export images from the SQL Server table to local hard drive. Following SQL table is the one we are going to use in this example.
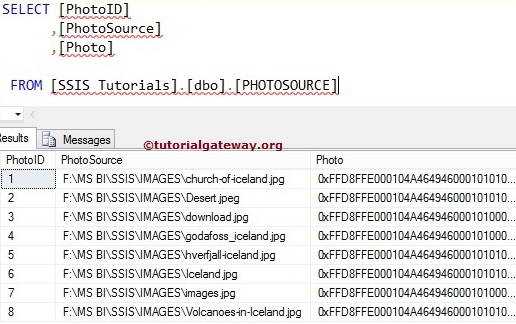
Export Column Transformation will store the images present in the Photo Column and store them in the location or path specified in the [PhotoSource] column.
STEP 1: Drag and drop the data flow task from the toolbox to control flow and name the data flow task as Export Column Transformation.
Double click on data flow task will open the data flow tab.
STEP 2: Drag and drop OLE DB Source, Export Column Transformation from toolbox to data flow region.
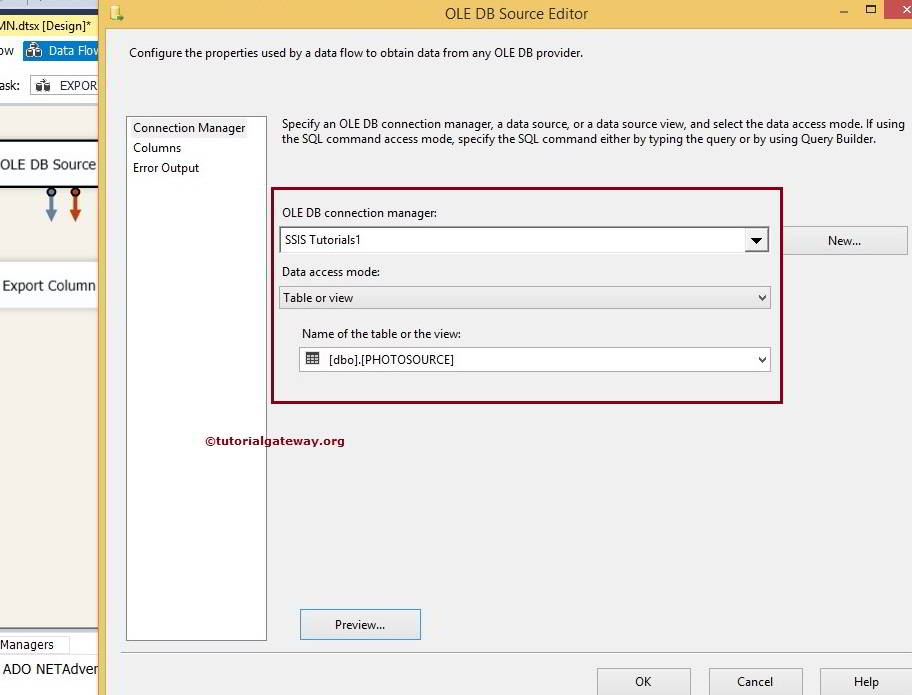
Double click on OLE DB source in the data flow region will open the connection manager settings. Here we are selecting [SSIS Tutorials] Data Base and PHOTOSOURCE table as OLE DB Source as shown below.
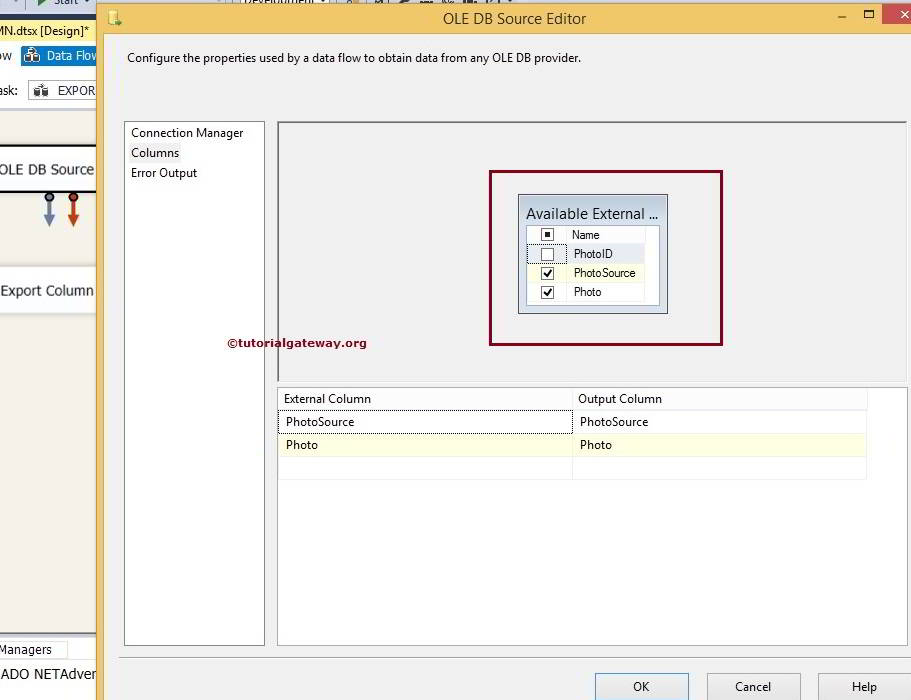
STEP 3: Click on columns tab to verify the columns. In this tab we can uncheck the unwanted columns also.
Here I am unchecking the PhotoID key column because there is no point in saving the Identity column as output at this time
Click ok. Drag and drop the blue arrow from OLE DB source to Export Column Transformation to perform the transformations on the source data.
STEP 4: Double click on Export Column Transformation to edit and configure. This will open the window as shown in the below screen.
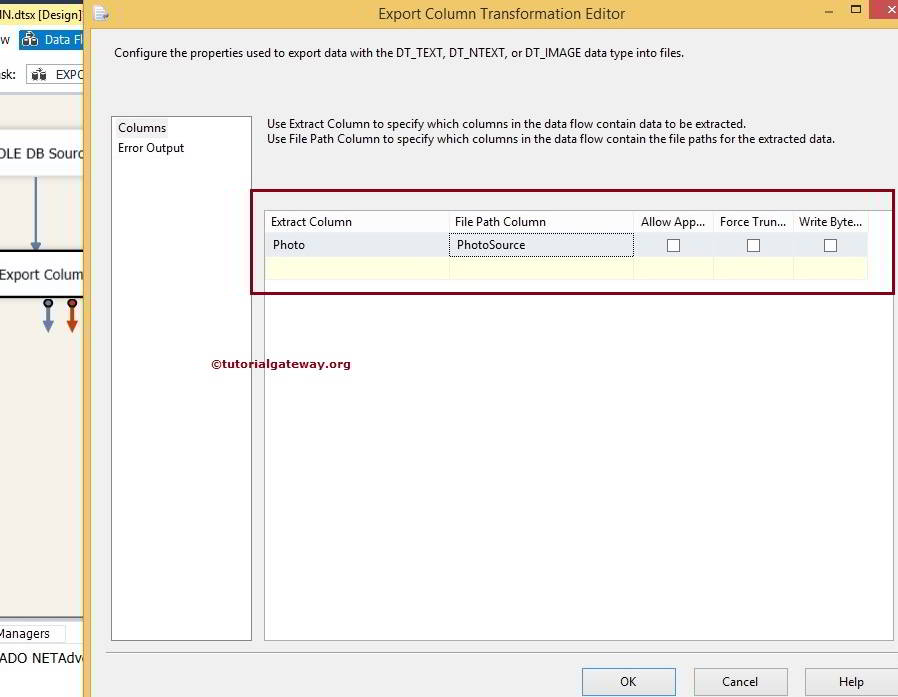
Here we have option to select the column where the path to be places as. You can also find checkboxes at the right side.
- Extract Column: Select text or image data columns from the list of available input columns. In this example, We selected Photo because we are exporting images from SQL to local hard drive.
- File Path Column: Select file paths or file names from the list of available input columns. This is the path where file or images will be saved (Here Images).
- Allow Append: Specify whether you want the Export Column Transformation to add data to existing files or not. The default is false, you can change if you require.
- Force Truncate: Specify whether you want the Export Column Transformation to delete any of the existing files before writing the new data. The default is false, you can change if you require by checkmark the option.
- Write BOM: Specify whether you want the Export Column Transformation to write a byte-order mark (BOM) to the file. A BOM is only written if the data has the DT_NTEXT or DT_WSTR data type.
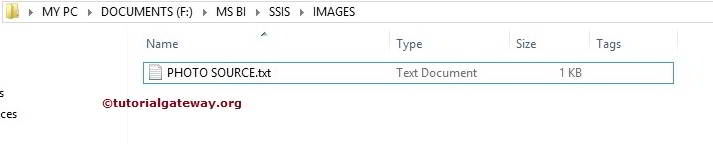
Let’s look at our destination path before we run the package
Let us Run the package
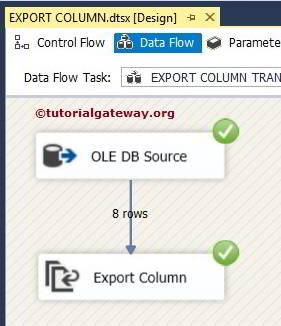
Let’s see the destination folder whether we succeeded or not.
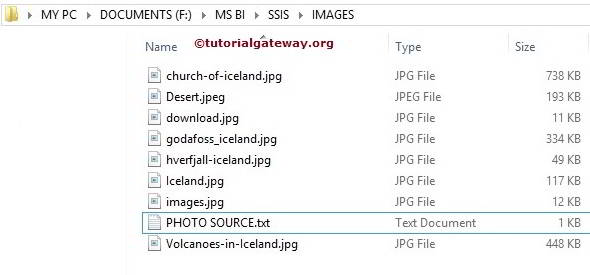
Well we did it.
Thank you for Visiting Our Blog
Pivot Transformation in SSIS 2008R2
The Pivot transformation allows you to perform a pivot operation on your input data. In this article, we are going to explain pivot transformation in SSIS 2008R2 using simple example so that you can understand it better. Please refer Pivot Transformation in SSIS 2014 article to understand the changes they made.
We have the input table as below and we want to PIVOT for the desired output.
Consider below data for this example
Open BIDS and Drag and drop the data flow task from the toolbox to control flow.
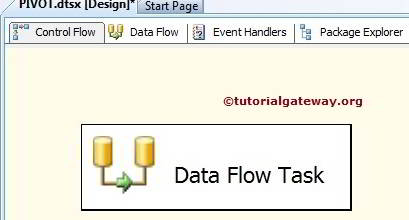
Double click on it and it will open the data flow tab.
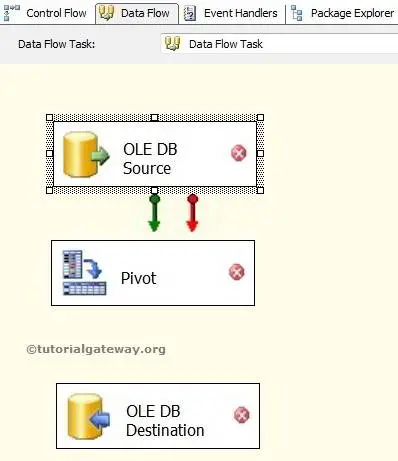
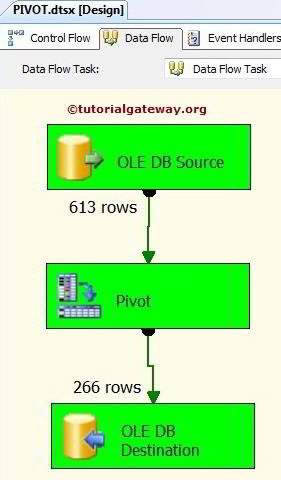
Drag and drop OLE DB Source, Pivot transformation and OLE DB destination from toolbox to data flow region
Double click on OLE DB source in the data flow region will open the connection manager settings and provides space to write our SQL statement.
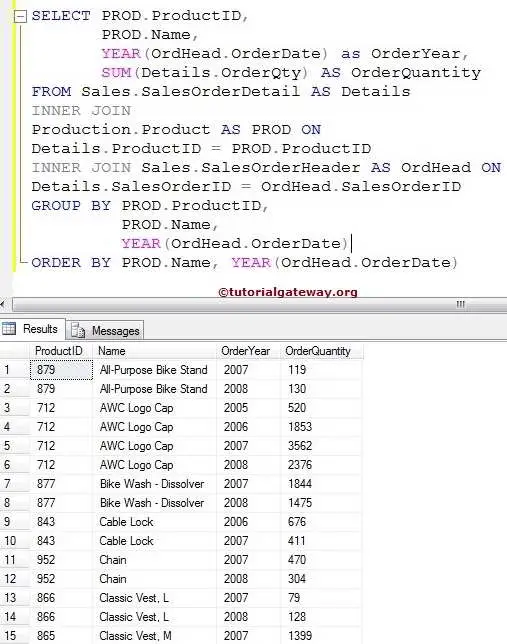
SQL Command we are going to use as our source is:

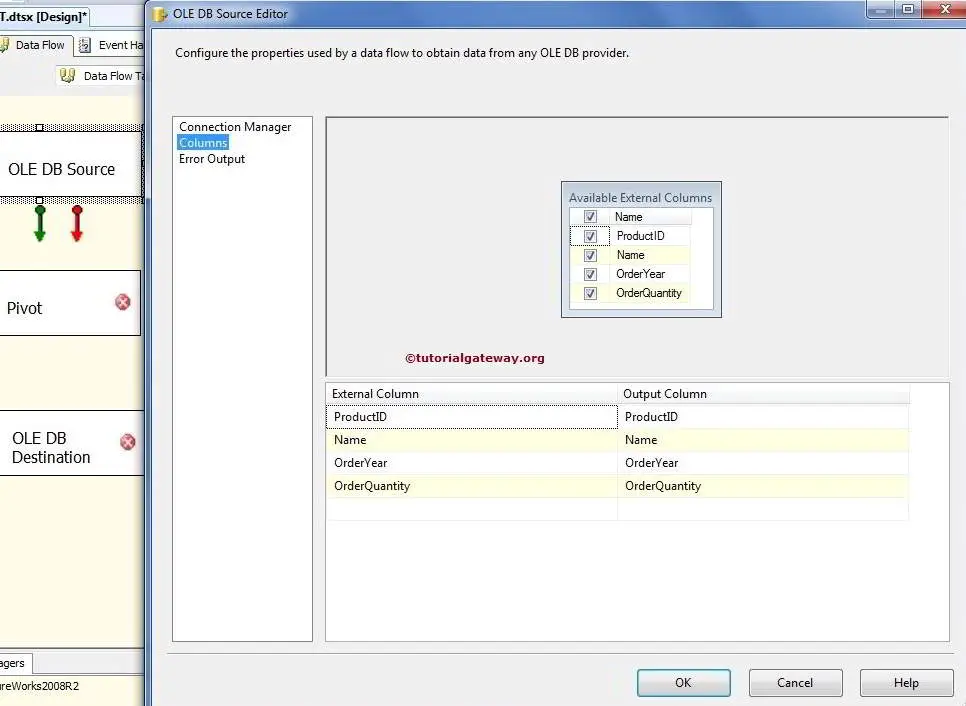
Click on columns tab to verify the columns. In this tab we can uncheck the unwanted columns also.
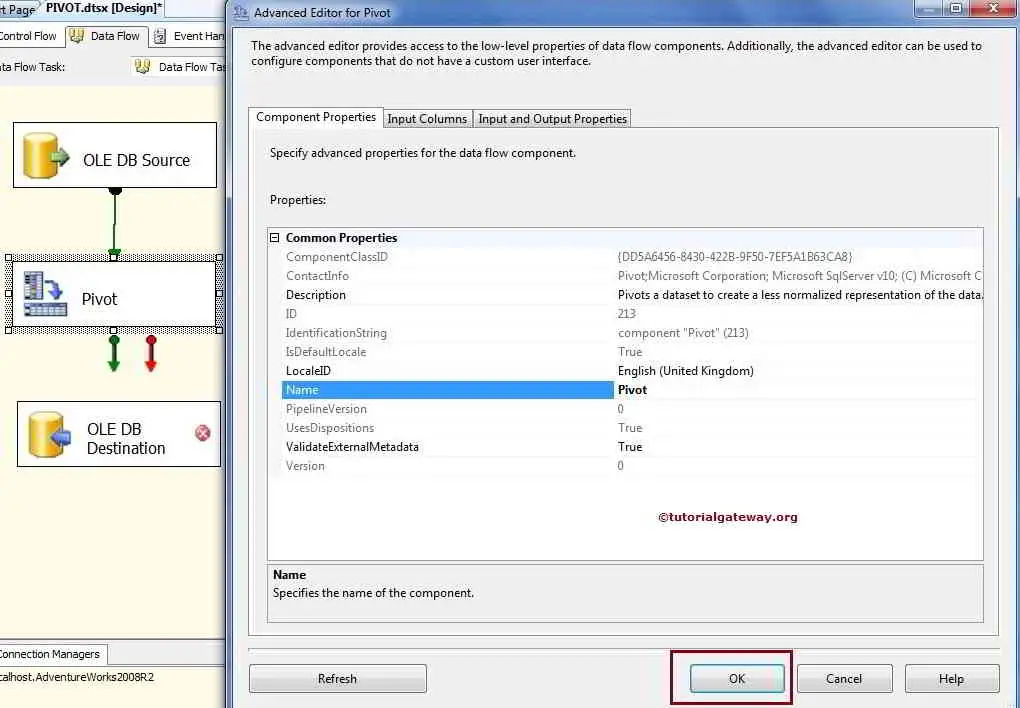
Click ok and edit the Pivot Transformation. In the component properties tab we can change the name but I will leave as it is for now
Go to input columns tab and select all input columns that we received from the OLE DB Source

Go to input and output properties tab, select pivot default input, under input columns you will find all columns which you selected in previous tab. The only property you must set for each input column is the PivotUsage.
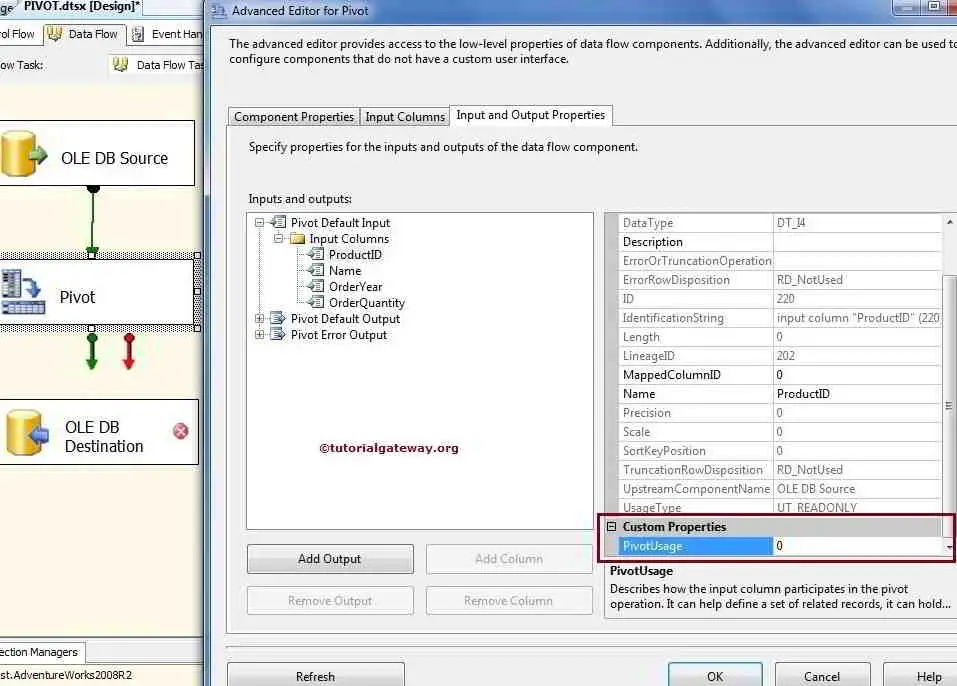
This describe the values you can use in PivotUsage property:
| OPTIONS | DESCRIPTION |
|---|---|
| 0 | Column values will pass through the transformation |
| 1 | Set key. All the columns with the same set key |
| 2 | This is a Pivot column (These Column values become the Column names) |
| 3 | Values from this column will be placed in the new columns created by the Pivot Transformation |
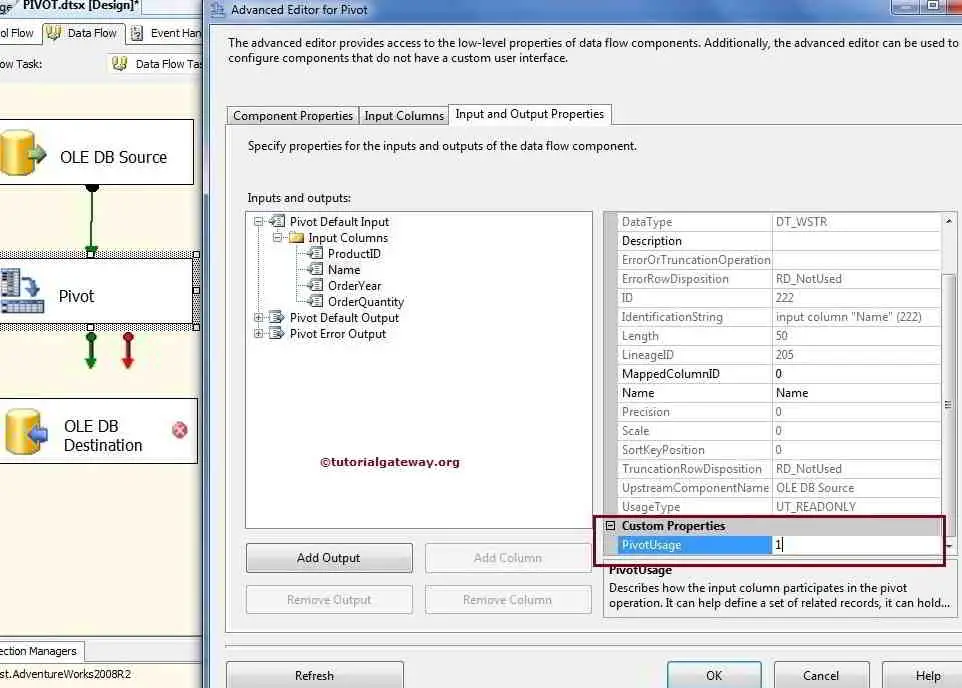
So, in this example, PivotUsage property for each input column will be as below:
ProductID = 0
Name = 1
OrderYear = 2
OrderQuantity = 3
Notice that you must have at least one input column with PivotUsage 2, one input column with PivotUsage 3, one input column with PivotUsage 0 OR 1 at least in your pivot transformation.
After setting input columns, go to Pivot Default output, and under output columns add these columns: ProductID, Name, 2005, 2006, 2007, 2008 using Add Column button

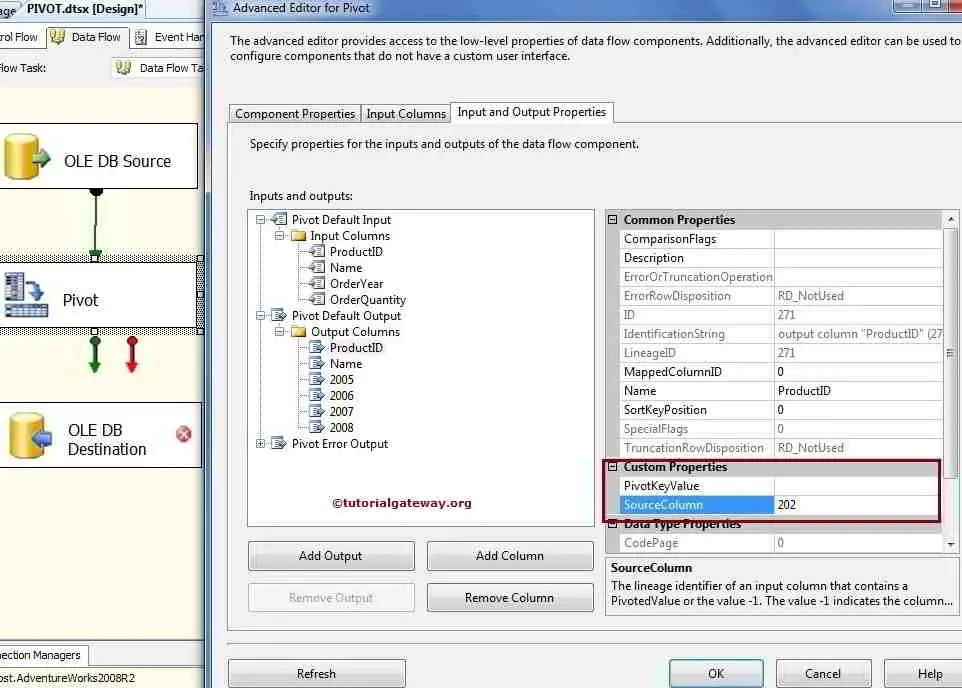
ProductID and Name columns will show the exact values from ProductID and Name input columns. So, set SourceColumn property of ProductID output column to LineageID of ProductID input column.
Simply select ProductID under input columns and see the lineageID value there.
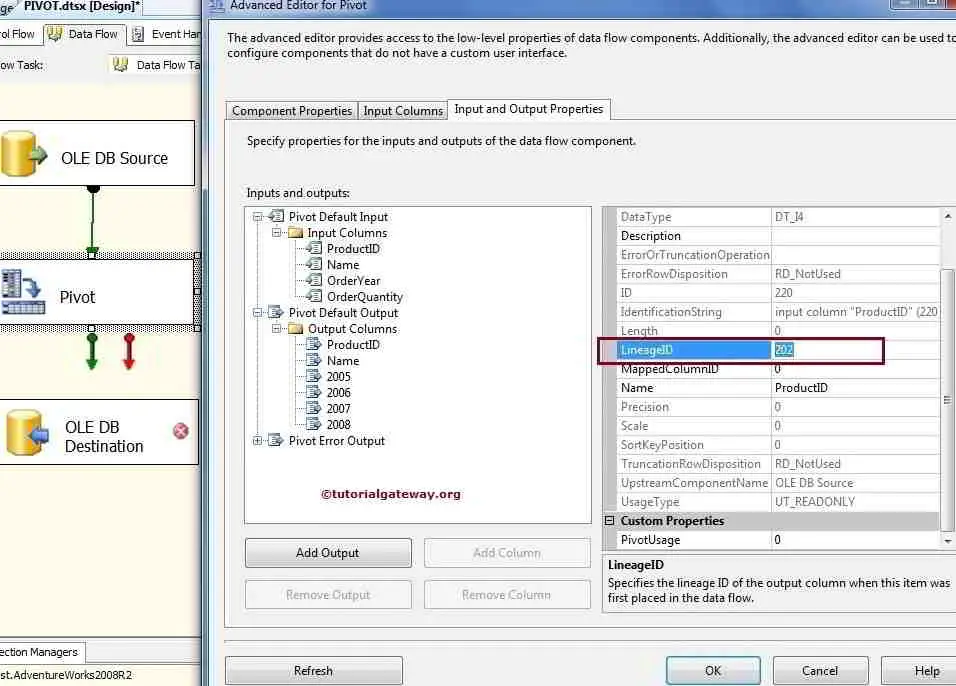
From the above screenshot you can observe that 202 is the LineageID of the input column. So, Set the SourceColumn property of ProductID output column to LineageID copied from ProductID (i.e., 202)
Do the same for name column also.
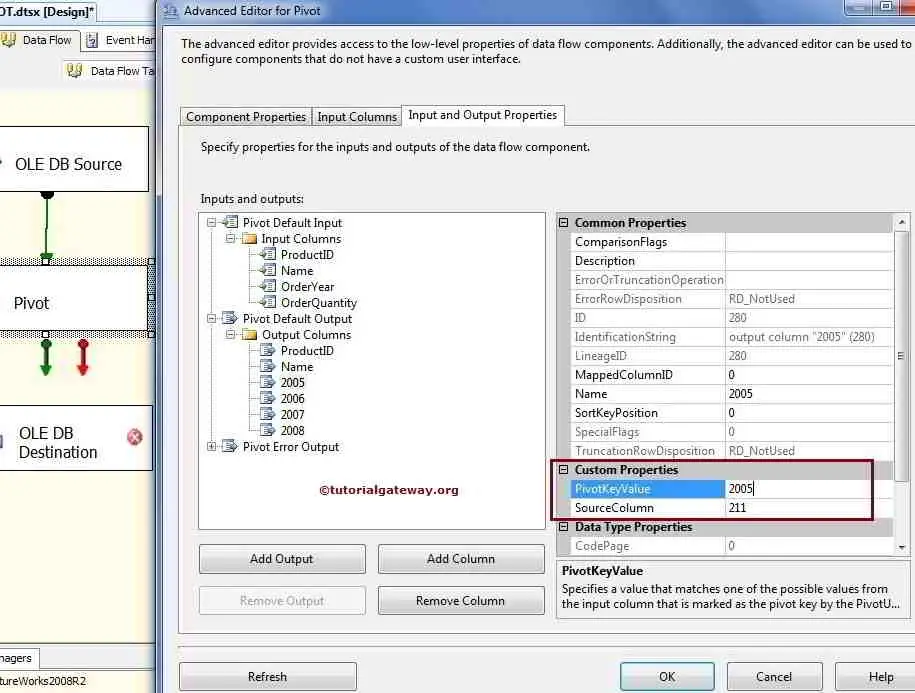
Now its Pivot columns turn, select 2005 under output columns, this columns will show the results for the year 2005, so enter 2005 in PivotKeyValue property.
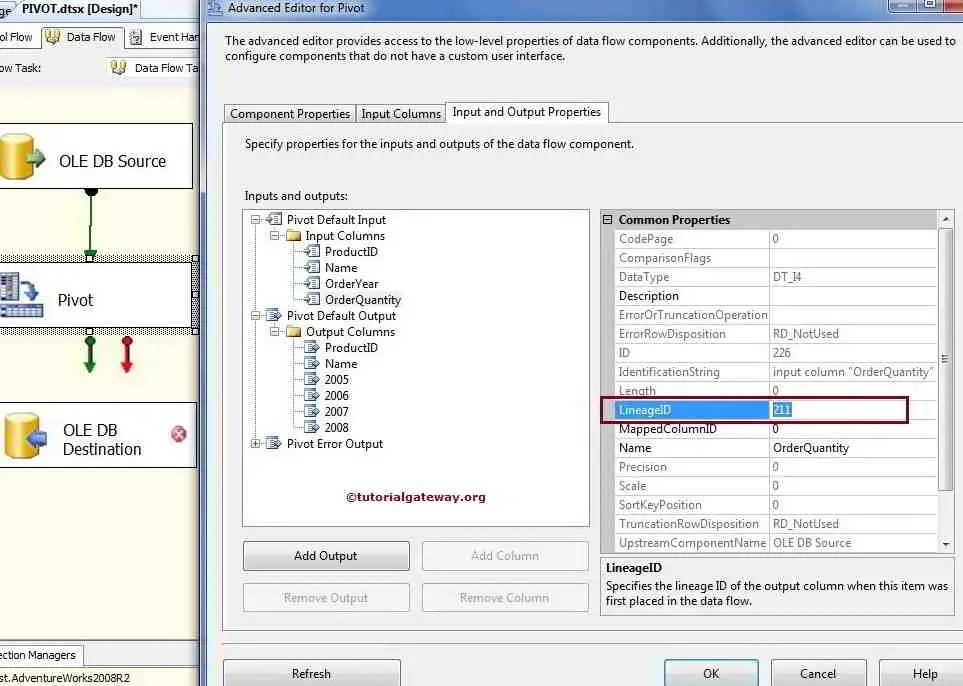
Data for the output columns 2005, 2006, 2007 and 2008 are coming from theOrderQuantity input column. So, Set SourceColumn value for 2005, 2006, 2007 and 2008 output columns with the lineageID of OrderQuantity input column.
In this example, lineageID of OrderQuantity is 211
So, We set SourceColumn with 211 and PivotKeyValue to 2005 for the 2005 output column
For 2006 output column, We set SourceColumn with 211 and PivotKeyValue to 2006

Do the same for 2007 also.
For 2008 output column, We set SourceColumn with 211 and PivotKeyValue to 2008

Now we have to save the output columns in the SQL database so, lets configure the OLE DB Destination.
Double click on the OLE DB Destination and provide the required information such as SQL Server name, database and table details of the destination.

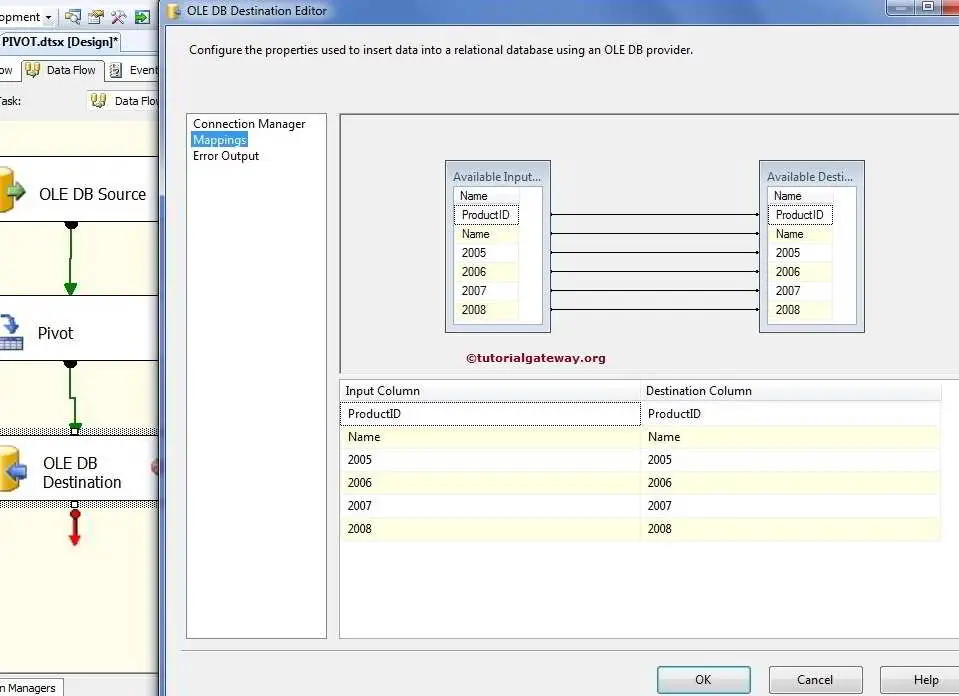
Here we selected the Employees database as our destination database and [Pivot table] as our destination table.
Click on Mappings tab to check whether the source columns are exactly mapped to the destination columns.
Click ok to finish our package design. Let us run the package
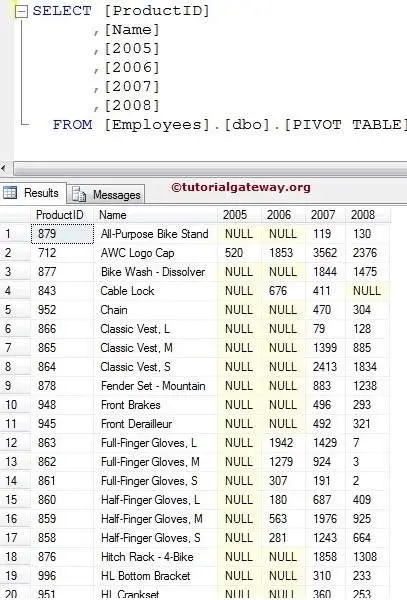
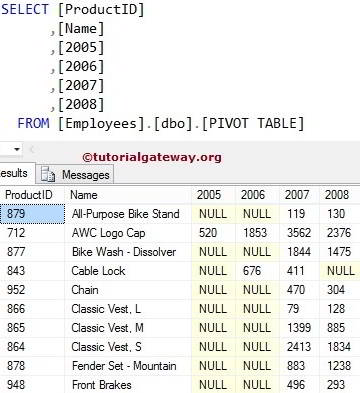
Let’s open the SQL Server Management Studio and check the results
Thank you for Visiting Our Blog
Pivot Transformation in SSIS 2014
The Pivot Transformation in SSIS is used to perform pivot operations on input data (Source Data). A pivot operation means converting individual row data into separate columns. Pivot Transformation is exactly opposite to Unpivot Transformation
In our previous article, We already discussed Pivot Transformation in SSIS 2008R2. Although the functionality is same in SSIS 2008R2 and SSIS 2014 but SQL Server Business Intelligence changed the User interface for the Pivot Transformation in SQL server 2012. It makes developers life much easier compared to earlier version. Please refer Pivot Transformation in SSIS 2008R2 article to understand the difference between Pivot Transformation in 2014 and 2008R2.
In this article, we are going to explain Pivot Transformation in SSIS 2014 using simple example so that you can understand it better.
NOTE: It is not mandatory but it is always best practice to use Sort Transformation before Pivot Transformation if the data is not sorted because, sometimes Pivot Transformation gives strange results for unsorted data.
Pivot Transformation in SSIS 2014 Example
In this example we are going to perform Pivot Transformation on SQL Server Table to convert row data (such as calendar years 2011, 2012, 2013 and 2014) into separate columns.
Consider below data for this example

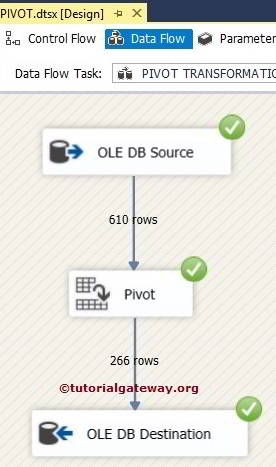
STEP 1: Open BIDS and Drag and drop the data flow task from the toolbox to control flow and rename it as PIVOT Transformation in SSIS 2014

Double click on it and it will open the data flow tab.
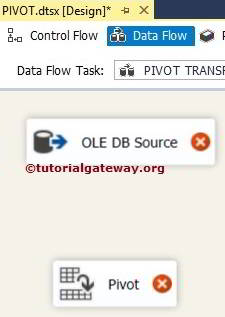
STEP 2: Drag and drop OLE DB Source, Pivot Transformation from toolbox to data flow region
STEP 3: Double click on OLE DB source in the data flow region will open the connection manager settings and provides space to write our SQL statement.

SQL Command we used in the above screenshot is same is:
STEP 4: Click on columns tab to verify the columns. In this tab we can uncheck the unwanted columns also.

Click ok and drag the output arrow of OLE DB source to the Pivot Transformation to perform pivot transformation on the source data.
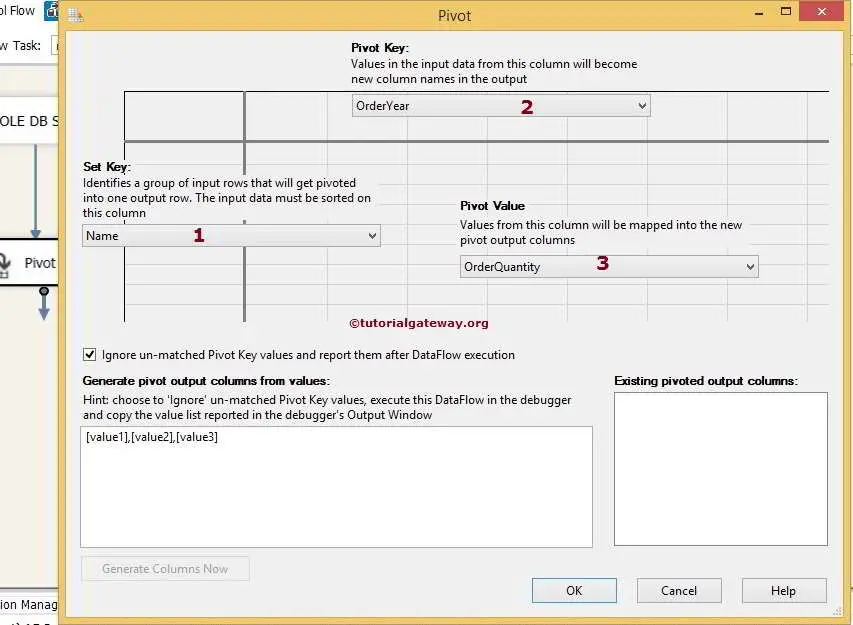
STEP 5: Double Click or edit the Pivot Transformation. It will open the Pivot window which is bit different when we compared to Pivot Transformation in SSIS 2008R2.

This describe the values you can use in Pivot Transformation Editor in SSIS:
| OPTIONS | DESCRIPTION |
|---|---|
| 0 | Column values will pass through the transformation |
| 1 | Set key. All the columns with the same set key |
| 2 | This is a Pivot Key (These Column values become the Column names) |
| 3 | This is pivot value and values from this column will be placed in the new columns created by the Pivot Transformation |
So, in this example:
ProductID = 0
Name = 1 (Set Key)
OrderYear = 2 (Pivot Key)
OrderQuantity = 3 (Pivot Value)
Click ok and run the package.
Goto the progress tab and check the column names as shown in the below screenshot.
NOTE: For 3 or 4 columns like this example we can directly replace the [Value1], [Value2] and so on with the column names but in real-time we may deal with 50 years then it is impossible to write those 50 years in the Generate pivot output columns from value region. So, it is always good practice to run the package once and then copy the column names from the progress Tab
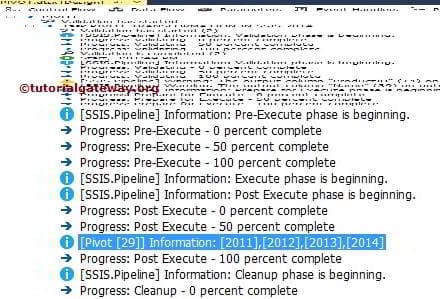
Stop the debugging mode and Copy the selected values.
Again double-click on the Pivot Transformation in the data flow region and paste the column names in the Generate pivot output columns from value region as shown in the below screenshot.

Click on the Generate Columns Now button to generate the pivoted columns. These generated column will automatically added to the Existing Pivoted output Columns region.
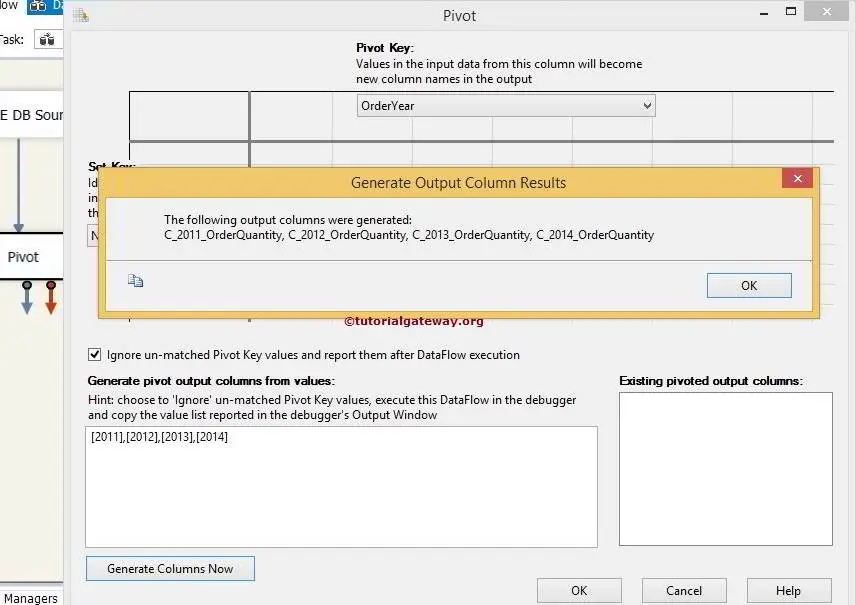
Click ok on the Generate Output Column Results window to generate the output columns with names as shown in the above screenshot.
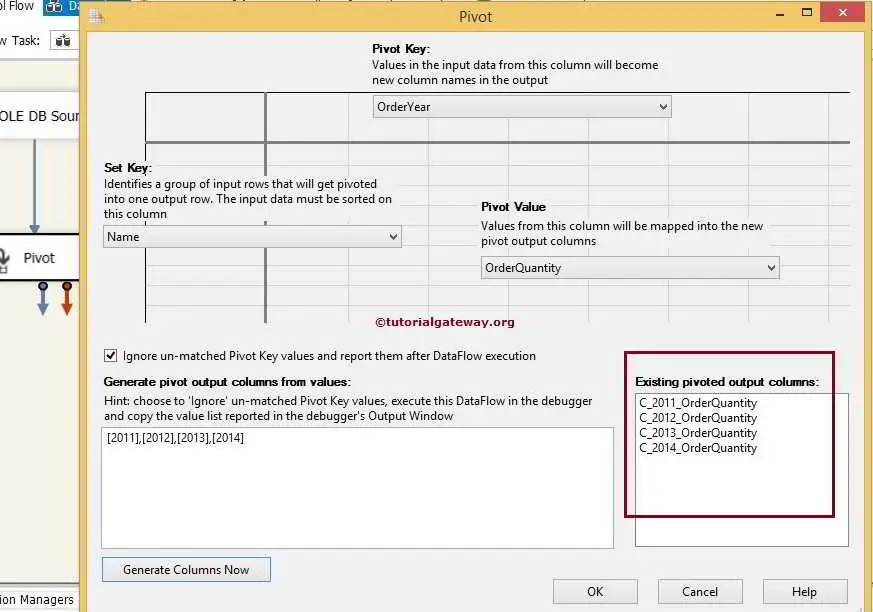
From the above screenshot if you can observe the Existing Pivoted output Columns region, output columns (C_2011_OrderQuantity, C_2012_OrderQuantity, C_2013_OrderQuantity and C_2014_OrderQuantity) are generated for the source data.
Click ok.
Now we have to save the output columns in the SQL database so, Drag and drop the OLE DB Destination from toolbox to data flow region and then, Drag the Pivot Transformation output arrow into the OLE DB Destination.
Double click on the OLE DB Destination and provide the required information such as SQL Server name, database and table details of the destination.

Here we selected the [SSIS Tutorials] database as our destination database and [Pivot Transformation in SSIS] table as our destination table.
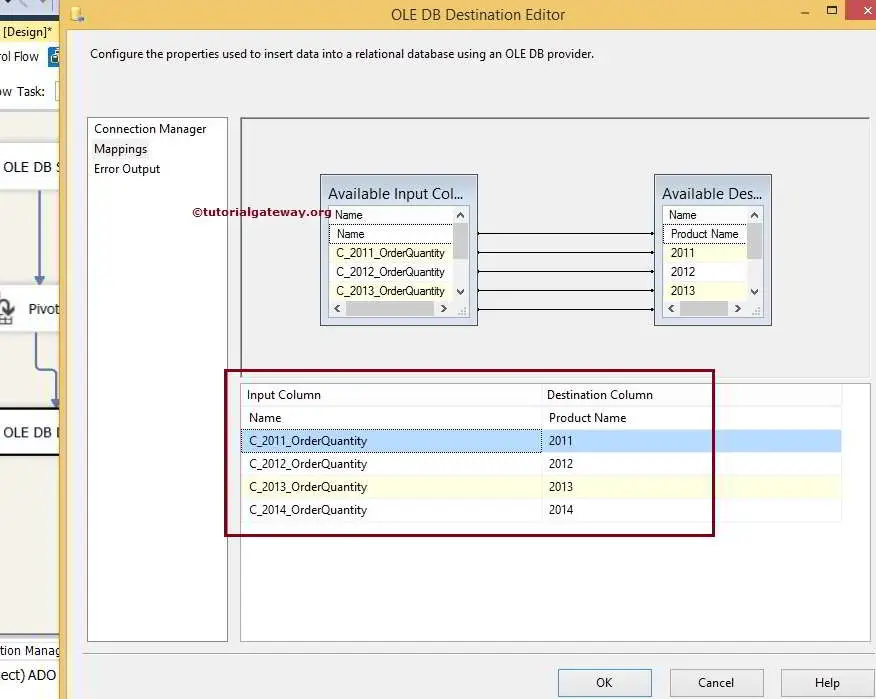
Click on Mappings tab to check whether the source columns are exactly mapped to the destination columns.

NOTE: If your input column names and destination column names are same then, the intelligence will automatically map. If there is any changes in the column names (any alias columns or any calculated columns) then we have map them manually.
As you can observe from the above screenshot, intelligence is unable to map on its own. So lets map them correctly.
Click ok to finish our Pivot Transformation package design. Let us run the package
Let’s open the SQL Server Management Studio and write the below SQL statement to check the results

Thank you for Visiting Our Blog
Unpivot Transformation in SSIS 2014
The UNPIVOT Transformation is used to convert the DE Normalized data into more normalized version. UNPIVOT Transformation acts exactly opposite to Pivot Transformation. Please refer Pivot Transformation article to understand, How to Convert Normalized data to DE Normalized data.
UNPIVOT Transformation in SSIS 2014 Example
In this example We are going to convert the Pivot table present in the Employees database into normal table. Consider below data as our source data
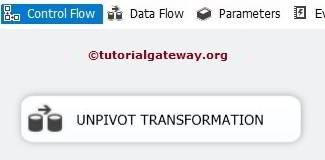
STEP 1: Open BIDS and Drag and drop the data flow task from the toolbox to control flow and rename it as UNPIVOT Transformation
Double click on it and it will open the data flow tab.
STEP 2: Drag and drop OLE DB Source, UNPIVOT Transformation from toolbox to data flow region as show in the figure.

STEP 3: Double click on OLE DB source in the data flow region will open the connection manager settings and provides space to write our SQL statement. In this example we are going to use the PIVOT Table in Employees Data Base as our source

STEP 4: Click on columns tab to verify the columns. In this tab we can uncheck the unwanted columns also.
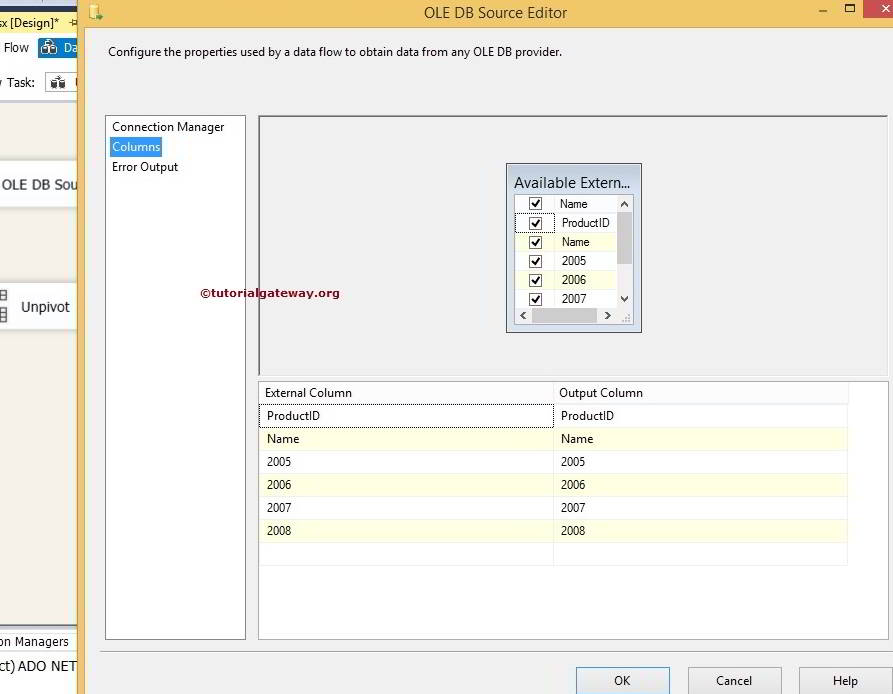
Here we are selecting ProductID, Name, 2005, 2006, 2007 and 2008
Click ok and drag the blue arrow from the OLE DB Source to UNPIVOT Transformation to perform transformations on the source data.
STEP 5: Double click on the UNPIVOT Transformation to configure it.

- Available Input Columns: Select the columns you want to UNPIVOT by checking the check boxes. Don’t forget to select the Pass Through option for the remaining columns. If you miss to select the Pass Through option then those columns will not be available for the destination. In this example ProductID and Name columns are Pass Throughcolumns and 2005, 2006, 2007, 2008 are the columns we want to UNPIVOT.
- Input Column: All the selected column in the Available Input Columns Option will automatically added to this section. So, 2005, 2006, 2007, 2008 columns are the Input Columns
- Destination Column: Specify the name of the destination column where you want to store the values or data inside the Input Columns such as 2005, 2006, 2007, 2008.
- Pivot Key Value: Specify the name for pivot value and these values will be stored as column values inside the Calendar Year column (Pivot Key Value Column Name). The default value is same as input column however, you can change as you like. We are fine with the values 2005, 2006, 2007, 2008 so we haven’t changed these values.
- Pivot Key Value Column Name: Specify the name you wish to see for the pivot value column. Since our column data is 2005, 2006, 2007 and 2008 we changed the defaultPivot Key Value to Calendar Year.
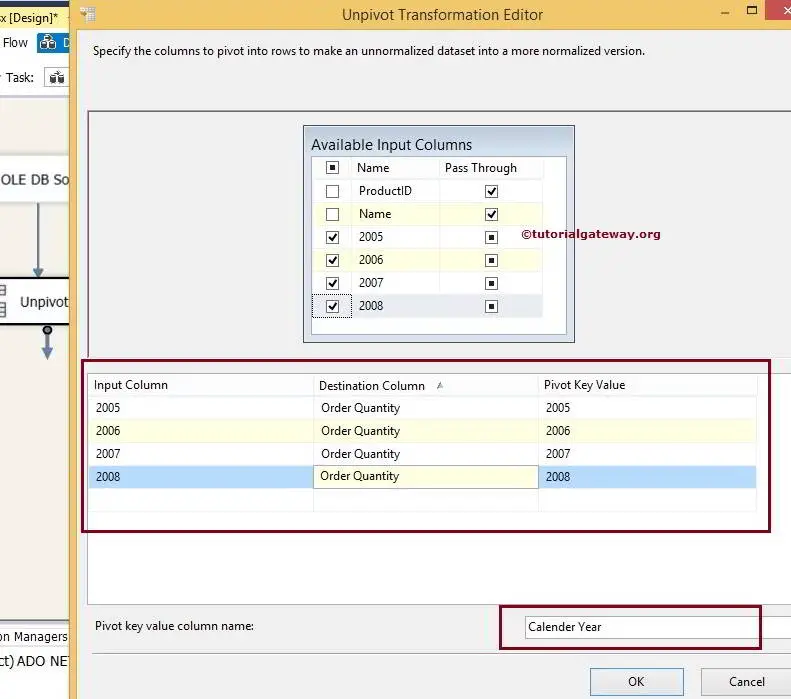
We named destination column as Order Quantity and Pivot Key value column name as Calendar Year
STEP 6: Now we have to provide Server, database and table details of the destination. So double-click on the OLE DB Destination and provide the required information.
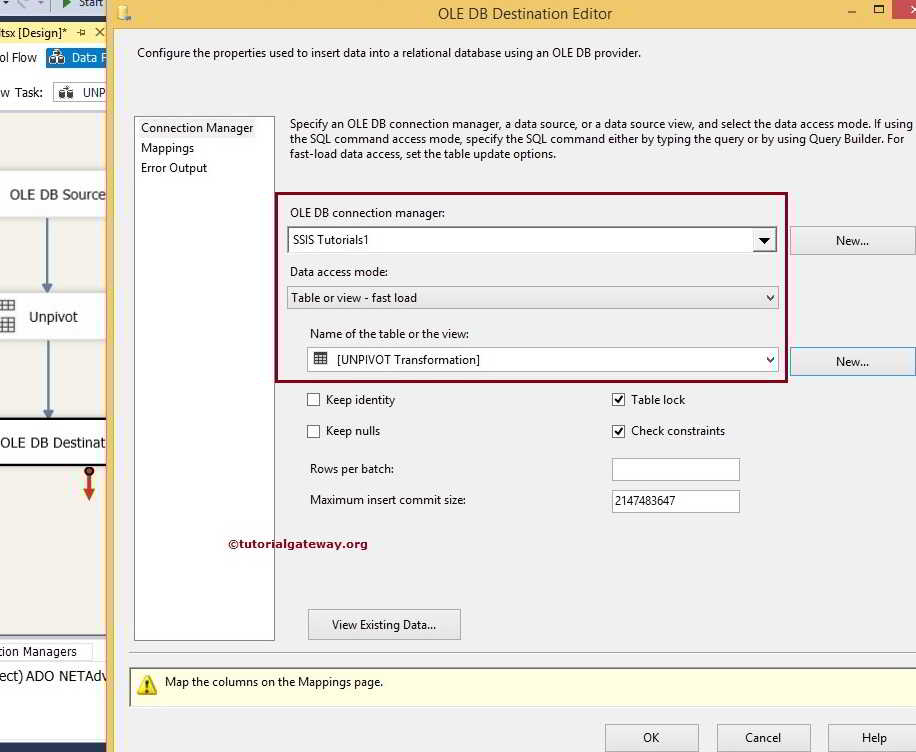
Here we selected [SSIS Tutorials] database as our destination database and [UNPIVOT Transformation] table as our destination table.
STEP 8: Click on Mappings tab to check whether the source columns are exactly mapped to the destination columns.

Click ok to finish our package designing UNPIVOT Transformation. Let us run the package
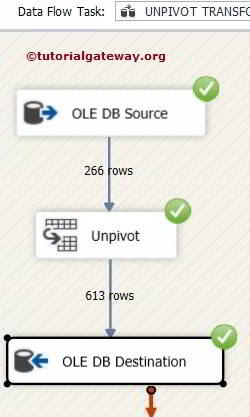
Check the results in SSMS

Thank you for Visiting Our Blog
Cache Transformation in SSIS 2014
The Cache Transformation is used to read data from a wide variety of sources such as flat files, Excel sheets and ADO.NET data sources and save data from those data sources in .caw file.
By default Lookup Transformation will use OLE DB Connection Manager for lookup reference table. We can use other sources also but they must be used indirectly via Cache Transformation. In real-time, We use Cache Transformation to save the reference table in .caw format and then perform Lookup transformation using the Cache Connection Manager.
Cache Transformation in SSIS 2014 Example
In this example we are going to use the Cache transformation to copy the data present in the Excel file to cache file (.caw extension).
STEP 1: Drag and drop the data flow task from the toolbox to control flow and rename it as Cache Transformation.

Double click on it and it will open the data flow tab.
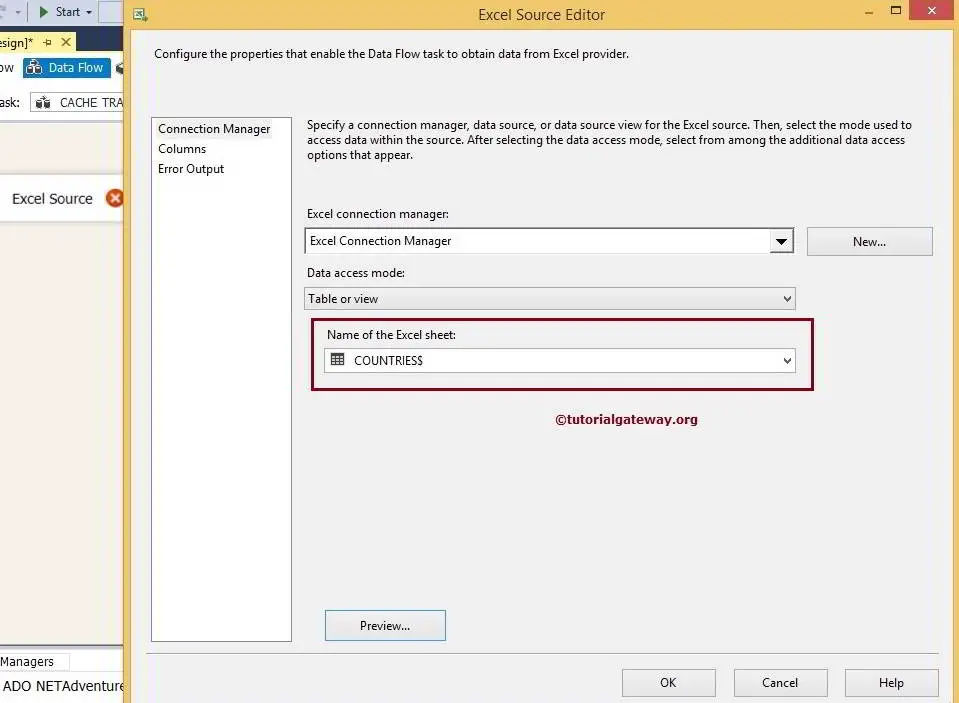
STEP 2: Drag and drop Excel source from toolbox to data flow region. Double click on it to configure the excel file
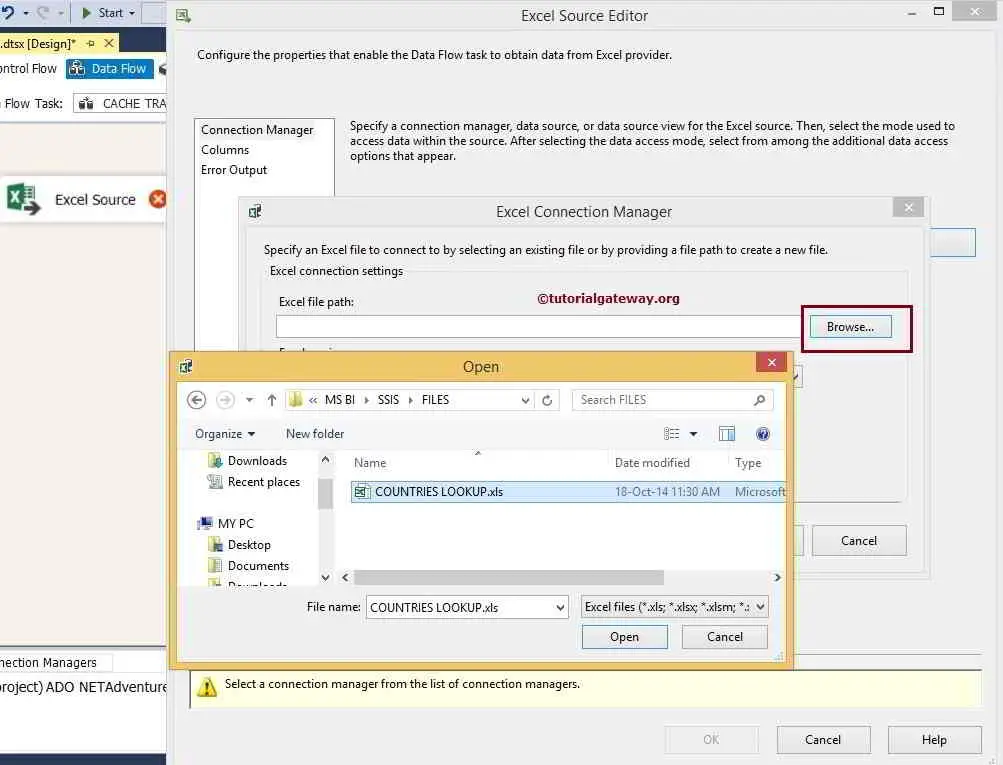
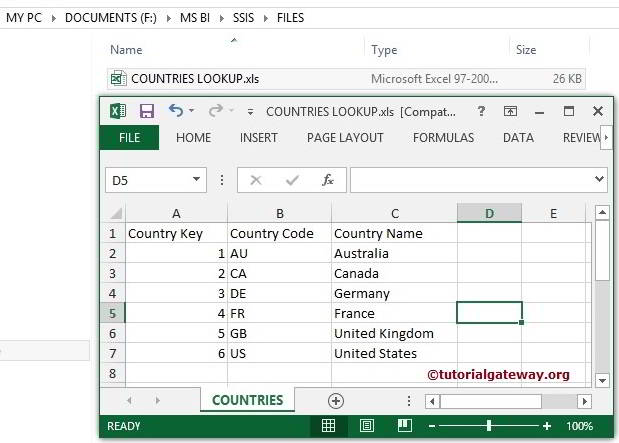
Click on the Browse button to select the source file from the local hard drive.
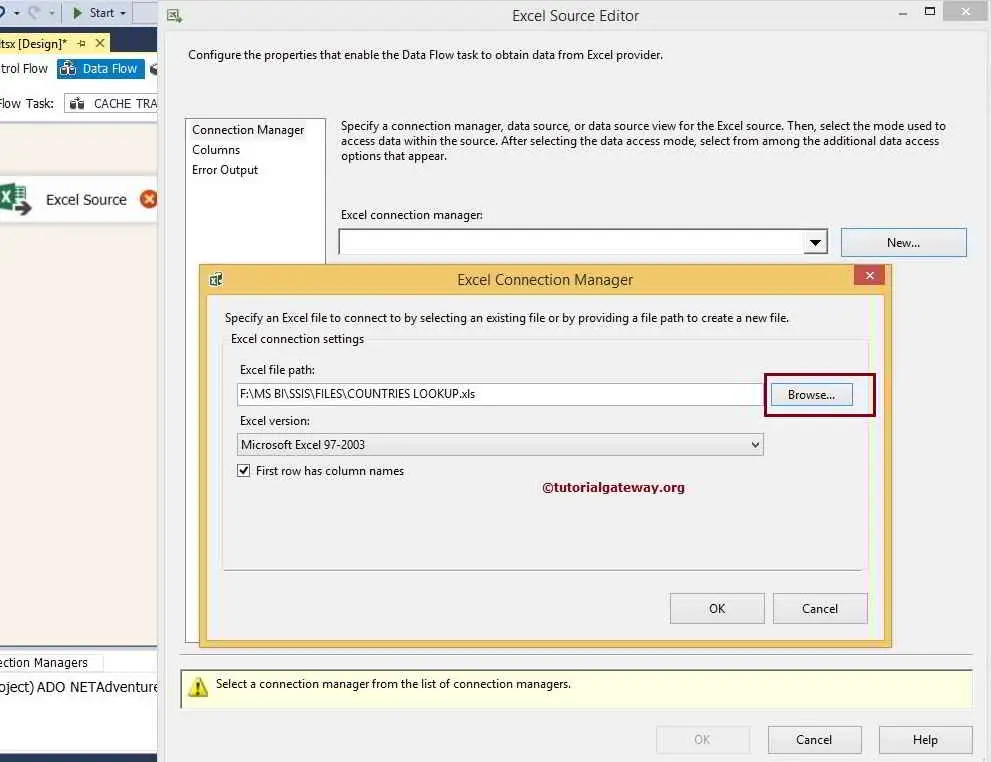
From the above screenshot you can observe that, we selected the COUNTRIES LOOKUP.xls file in local drive.
NOTE: If your Excel file contains column names in the first row then check mark the First Row has Column Names option.
STEP 3: Click on columns tab to verify the columns. In this tab we can uncheck the unwanted columns also.
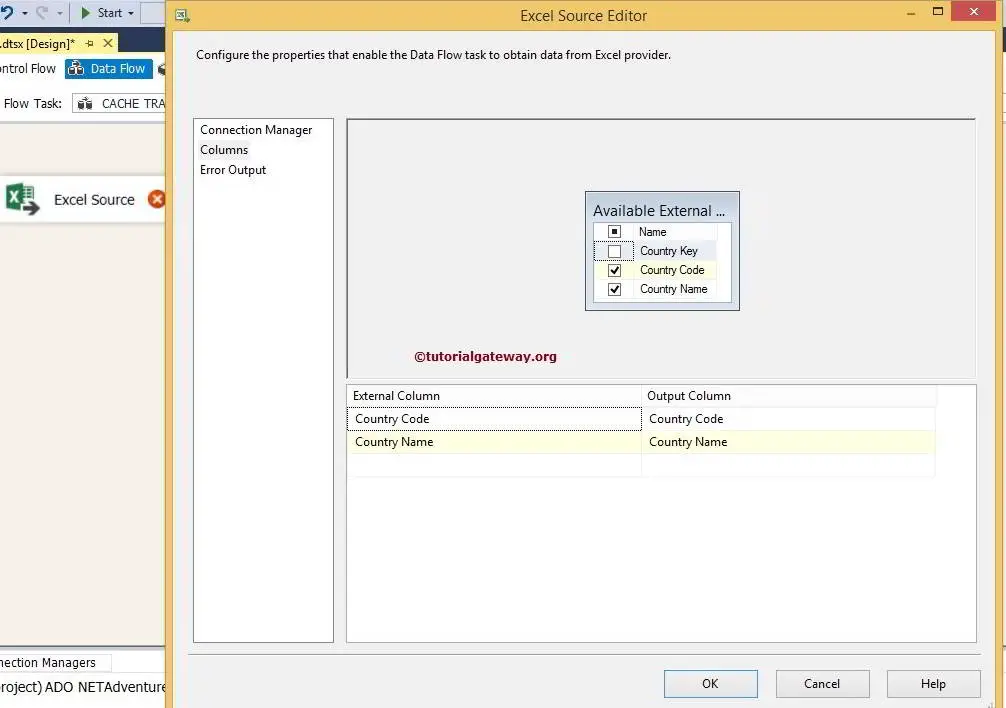
From the above screenshot you can observe that, Country Key is unchecked because we have nothing to do with key columns. We only require Country name to use as lookup column and Country code column as additional output column.
Drag the blue arrow from Excel Source to Cache Transformation to perform the transformation on the source data.
STEP 4: Double click on the Cache Transformation to configure it.
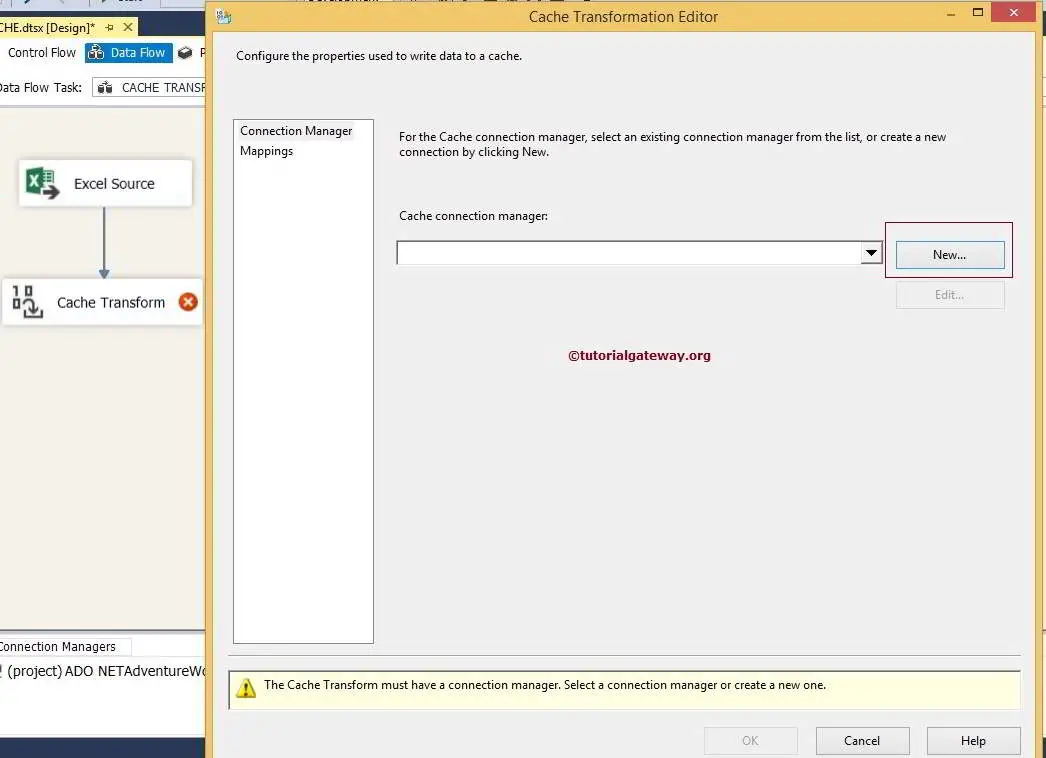
We havent created the Cache Connection Manager in this project before, Click on new button to configure it.
STEP 5: On the General tab of the editor,
- Connection Manager Name: The Default value is Cache Connection Manager but you can change the name of the connection manager as per the project requirement.
- Description: if you want, Provide the description for the Cache Connection manager but for now we are leaving default here.
- Use File Cache: If you check mark this option, the connection manager will write cached data to a file.
- Browse: This button is used to browse the existing file or creating new file of extension .caw

From the above screenshot you can observe that, We used file cache option and then we selected the lookup.caw file located in my local drive.
Now select the Column Tab.
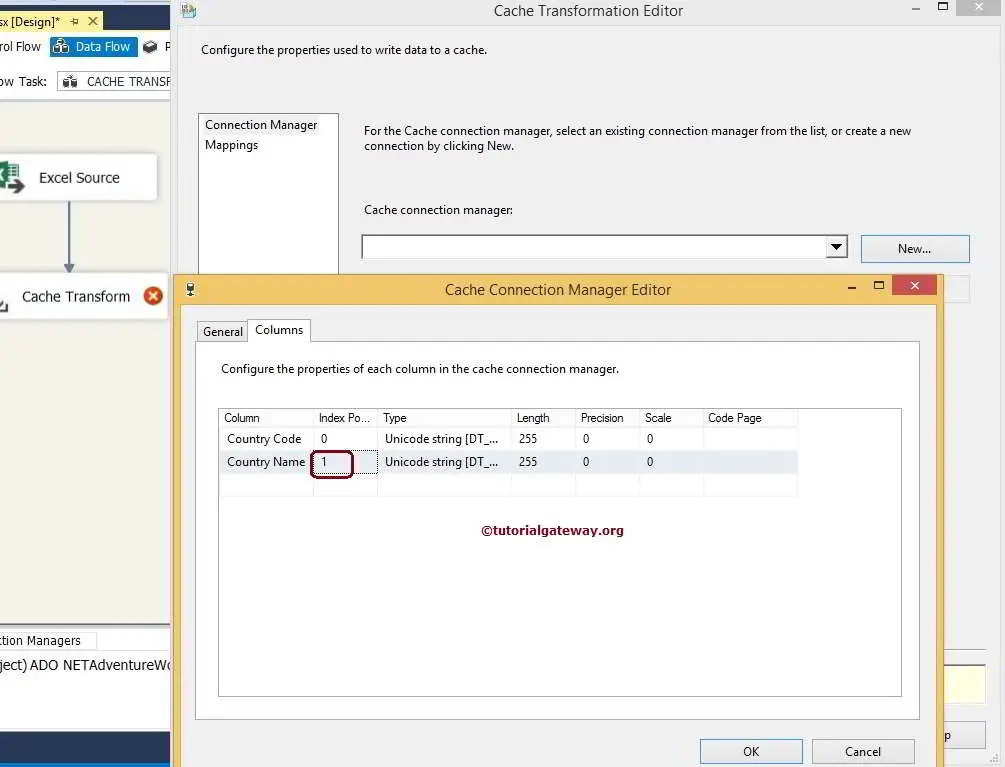
STEP 6: Columns tab will show the list of available columns coming from the source data and their data types, length, precision scale etc. Apart from these option there is one important property called Index Position.
- Set Index Position to 0 for all the columns that are not used for the lookup. For this example, We don’t want to perform lookup operation on Country Code Column so set the index position for this column to 0.
- Set Index Position to 1 for the columns that are used for the lookup. For this example, We want to perform lookup operations on Country Name Column so set the index position for this column to 1.
Click ok to finish configuring the Cache Connection Manager.
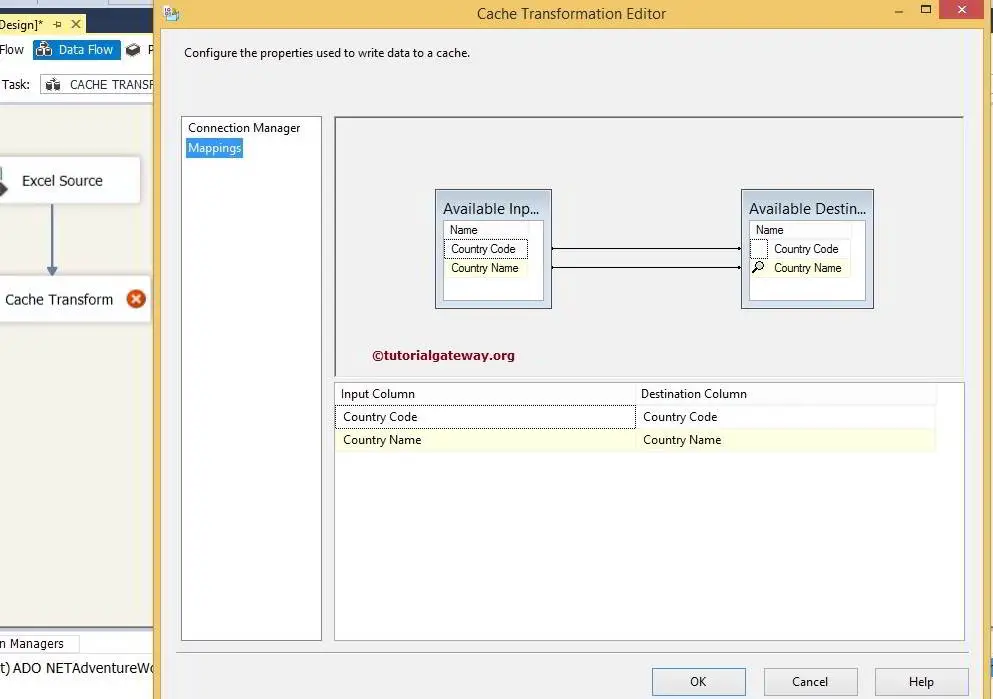
STEP 7: Click on columns tab to verify that all the columns are mapped exactly or not. If not, please map Input Columns with the appropriate Destination Column otherwise, you will end up with wrong data.
Click ok and run the Cache Transformation package to create cache file in local drive
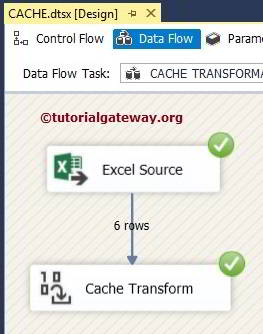
Check the result

Thank you for Visiting Our Blog
Union All Transformation in SSIS 2014
Union All Transformation is used to combine data from multiple sources (excel files, flat file etc) or multiple SQL tables and produce one output to store in the destination table. Union All Transformation does not follow any particular order while merging the data and storing in the destination table
For example, company has 100 stores and each store maintain their own sales data. End of the day they all belongs to one company and your job is to find out the one month or year sale for any single product. It is not practical to visit 100 stores or cross checking 100 excel or flat files and calculating the sales. In this situations all you have to do is, use Union All Transformation to combine all the 100 excel files from 100 stores and store it in the data warehouse and then calculate the product sales from the database.
NOTE: Union All Transformation will produce only one output and it does not support error output.
Union All Transformation in SSIS 2014 Example
We have products sales data stored in three different excel files (SALES 1, SALES 2, SALES 3 as shown in the below screenshot) and we want to export all the excel data into one SQL database table.
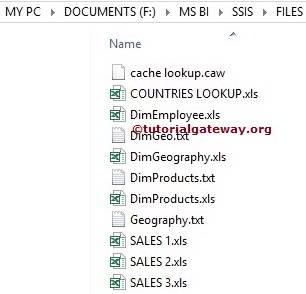
STEP 1: Drag and drop the data flow task from the toolbox to control flow and rename it as Union All Transformation.
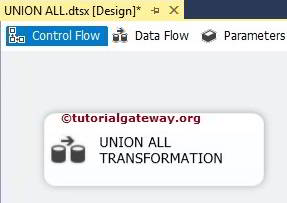
Double click on the Union All Transformation will take us to Data flow region.
STEP 2: Drag and Drop three Excel sources from the toolbox to data flow region

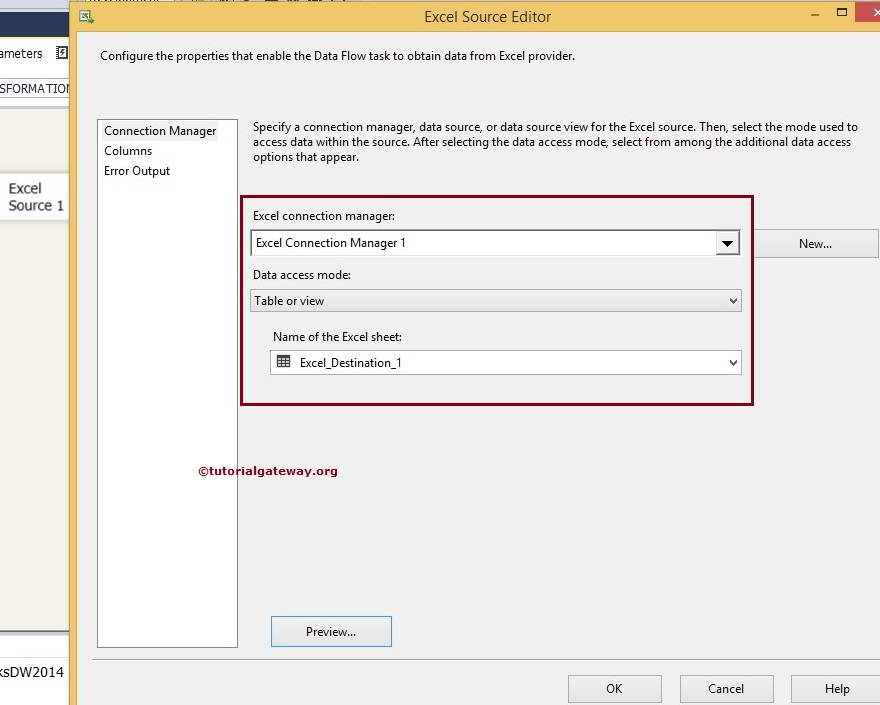
Double click on first Excel source in the data flow region will open the connection manager settings and provides option to select the table holding the source data.
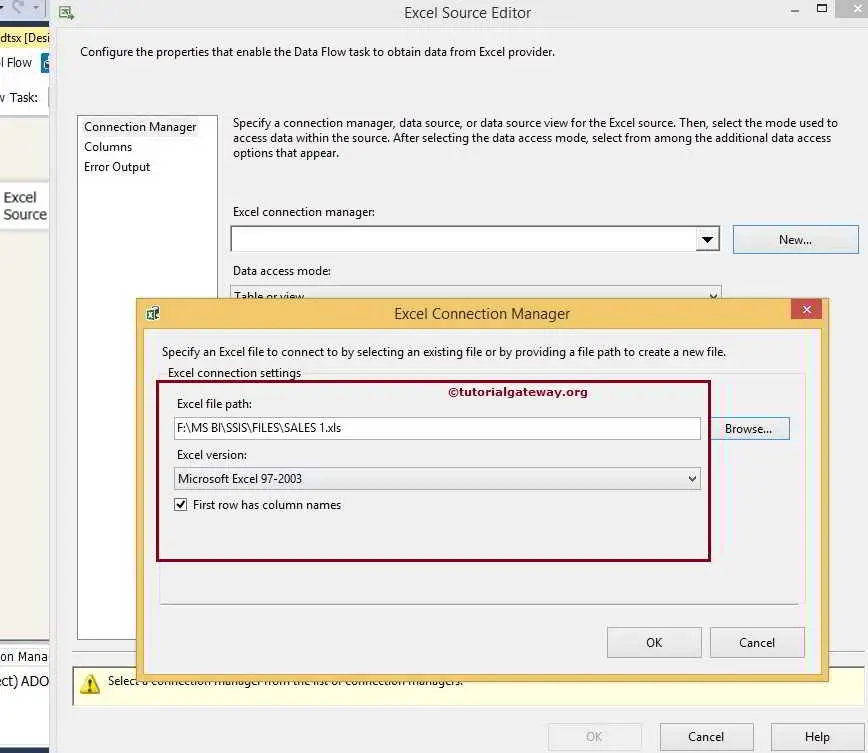
From the above Screenshot you can observe that, we are selecting SALES 1.xls file as source. Click ok to select the table or Excel sheet which is holding the data.
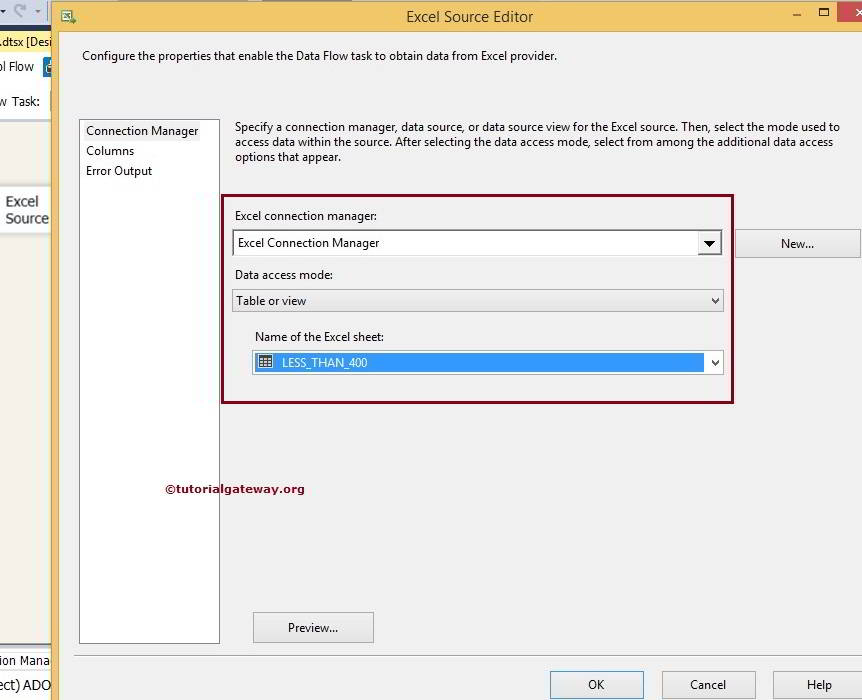
Here we selected the LESS_THAN_400 Table present in the Sales1.xls
STEP 3: Click on columns tab to verify the columns. In this tab we can uncheck the unwanted columns also.

STEP 4: Double click on second excel source to configure it with Sales 2 excel file.
Do the same for another excel file and then Drag and Drop the Union All Transformation into the data flow region
STEP 5: Join all the Excel sources to the Union All Transformations by dragging the output arrows
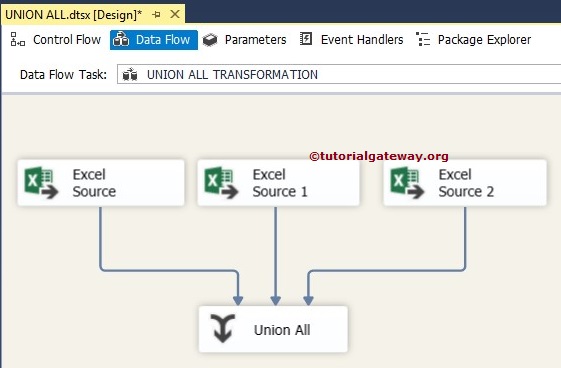
STEP 6: Double click on Union All Transformation will open Union All Transformation editor window to configure it

TIP: Union All Transformation editor will automatically maps columns as long as the column names are same, if they aren’t then we have to do it manually. Please be careful with the data conversions while working with Excel.
STEP 7: Drag and drop OLE DB destination and double-click on it to configure. Now we have to provide Server, database and table details of the destination.
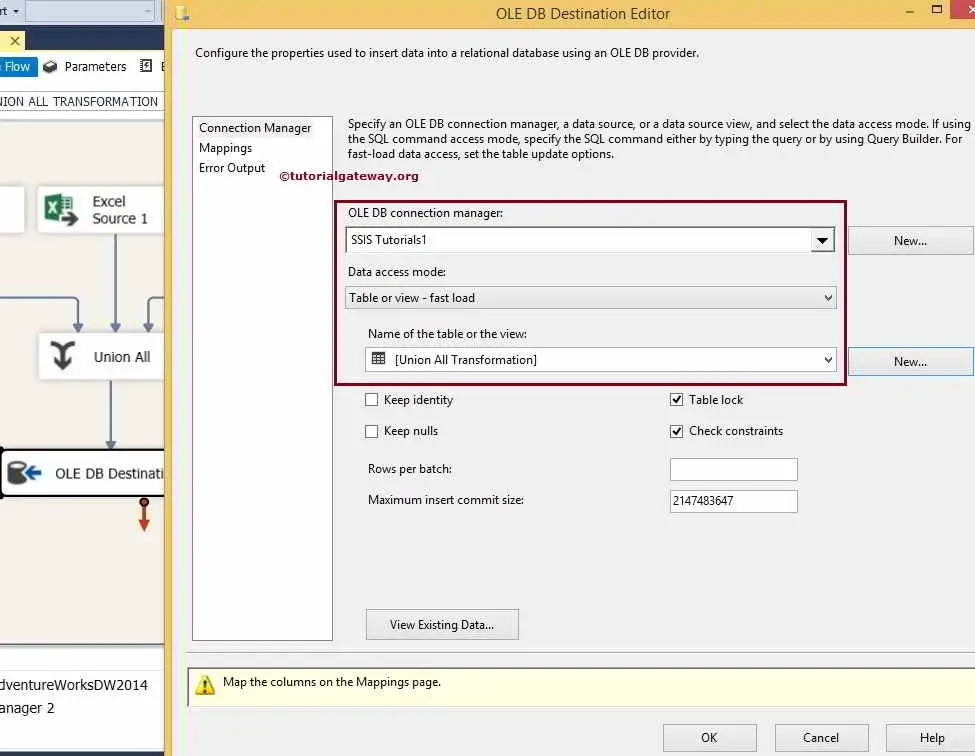
Here we selected the SSIS Tutorials database and [Union All Transformation] table as destination.
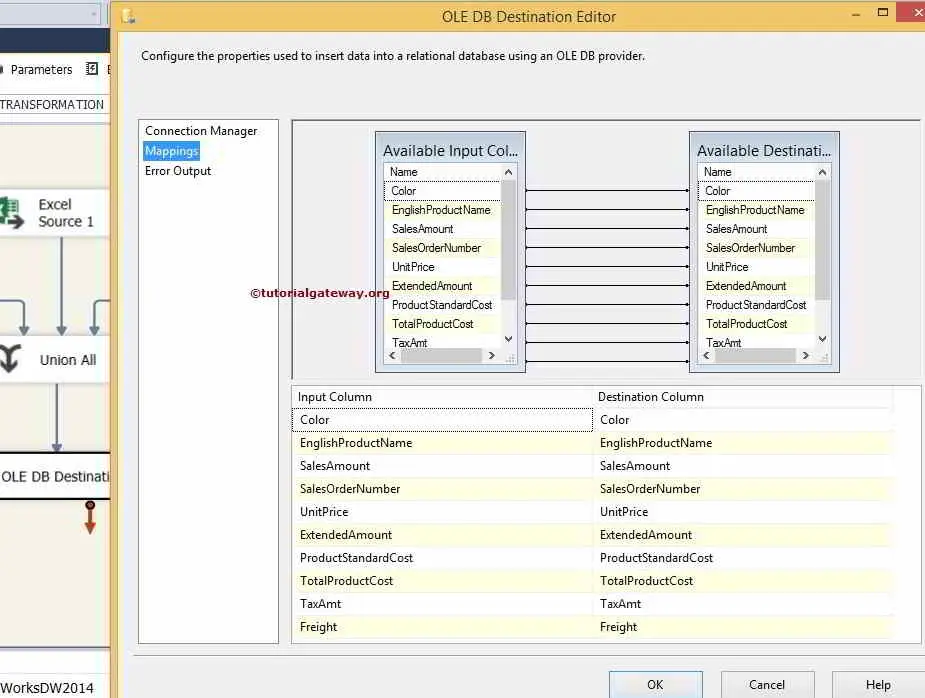
STEP 8: Click on Mappings tab to check whether the source columns are exactly mapped to the destination columns.
By clicking ok we finish developing the Union All Transformation package So, Let us run the package

Let’s open the SQL Server Management Studio and check the result
Thank you for Visiting Our Blog
Sort Transformation in SSIS 2014
Sort Transformation is used to sort the source data in either Ascending or Descending order which is similar in T-SQL command ORDER BY statement. Some transformations like Merge Transformation and Merge Join Transformation need data to be sorted before using them. In these situations we use Sort Transformation to sort the data.
Sort Transformation uses the Sort Order property to specify the priorities.
- If the Sort Order value is positive number then Sort Transformation sort the data in Ascending order
- If the Sort Order value is Negative number then Sort Transformation sort the data in Descending order
For example, if Employee Name column has sort order of 1 and Salary column has sort order 2. Sort Transformation will sort the data by Employee Name and then sort by city.
Sort Transformation in SSIS 2014 Example
STEP 1: Drag and drop the data flow task from the toolbox to control flow and rename it as Sort Transformation.
Double click on it and it will open the data flow tab.
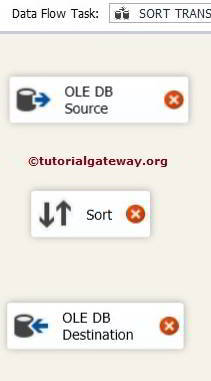
STEP 2: Drag and drop OLE DB Source, Sort Transformation and OLE DB Destination from toolbox to data flow region
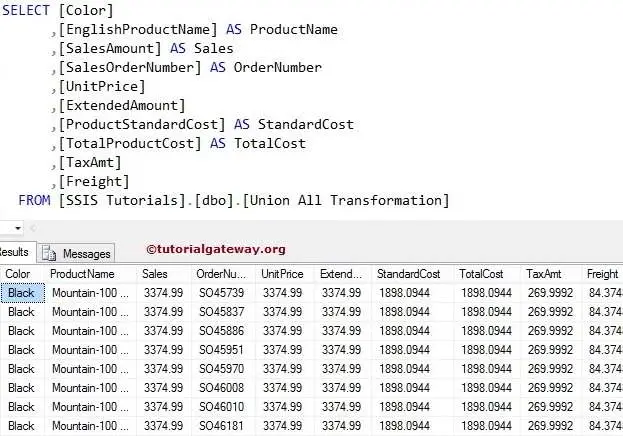
STEP 3: Double click on OLE DB source in the data flow region will open the connection manager settings and provides space to write our SQL statement.
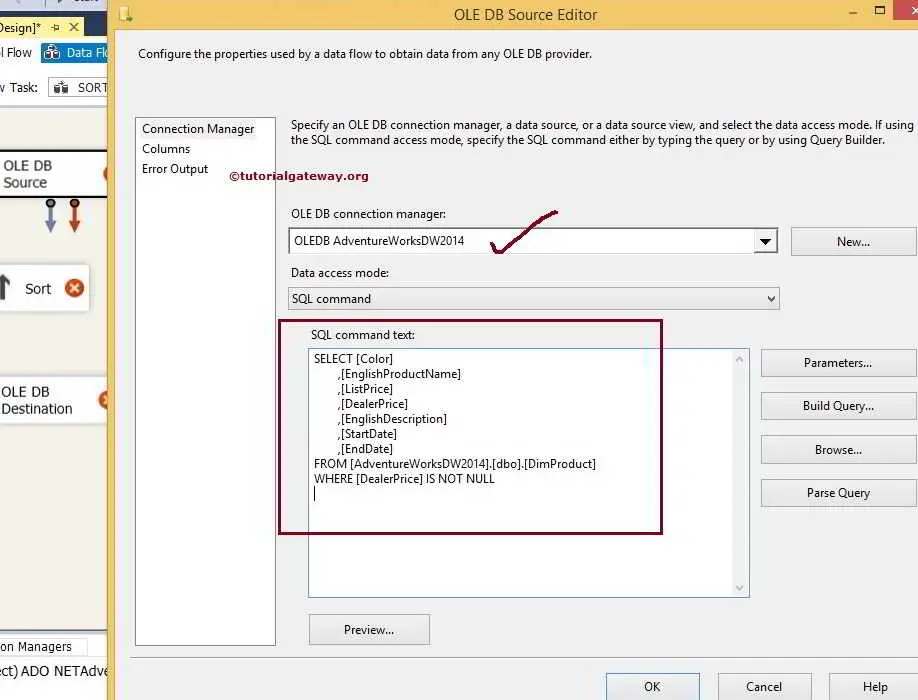
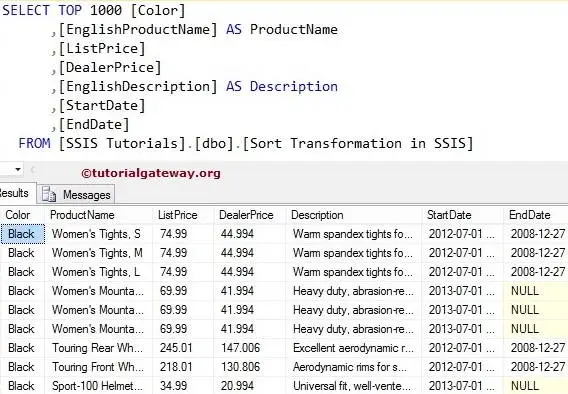
SQL Command we used in the above screenshot is:
STEP 4: Click on columns tab to verify the columns. In this tab we can uncheck the unwanted columns also.

Click ok and Drag the blue arrow from OLE DB source to Sort Transformation to perform transformations (sorting) on the source data.
STEP 5: Double click on Sort Transformation to configure it.
Check the columns we want to sort and don’t forget to Pass Through remaining column. If you forget to select the Pass Through then they won’t appear in output columns.
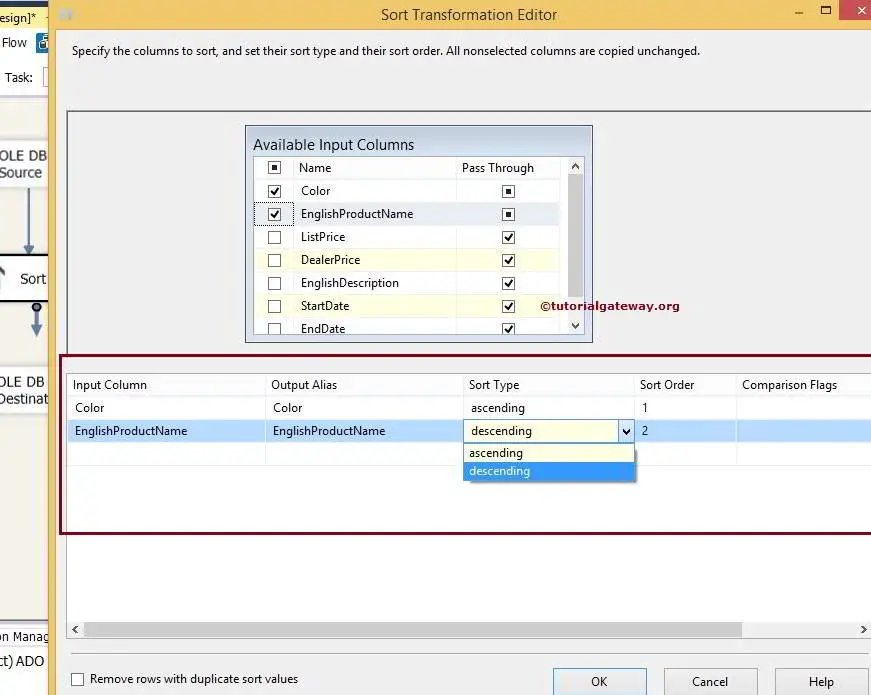
To make you understand the Sort Transformation better we are sorting one column with Ascending order and another with Descending order.
From the above we are sorting the data by Color and then by [English product name] because we specified the Sort order in that way.
- First data is sorted by Color in Ascending Order and then
- Second, data is sorted by English product name in Descending order.

From the above screenshot you can observe that, Sort Transformation has one more important property called Comparison Flags.
- Ignore case: Specify whether you want to differentiate between uppercase and lowercase letters. If we check this option then both XYZ is same as xyz.
- Ignore Kana Type: Specify whether you want to differentiate between Japanese language hiragana and katakana letters. If we check this option then it will ignores kana Type.
- Ignore nonspacing characters: If you don’t want to differentiate between the normal characters and diacritics then check this option.
- Ignore Character Width: Specify whether you want to differentiate between single bite and double byte representation of same character. If we check this option then Sort Transformation ignores the difference.
- Ignore Symbols: Specify whether you want to consider the normal letters and letters with symbols (such as white spaces, currency symbols, operators etc) as same or not. If we check this option then both %xyz is same as xyz.
- Sort punctuation as symbols: If we check mark this option then all the punctuation symbols except the hyphen and apostrophe will be sorted before the actual letters. For instance, Sort Transformation will sort ?xyz before x.
Remove rows with duplicate sort values: If you check mark this option then, Sort Transformation will remove the duplicate columns. If not, then this transformation will copy all the columns including duplicate rows.
STEP 6: Drag the blue arrow from Sort Transformation to OLE DB Destination.
Now we have to provide Server, database and table details of the destination. So double-click on the OLE DB Destination and provide the required information
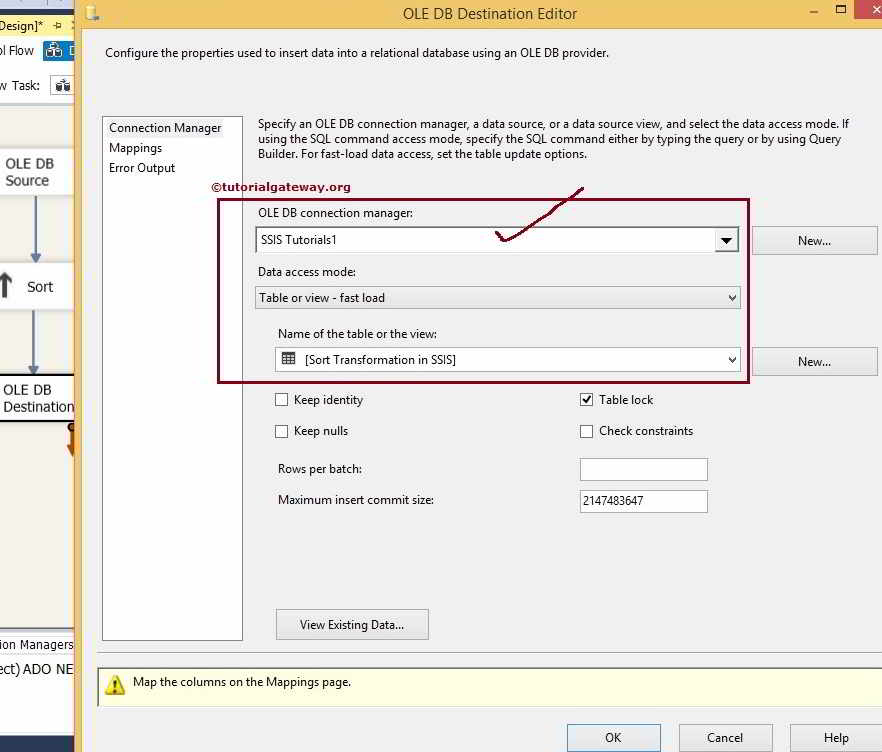
From the above screenshot you can see that, We selected the [Sort Transformation in SSIS] table in [SSIS Tutorials] Database
STEP 7: Click on Mappings tab to check whether the source columns are exactly mapped to the destination columns.

Click ok to finish designing the Sort Transformation package. Let us run the package

Let us open the SQL Server Management Studio and check the results
Thank you for Visiting Our Blog