Friday, September 4, 2015

SSAS - Options for Cube and Dimension processing

Options available for processing cube and dimensions are almost same. Cube is having couple of more options than dimension.


Cube


There are 7 different types of options are available for cube processing.


Process Full – Server checks the storage mode and if the mode is MOLAP, server reads the from the relational data and store it in a compact format. If there were aggregations defined for the cube, the server will build those aggregations during these processing. Finally the server creates indexs for the data that helps the speed access to data during querying.


Process default – Server checks all the objects and process only those that have not been processed if the cube data has been processed and if aggregations and indexes are not processed, then those are processed.

Process incremental- Process only new fact data
Unprocess – it will clear all the data in the cube that we have processed already.
Process structure – Process all the cube dimensions and the cube definitions and not the data.
Process index – Process the aggregations and index alone.
Process data – Read the data from relational tables and store in compact mode.

Dimension


There are 5 different options are available for dimension processing.


  • Process full
  • Process update
  • Process data
  • Process index
  • Unprocess

There is one interesting dimension property (Lazy aggregations ) which allows to build the index for new attributes of the dimension as a lazy operation in the back ground thread.

SSAS - Creation of cube top-down

In Analysis services 2008 we can build cubes via three approaches

  • top-down
  • bottom-up
  • empty cube
Traditional way of building cubes is bottom-up from existing relational databases. In the bottom-up approach, you need a data source view from which a cube can be built. Cubes within a project can be built from a single DSV or from multiple DSVs. In the top-down approach, you create the cube and then generate the relational schema based on the cube design. In SSAS 2008 you also have the option to first create an empty cube and then add objects to it. Here I would like to demonstrate top-down approach.

Schema datawarehouse is empty as shown in figure.  In this demo we will be designing the tables from SSAS and deploy it into this schema.


Step 1 : Create a new SSAS project and you can see in Fig 2 that datasource, dsv, cube, dimension etc are empty.


Step 2 : right click on the Cube and click on new cube. Choose the option Generate tables in the datasource but do not select the template and leave it as none.


Step 3 : Create all the required measures as shown in Fig 4


ProductKey and CustomerKey are the fields which reference to product and customer dimension tables respectively and so Aggregation should be none.

Step 4 : Create all the dimension as shown in Fig 5


Here we can select the option SCD if the dimension is changing in nature so that SSAS creates extra fields to track.

Step 5: define the dimension usage for the fact created as mentioned in Fig 6


Step 6 : Click finish to complete cube creation. we can generate the schema by selecting Generate schema now option or later by right click on project and choose the option.


Step 7 : Add required fields in all the dimension from attributes window of the dimension layout.


Step 8 : right click on the solution and select option Generate Related schema to create tables. mentioned.


Step 9 : Select the data source from which cube should pick the data in future.


Once the schema successfully generated, you get the window as given below.


Now we can go back to the database datawarehouse which we have created at the begining of the demo and find that these tables are gnerated successfully.


We can use SSIS to pull the records from the source systems and load the records into these tables.

SSAS - ignore unrelated Dimensions

It is good to ignore any un related dimension while comparing multiple measure values together. Lets consider below example to explain the use of the property ignoreUnrelatedDimension in cube structure of SSAS.


I have Case and installedbase details in the cube. case store all the information about the case created by the customer and installed product stores all the information related to the product. Look at the dimension relations ship as shown in Fig 0.1

Fig 0.1


Person dimension is not related to ZINSTALLBAEproactive measure. Now lets look at the excel sheet below in which I considered count of case and count of installed product for the dimension person.


Fig 0.2


Here we can see that Serialnumber count of installed product is repeating. this may confuse the end user to have proper decision.

This we can avoid by changing the setting ingoreUnrelatedDimension property of measure group to false as givne in Fig 0.3


Fig 0.3


Now process and deploy the cube and refresh the excel and you can see the result as given in Fig 0.4

Fig 0.4

SSAS : Transaction deployment

There are different options available to deploy and process the cube. Based on project requirement we can carefully select the appropriate deployment options. Here I would like to explain the use of transaction deployment property of cube deployment attribute. Normally while processing the cube user will not be able to access the cube but if you enable this property cube user can access the data from the cube while processing. Changes will be committed only if the deployment succeeds.


Deploying and processing SSAS cubes

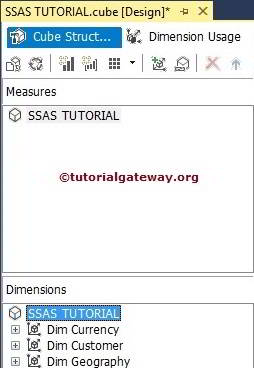
In SSAS we build what’s known as a UDM, or Unified Dimensional Model, over the top of a database schema, usually a data warehouse. The UDM consists of several objects designed to aid analysis of the data. The UDM is built in BIDS (Business Intelligence Development Studio) and in terms of SSAS is synonymous with the more common term cube.
As the UDM is built and developed it needs to be deployed to an SSAS service for testing. Ultimately it will need to be deployed to production. Once the objects have been deployed, the resulting cube needs to be processed.
There are actually three stages, first the UDM needs to be built, then deployed and finally processed. Building and deploying are closely coupled operations but processing is likely to happen on an independent schedule.
1. Build.
When we are developing a UDM or Cube in BIDS it is possible to be in one of two modes; connected mode or project mode. In connected mode a connection is established directly with an Analysis Services Service and objects are edited “in situ”. The more familiar project mode is where objects are edited in the BIDS environment on a development machine and then deployed to testing or production.
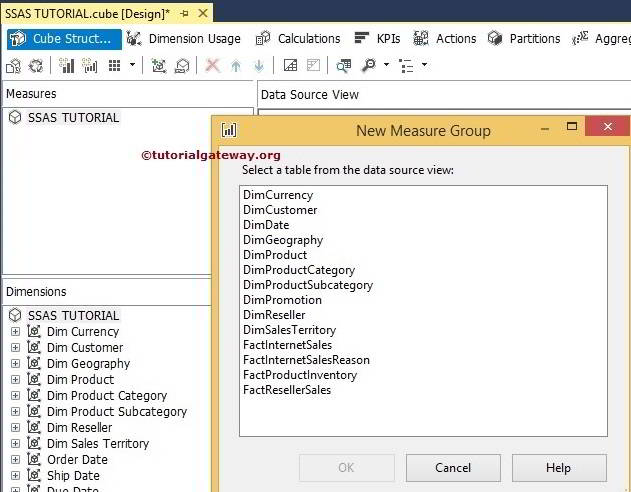
In BIDS from the build menu – select the build option (or right click on the project in the solution explorer).
BuildCube
The build process will create four xml files in the bin subfolder of the project folder (this location can be overridden by right clicking the project and selecting properties).
BuildFiles
As the names hint at, the .asdatabase file is the main object definition file and the three other files contain configuration and deployment metadata.
2. Deploy.
Deployment is the process of attaching the objects defined in the build file to a runnning Analysis Services service. This can be done in a number of ways.
In BIDS simply select deploy from the build menu. Deployment options can be configured by right clicking on the project, selecting properties and clicking on the deployment tab. Deployment via BIDS will overwrite the destination database management settings – so is not recommended for production deployment.
A more controllable option is the deployment wizard, available in interactive or command line mode.
Run the wizard from Start>All Programs>Microsoft SQL Server>Analysis Services>Deployment Wizard
1. Browse to the .asdatabase file created by the build.
2. Connect to the target server.
3. Configure how partitions and role should be deployed.
4. Specify how configuration settings are deployed.
5. Specify if objects should be processed as part of the deployment.
6. Finally, choose whether to deploy instantly or to create an XMLA command script for later deployment. The script will be created in the same location as the .asdatabase file.
Deployment can also be done using the Synchronize Database Wizard. This involves deploying to a target server by synchronising metadata from a designated source server/database.
Deployment is also possible using the .net analysis management objects (AMO) API.
I’m not going to cover either of these methods here.
3. Process.
Processing means populating our freshly deployed SSAS database with data from the data source (most likely a data warehouse of some sort attached to a SQL Server database engine). It is essentially the process of executing a number of select statements against the source database and storing the results in the cube. Aggregations and other materialised objects are also created or rebuilt at process time. A detailed description of SSAS processing is given in this whitepaper.
Processing can be done from BIDS, in SSMS either with the GUI or scripted in XMLA or through SSIS tasks. In BIDS the process option is available in the build menu or by right clicking the project node in the solution explorer. In SSMS, right click the database. Processing can be done at the database, cube, partition or dimension scope. Both methods result in a similar dialog.
ProcessSSAS
The processing options for OLAP objects are:
Process Default: SSAS dynamically chooses from one of the following process options.
Process Full: Drop all object stores, and rebuild the objects. This option is required if any metadata changes have occurred.
Process Update: Only apply dimension member updates, inserts or deletes.
Process Add: Only apply new data.
Process Data: Process data only, do not rebuild indexes or aggregations.
Process Index: Rebuild indexes and aggregations without processing data.
Unprocess: Delete data from the object.
Process Structure: Drop the data and perform process default on all dimensions.
Processing can be done in parallel, and can be wrapped in a transaction to enable an aborted or failed process to be rolled back. Like most other SSAS management tasks, processing is implemented via an XMLA command script built in the background. This script also gives the ability to batch processing commands. For details of building these scripts look at the whitepaper linked above.
The Impact Analysis button produces a list of object interdependencies with their dynamically chosen process options preselected. You have the option here to choose to process dependant objects.
Proactive caching allows SSAS to dynamically execute processing tasks in response to changes in the data source. That is another story for another day.

SSAS - XMLA script to restore the Analysis database

This script provides an easier way of restoring the analysis DB and it is useful when replica or snapshot of analysis DB is required in automate fashion. Change the path of your backup (.adf) file and your SQL Server OLAP data folder in the script before execution.


<Restore xmlns="http://schemas.microsoft.com/analysisservices/2003/engine">
  <File>G:\MyAnalysisDBBackup.abf</File>
  <DatabaseName>MyAnalysisDBName</DatabaseName>
  <AllowOverwrite>TRUE</AllowOverwrite>
  <DbStorageLocation xmlns="http://schemas.microsoft.com/analysisservices/2008/engine/100/100">C:\Program Files\Microsoft SQL Server\MSAS11.SQL2012\OLAP\Data\</DbStorageLocation>
</Restore>
 

Following are the benefits of this script:
1. Easier way of restoring the analysis DB
2. Helpful in automating the restore process
3. Can be utilized for creating replica or snapshot of DB in an automated way.


Restores in SQL Server Analysis Services


“You’re only as good as your last restore”
I’ve no idea who originally said that – but it probably qualifies as DBA folklore. I blogged recently about backups in SSAS so to close the loop here are the basics of restoring SSAS databases.
In the GUI:
Connect to the SSAS service with SSMS, right click the database node in object explorer and select restore. The following dialog appears:
RestoreSSAS
Browse to a valid SSAS backup file.
Select a database to restore over or type a new name for a new database.
Optionally select an alternative storage location for database. (The folders that appear in the browse dialog are defined in the advanced server propertyAllowedBrowsingFolders. This is a pipe (|) separated list of local folder paths. Adding a folder to this list also gives access to all of its subfolders.)
If you are choosing to restore to an existing database you must enable the allow database overwrite option.
Choose whether to restore security metadata with the backup, the options are restore all, or to skip role membership.
If the backup was encrypted then provide the password.
The partitions page allows you to have control over the restore locations of local or remote partitions.
Using XMLA command scripts:
As with the backups SSMS builds an XMLA command script behind the scenes of the restore dialog. This script is available via the script dropdown at the top left of the dialog.
The following script restores the backup.abf backup into the pre-existing SSASDatabase database, overwriting all security metadata, and without encryption:
<Restore xmlns="http://schemas.microsoft.com/analysisservices/2003/engine">
<File>C:\MSSQL\SQLDataDumps\backup.abf</FileDatabaseName>SSASDatabase</DatabaseName>
<AllowOverwrite>true</AllowOverwrite>
</Restore>
The following script restores the backup.abf to the new SSASDatabase without restoring any of the security metadata:
<Restore xmlns="http://schemas.microsoft.com/analysisservices/2003/engine">
<File>C:\MSSQL\SQLDataDumps\backup.abf</FileDatabaseName>SSASdatabase</DatabaseName>
<Security>IgnoreSecurity</Security>
</Restore>
Finally this script will restore the backup.abf file to the pre-existing database SSASDatabase to a non-default location without restoring role membership metadata.
<Restore xmlns="http://schemas.microsoft.com/analysisservices/2003/engine">
<File>C:\MSSQL\SQLDataDumps\backup.abf</FileDatabaseName>SSASDatabase</DatabaseName>
<AllowOverwrite>true</AllowOverwrite>
<Security>SkipMembership</Security>
<DbStorageLocation xmlns="http://schemas.microsoft.com/analysisservices/2008/engine/100/100">
C:\Program Files\Microsoft SQL Server\MSAS10_50.MSSQLSERVER\OLAP\Log\</DbStorageLocation>
</Restore>

SSAS - Message group has zero dimensional overlap

Creating SSAS Measure Groups

A Measure is single Numeric value (Means single column in a table) whereas a Measure Group is a collection of measures or we can simply say group of all the columns present in a table. For instance, In fact internet sale table [Sales Amount] and [Tax Amount] are the individual measures and group of all the columns are considered as Measure group.

Creating SSAS Measure Group Example

After the completion of creating Empty OLAP Cube using Wizard we have to create Measures or Measure Groups. Before we start creating New Measure Group let us see our Measures Pane in Cube Editor
SSAS Measure Groups 1
To create a new measure group, Within the Measures pane ,right-click on the cube name will open the context menu for creating Measures.
SSAS Measure Groups 2
From the above context menu we have two options such as New Measure and New Measure Group. In this example we are creating measure group so please select the New Measure Group option.
NOTE: When we select the New Measure Group option then all the columns present in the table will be selected by default. Most of the times we don’t require all the columns present in the fact table, so this is very bad option to be frank.
Once you selected the New Measure Group option, New Measure Group window will be opened and it will display all the tables available in the Data Source View.
SSAS Measure Groups 3
Here we are selecting FactInternetSales table from the list.
SSAS Measure Groups 4
Click ok to finish configuring the SSAS Measure Group (Fact Internet Sales). Let us see the Measures Pane for the newly created Measure Group.
SSAS Measure Groups 5
If you look at the above screenshot you can understand why this is bad choice. If we don’t want any measure like Revision Member then we have to remove it explicitly.
Thank you for Visiting Our Blog


It is always better to have seperate cube for each measure group if there are no common dimension between them. But if you have added multiple measure group in same cube and not added the common dimension in the dimension usage, SSAS gives warning message " The measure group has zero dimensional overlap with all of the other measure groups in the cube. Consider moving it to the seperate cube"


To demonstrate this, I have created cube with internetsales and internetSalesReason from AdventureworksDW database. Initially there are no common dimension and so I have received the error as showned in Fig 0.1.

Fig 0.1


There are no common dimension between the measure group InternetSales and InternetSalesReason as shown in Fig 0.2

Fig 0.2


In order to avoid this issue, we can have common dimension between these two tables by adding SalesOrderNumber as cube dimension. SalesOrderNumber is actually saved in InternetSales table itself which is a fact table and so to have this field as dimension, we need to create fact relationship.

Click on the Add dimension option from Dimension usage tab and select FactInternetSales from the list to add InternetSales as dimension.
Fig 0.3


Once you add this, you can see the dimension usage tab with common dimension.


Previous Warning/Error message also disappears once this common dimension is in place.