Bulk Insert Task
Description – Bulk insert task helps us to import text files into a MS SQL Server table. You cannot validate, clean or transform data with this task. Let’s get started and get into this concept by taking a simple example.
Example Scenario :- We will be having a Text file with some data in it (as I am having list of Dota players in my text file). Then, we will create one package (I have created a package namedcK_Bulk_Insert_Task) and then with the help of Bulk insert task, the data in text file will be inserted into SQL Server Table.
STEPS TO FOLLOW:-
Step 1. Open Business Intelligence Development Studio (BIDS) by any way you prefer. Create a newpackage and give it any desired name, say cK_Bulk_Insert_Task.dtsx.
Step 1. Open Business Intelligence Development Studio (BIDS) by any way you prefer. Create a newpackage and give it any desired name, say cK_Bulk_Insert_Task.dtsx.
Step 2. Open SQL Server Management Studio (SSMS). Create a table for storing Dota Players information in your working database (as in this example, Chander is my working database and I am creating a table with a name dbo.Dota_players with the following fields).
Create table dbo.Dota_player
(
Name nvarchar(50) not null,
Age nchar(10) not null,
Sex nvarchar(10) not null,
Skill nvarchar (50) not null,
Location nvarchar(50) not null
)
Create table dbo.Dota_player
(
Name nvarchar(50) not null,
Age nchar(10) not null,
Sex nvarchar(10) not null,
Skill nvarchar (50) not null,
Location nvarchar(50) not null
)
Step 3. Back in your new package, go to control flow items in toolbox and drag the Bulk Insert Taskonto the Control Flow design pane. Notice that the task has a red icon on it, indicating that it hasn’t been configured yet.
Now, double-click the Bulk insert task to open the editor to configure it. In the General tab specify the following fields as:-
- For the Name option – write Dota Players and
- For the Description – write Loads Dota Players Information from a flat file.

Step 4. Click on the Connection tab and proceed as:-
- From the Connection dropdown box, select <NEW CONNECTION ..>. This will open the ConfigureOLE DB Connection Manager dialog. Now, we will create a connection to the database. Click New to add a new Connection Manager. For the Server Name option – select local host and for theDatabase – select database name.

Step 5. Click OK to go back to the previous screen and click OK again to return to the Bulk Insert Task Editor. You’ll now see that the Connection Manager you just created has been transposed into theConnection dropdown box.
STEP 6. Now we need to define the destination. For the Destination Table option, Select the[chander].[dbo].[Dota_players] table.

NOTE: – The Bulk Insert Task does not log error-causing rows. If you want bad records to be written to an error file or table, it’s better to use the Data Flow Task.
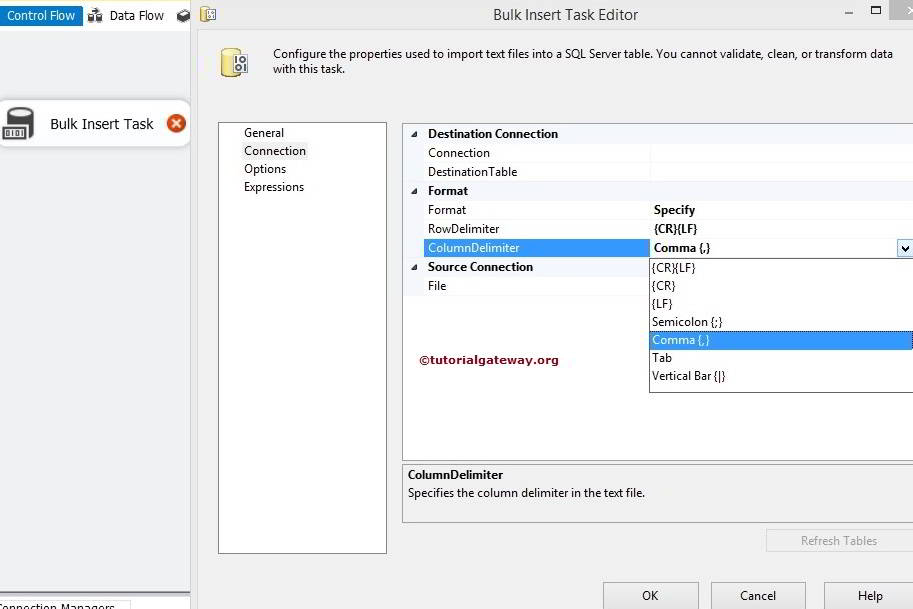
STEP 7. The Row Delimiter property option will be {CR}{LF} (a carriage return) and the Column Delimiter property will be set to Comma{‘} as in our flat file of Dota Players, columns are separated by a comma.
STEP 8. For the File option under Source Connection, again select <New connection …> to create a new Connection Manager. This will open the File Connection Manager Editor. For the Usage Type, select Existing File and then Browse to DotaPlayers.txt for the File option. Click OK to return to the editor.

NOTE: – If you had a column header and needed to skip it, you would go to the Options tab and change the First Row option to 2. This would start the import process on the second row, instead of the first, which is the default.
STEP 9. You should be able to execute the package now. When it runs, the table will be populated with all the Dota players information from the import file. Let’s verify this by selecting all the rows from theDota Players table from MS SQL Server.

With this our implementation of Bulk Insert Task is finished under the Control flow section and in further posts we will go into the concept of Data Flow. I hope this example helps you to clarify your concept of Bulk Insert task. If you are having any queries regarding this post, feel free to postcomment.


Bulk Insert Task in SSIS 2014
The Bulk Insert task can transfer data only from a text file into a SQL Server table or view. If the destination table or view already contains data, the new data is appended to the existing data when the Bulk Insert task runs. If you want to replace the data, run an Execute SQL task that runs a DELETE or TRUNCATE statement before you run the Bulk Insert task.
For instance, We are working with stock market data and every day we are getting billions of data in .csv format (Comma Separated Values). Our task is to copy data inside this .csv file to SQL database table every day. Normally we have 2 approaches to do the same
- Drag and drop the data flow task and inside the data flow drag and drop flat file source and OLE DB destinations and copy the data. This approach is very useful if we want to perform any transformations.
- Use the Bulk Insert Task. This approach is more powerful compared to previous one because internally Bulk Insert Task uses Bulk Copy (bcp) operation (Which is very fast in SQL Server).
Available Options inside the Bulk Insert task
Click on the Options tab inside the Bulk Insert Task will give the following options
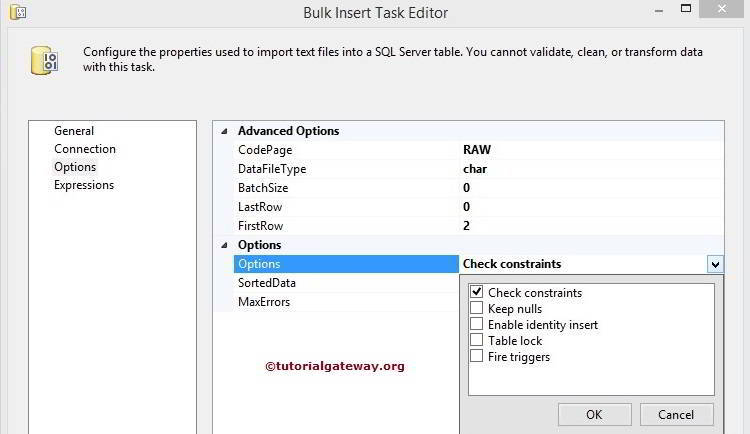
- CodePage: Specify the code page of the data in the data file. Normally used for other languages.
- DataFileType: Specify the data-type value to use in the load operation.
- BatchSize: Specify the number of rows in a batch. The default is the entire data file. If you set BatchSize to zero, the data is loaded in a single batch. For instance, If we set the batch size as 100 then each batch acts as 1 transaction and if the task fails after sometime then successfully loaded batches will not be rollback.
- LastRow: Specify the last row to copy.
- FirstRow: Specify the first row from which copying starts.
- SortedData: Specify the ORDER BY clause in the bulk insert statement. The default is false.
- MaxErrors: Specify the maximum number of errors that can occur before the bulk insert operation is canceled. A value of 0 indicates that an infinite number of errors are allowed.
Options
| Term | Definition |
|---|---|
| Check constraints | Checks the column data. |
| Keep nulls | Select to retain null values during the bulk insert operation, instead of inserting any default values for empty columns. |
| Enable identity insert | Select to insert existing values into an identity column. |
| Table lock | Select to lock the table during the bulk insert. |
| Fire triggers | Select to fire any insert, update, or delete triggers on the table. |
Bulk Insert Task in SSIS 2014 Example
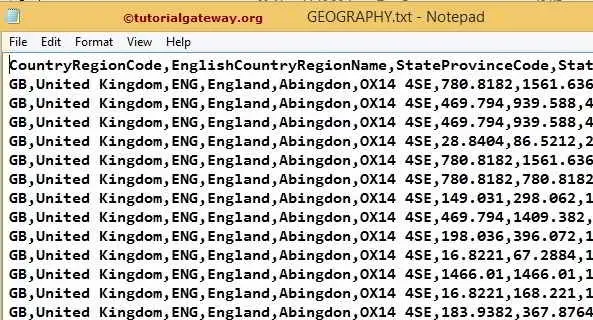
In this example we are going to copy the text file present in the local drive to the SQL Server destination.
We have a flat file called GEOGRAPHY.txt contains 1000000 Rows. Our task is to insert all the rows using Bulk Insert Task.
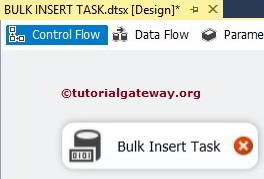
Drag and Drop the Bulk Insert Task from toolbox to Control flow region
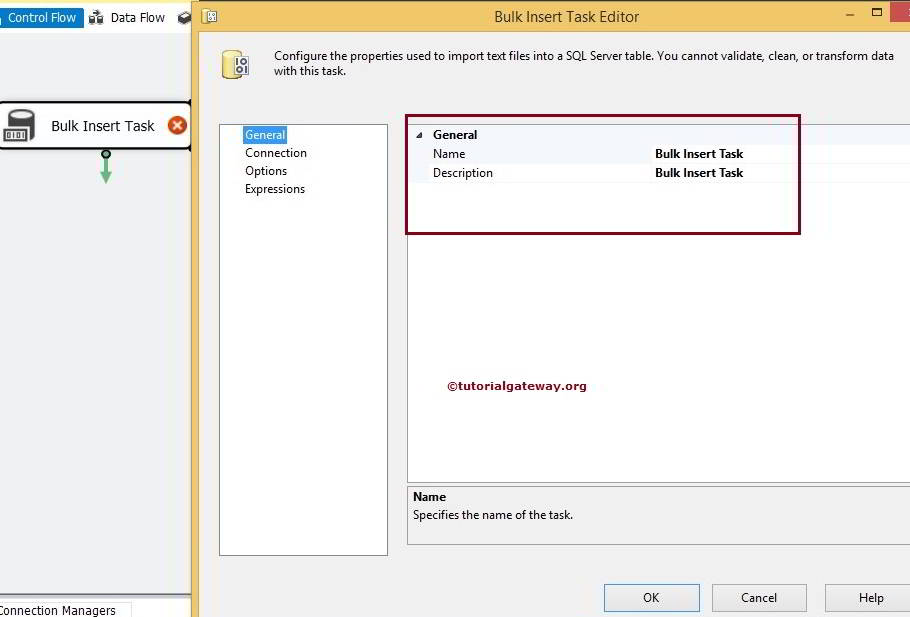
Double click on Bulk Insert Task to configure the source and destination connection strings. In the General tab we can change the Name and description
Now click on the connection tab to configure the source and destination connections. Firstly, we have to configure the source connection so select the file option
NOTE: We must provide the credentials to access the text file present in the local or remote.
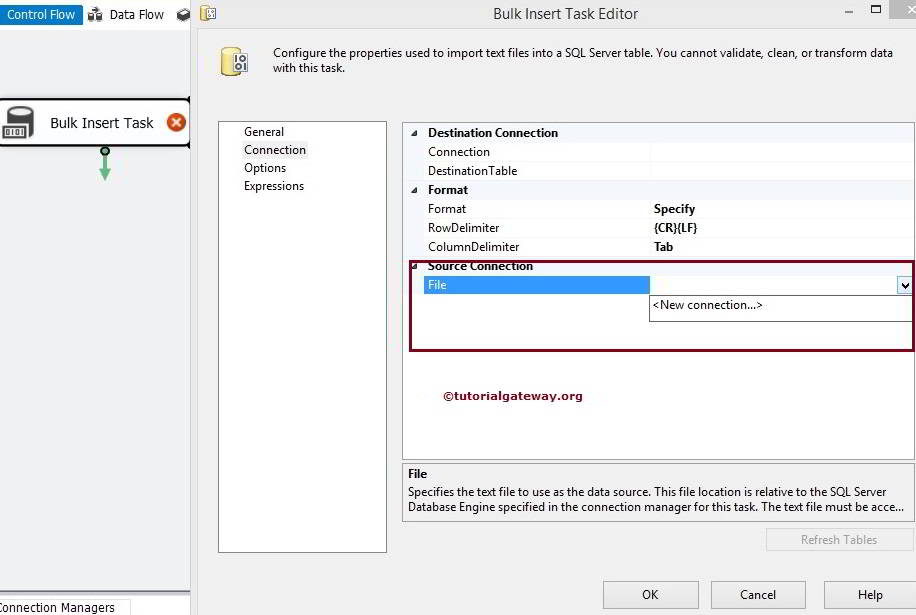
By clicking on New Connection, we can select the source text file we want to use. Click on Browse button to select the text file. Here we are selecting the GEOGRAPHY text file of size 92, 562 KB.
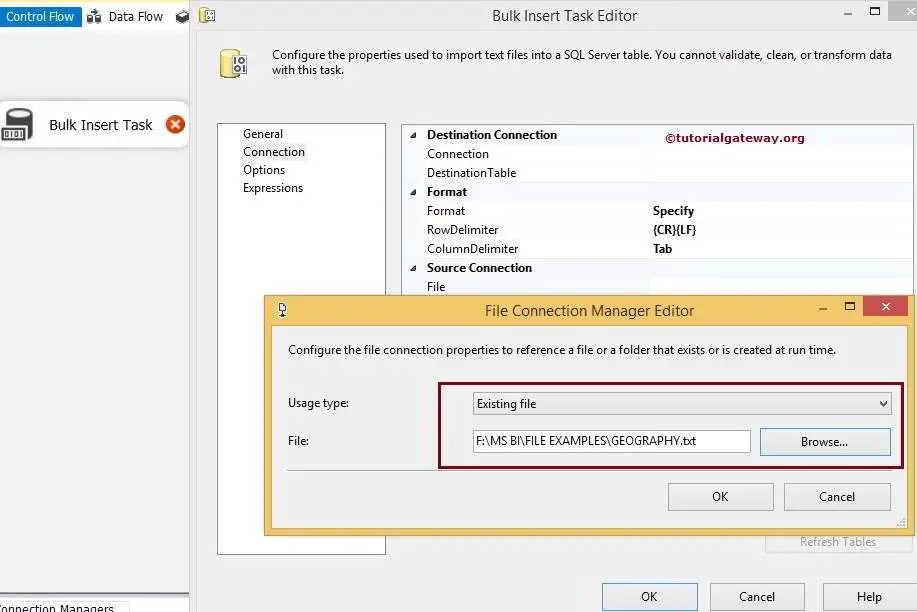
Click ok to finish source configurations
The Row Delimiter property option will be {CR}{LF} (a carriage return) and the Column Delimiter property will be set to Comma{‘} as in our flat file, columns are separated by a comma.
Now let us configure the destination connection by click on <New Connection>. Connection means selecting the SQL server database name and here I am selecting SSIS Tutorials Data base as target data base. Now configure the destination table by selecting it from the list. Here I am selecting GEOGRAPHY table as destination table
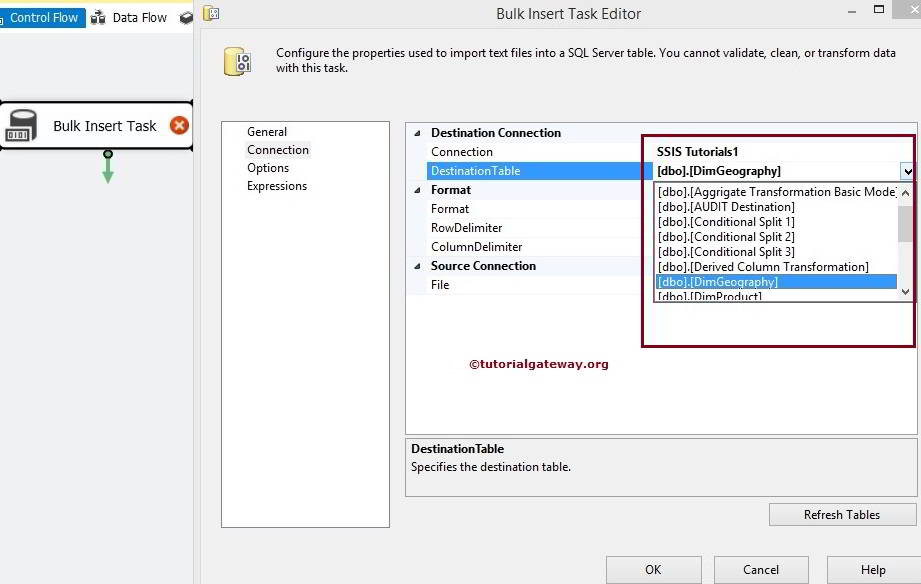
TIP: Destination table should be pre designed in SQL server.
NOTE: The Bulk Insert Task does not log error-causing rows. If you want bad records to be written to an error file or table, it’s better to use the Data Flow Task.
Click on the “Options”
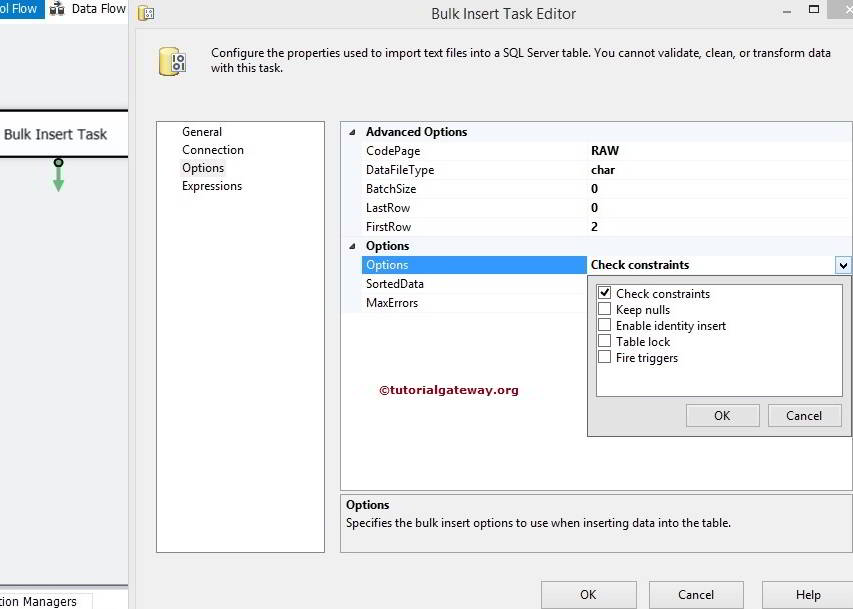
We already explained the properties of each option in the starting only. For the time being, We are leaving default settings but for the First Row we changed the value to 2 because you can observe the data that, We have column names in the first row.
Click ok and run the package
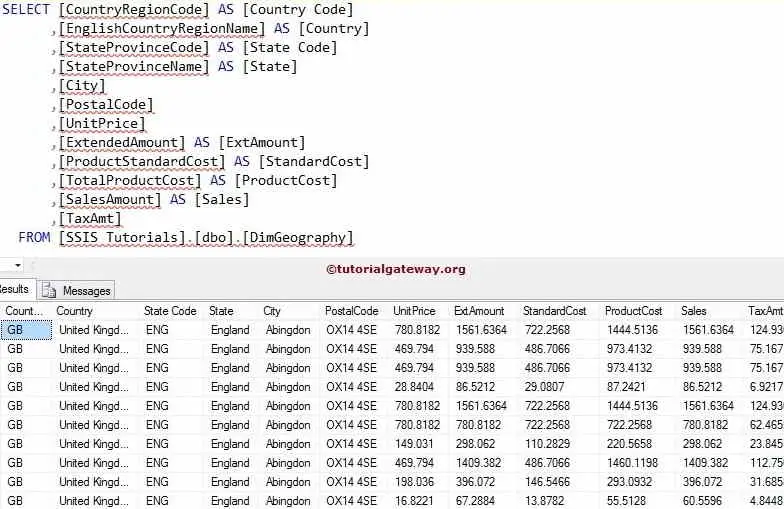
Let’s open the SQL Server Management Studio and write the following T-SQL command and check the result
Points to Remember
- The Bulk Insert task can transfer data only from a text file into a SQL Server table or SQL Server View.
- The Bulk insert Task supports Flat file Connection manager to select the text file.
- The Bulk insert Task only supports OLE DB Connection manager for the destination database.
- Destination table must exist before it is using in the Bulk Insert Task
- Don’t forget to change the First Row option to 2, if you have your column names in the first row of a text file.
- It is always good practice to set the batch size, to insert large amount of data.
Thank you for Visiting Our Blog
Execute T-SQL Statement Task in SSIS 2014
In SQL Server Integration Services, The Execute T-SQL Statement Task is used to run only the T-SQL statements.
In this article, we are going to create the New table and send the following data into that newly created table.

Drag and drop the Execute T-SQL Statement Task from SSIS toolbox to Control Flow Region

Double click on the task will open the Execute T-SQL Statement Task editor to configure it
- Connection: Please specify the Server instance name and credentials to log into the SQL Server Database.
- Execution Time Out: Here you can limit the execution time of a T-SQL query. If the query exceeds this time then task fails.
- T-SQL Statement: Write the T-SQL statement you want to execute.

If you have already created the connection then select it otherwise, Click on the New button to specify the connection properties

Following are the Connection Properties of the Execute T-SQL Statement Task
Connection Name: Please provide unique name for this connection. In this example, We changed it as Execute T-SQL Statement Task Example
Select or enter Server Name: By clicking the … button you select or if you know your server name then type it in the text box.
Enter information to log on to the server: Specify how to connect with the SQL Server
- Use Windows integrated security: If you select this option then, Execute T-SQL Statement Task will use Windows Authentication to connect the Microsoft SQL Server.
- Use a specific user name and password: If you select this option then, Execute T-SQL Statement Task will use SQL Server Authentication to connect the Microsoft SQL Server. Please provide the Username and Password to connect to a server instance

From the above screenshot you can observe that, We are connecting to our own server using windows security.
Click Ok to finish the Connection Properties and write the following T-SQL Statement
SELECT INTO Statement will create new table and then insert the rows from the select statement. In this example, we are creating new table in the [SSIS Tutorials] Database and the table name is Execute T-SQL Statement Task Output

Click ok to finish configuring the Execute T-SQL Statement Task. Let us run and see whether it is executing the T-SQL statement or not

Lets open the SQL Server Management Studio and check the result

We successfully inserted the selected rows into new table using Execute T-SQL Statement Task.
Thank You for Visiting Our Blog
Execute Package Task in SSIS 2014
The Execute Package task is the most useful task in SQL Server Integration Servicesbecause, it allows us to call other packages from the workflow. Following are few advantages of using Execute Package task:
- We can break down the complex packages into multiple packages and then, using Execute Package task we can call them at any time. For example, Instead of performing 10 transformations in a single SSIS packages we can break down the single package into 10 packages and then using Execute Package task we can call them.
- If we break down the complex packages into multiple packages, we can reuse them multiple times. It means Code usability.
- If we break down the complex packages into multiple packages, maintenance will be easy and cheaper.
- If we break down the complex packages into multiple packages, it helps us to divide the work to whole team where each individual can work on single package and module lead can access all the packages by creating the parent package. Any package that calls other packages (child packages) is called to as parent package.
Configuring Execute Package Task in SSIS
Double click on the Execute Package task will open the Execute Package task Editor to configure it.
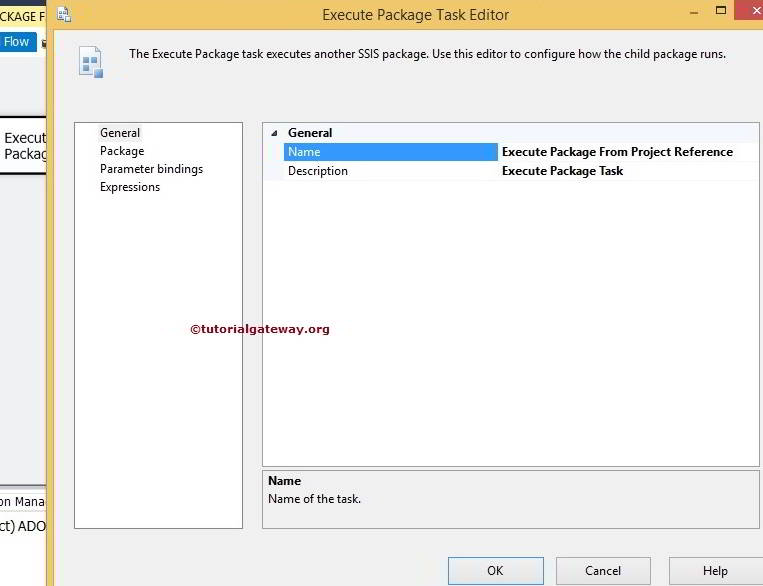
General Page
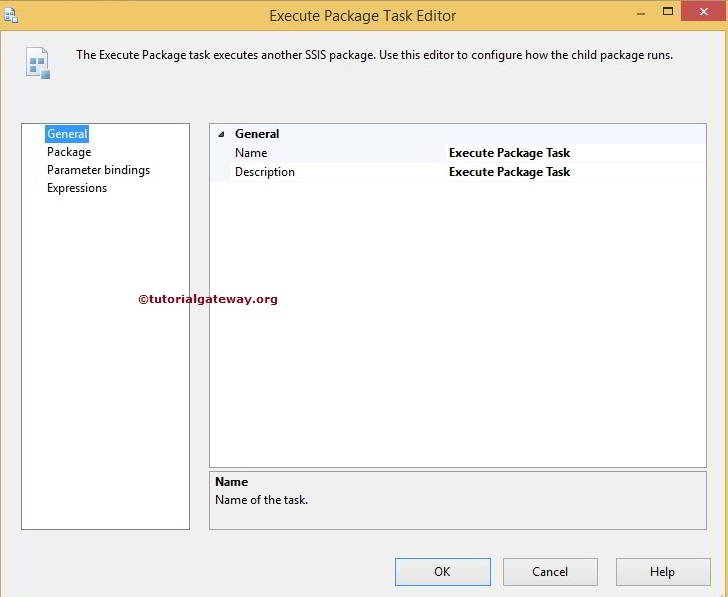
Within the General page, You can configure the Name and Description of the Execute package Task.
- Name: Please provide the Unique name for the Execute Package task.
- Description: Please explain, What this task is doing?
Package Page
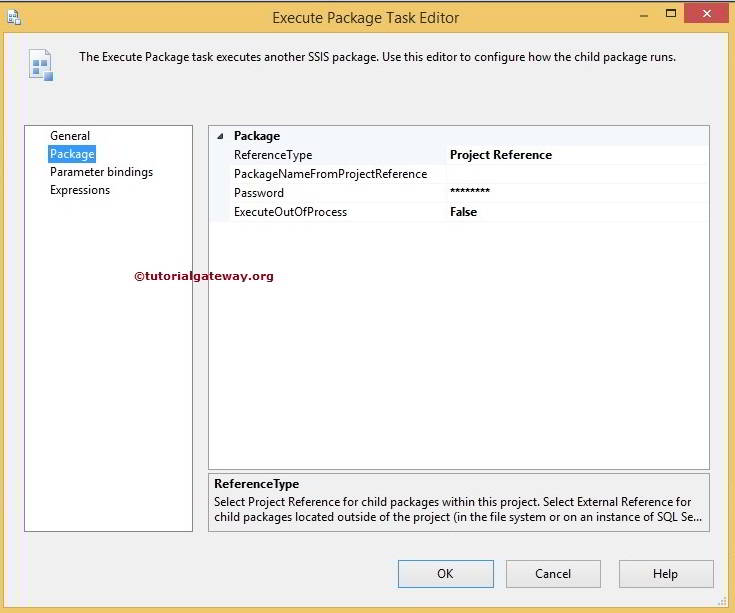
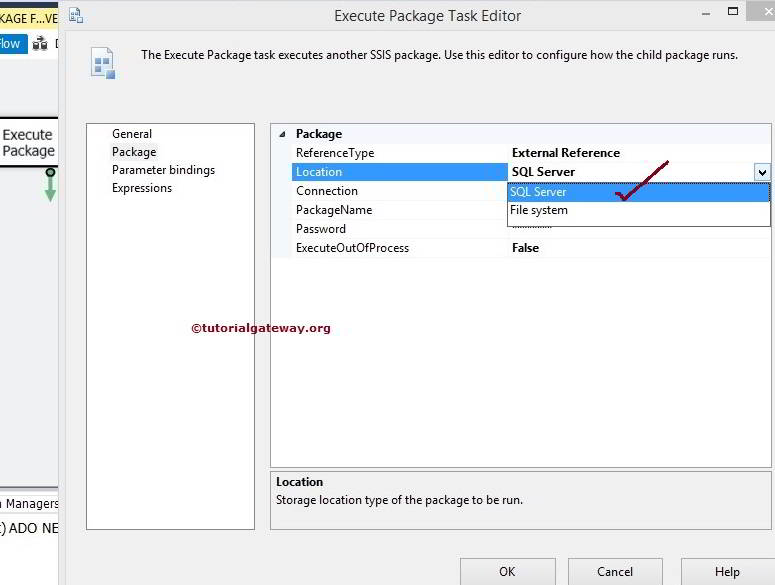
Reference Type: The Execute Package task allows us to call packages present in the Same Project, File system and SQL Server.
- If you select the ReferenceTypeproperty to Project Reference then Execute Package task allows us to select the child package present in the same project that contains the parent package. Please refer SSIS Execute Package Task Project Reference article to understand, How to call packages inside the same project.
- If you select the ReferenceTypeproperty to External Reference then Execute Package task provides 2 options to choose: File System and SQL Server
- File System: If we selected the File System then, Execute Package task will allow us to select the child package present in the file system. To access the files it uses the File connection manager. Please refer Execute Packages in File System using SSIS Execute Package Task for calling packages in File System
- SQL Server: If we selected the SQL Server then, Execute Package task will allow us to select the child package stored in the MSDB Database in the SQL Server. Execute Package task uses OLE DB Connection Manager to access the packages present in the SQL Server. Please refer Execute Packages in SQL Server using SSIS Execute Package Task for calling packages in SQL Server.
Password: While selecting the child package, If the package is protected by password (Which is common in real-time) then please provide the password for that child package.
ExecuteOutOfProcess: Specify whether you want your child package to run in the same process of the parent package or in a separate process. If you set this option to Flash then, both parent package and child package will run in the same process. If you set this option to True then, both parent package and child package will run in the different process.
Thank You for Visiting Our Blog
Execute Packages in File System using SSIS Execute Package Task
The Execute Package Task allows us to call other packages present in SQL Server or File System as a part of its execution. In this article we are going to show you, Executing Packages present in the File System using SSIS Execute Package Task.
In this example, we are going to execute SSIS Audit Transformation Package present in the File System using Execute Package Task. We already explained about this Audit Transformation package in our previous article so, Please refer it for understanding the package,
You can see from below screenshot, [Audit Destination] table is empty. If not, Please truncate the table using T-SQL or add Execute SQL Task.
Drag and drop the Execute Package Task from toolbox to Control Flow Region.
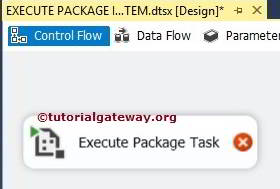
Double click on the Execute Package Task to configure the package. In the General Tab we can change the name and provide useful description. As of now, we changes the Name as Execute Package Task from File System and left the description as it is.
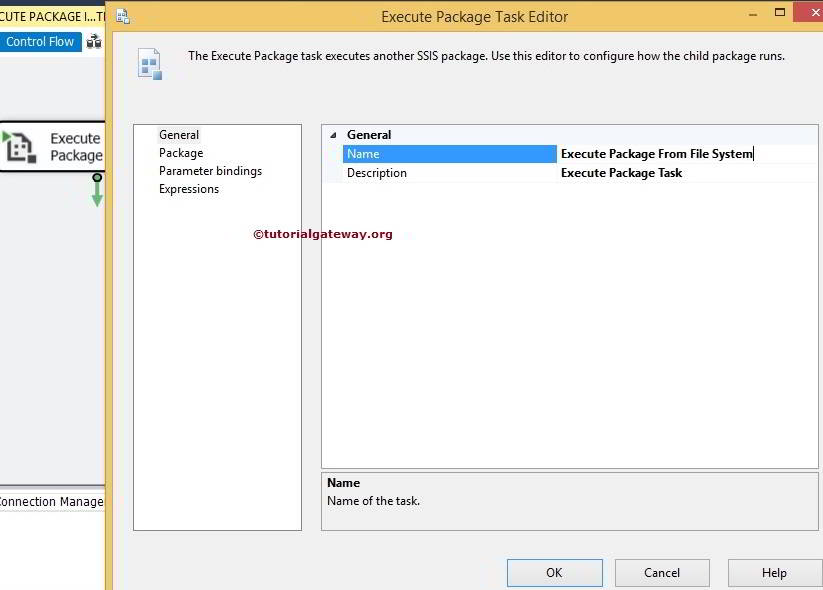
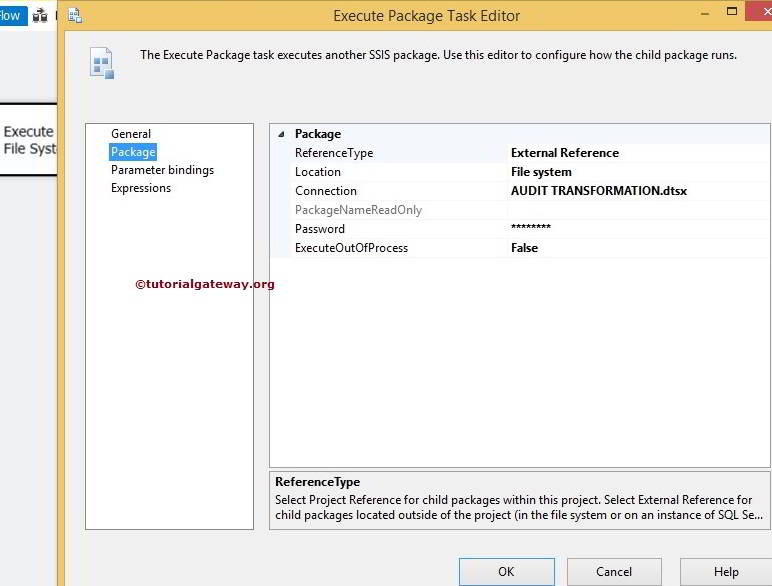
Click on the package tab to configure the package location and connection string
In this example, We are executing the package located in the file system so, Please change the ReferenceType from Project Reference to External reference. Please refer SSIS Execute Package Task Project Reference article for calling packages inside the same project and Execute Packages in SQL Server using SSIS Execute Package Task for calling packages in SQL Server.

Here let us select the file system as package source

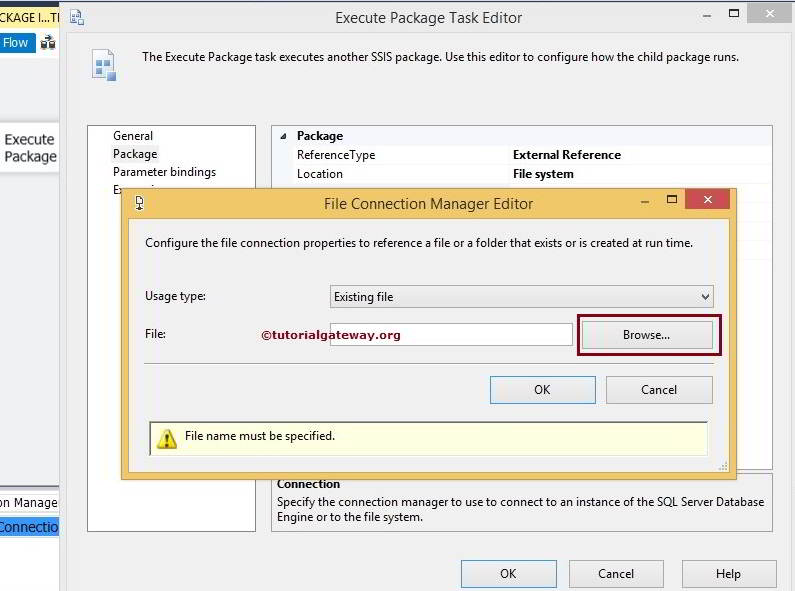
Click on the New Connection to configure or select the file from the file system.

Once you click on the <New Connection…>, it will open the File Connection Manager Editorto configure the file in the file system.
From the below screenshot you can observe, we are selecting AUDIT TRANSFORMATION from the list of SSIS Packages.
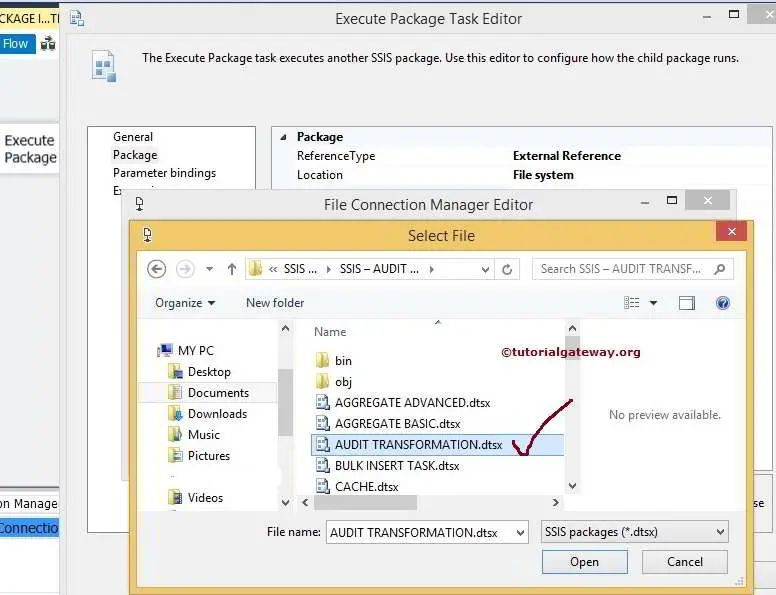
Click ok to select the file. If the Audit Transformation package is secured with password (In general Yes) then provide appropriate password.
Click ok to finish configuring the Execute Package Task. Let us Run the Package and see whether we successfully called the package present in the file system using Execute Package Task or not.
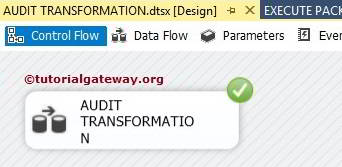
From the above you can observe that, our Execute Package Task is calling Audit Transformation. After this Transformation is successful then Execute Package Task will execute.
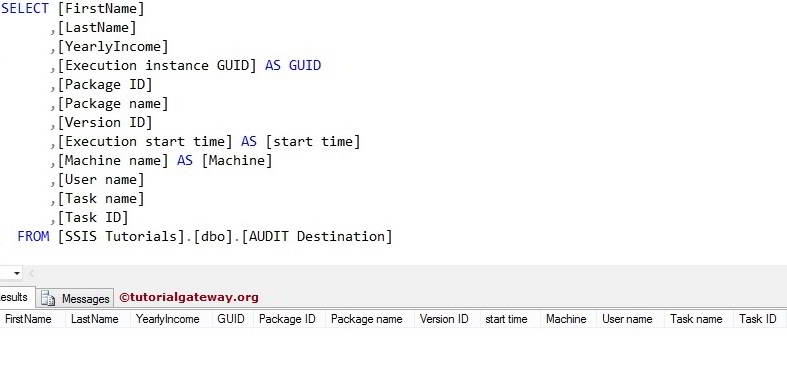
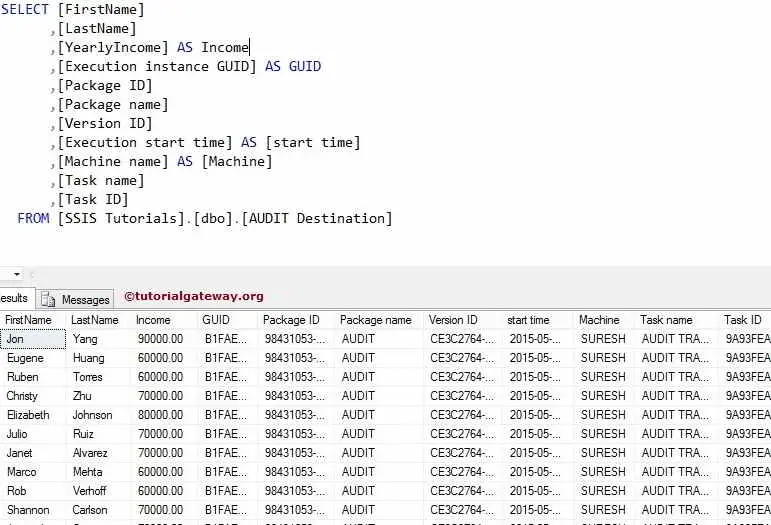
Let us open the SQL Server Management Studio and check the result.
Thank You for Visiting Our Blog
Execute Packages in SQL Server using SSIS Execute Package Task
The Execute Package Task allows us to call other packages present in SQL Server SQL Server, File System and Packages present in the same project as a part of its execution. In this article we are going to show you, Executing Packages present in the SQL Server using SSIS Execute Package Task.
In this example, we are going to execute SSIS Aggregate Transformation Package stored inside the SQL Server using Execute Package Task. We already explained about this Aggregate Transformation in Basic Mode package in our previous article so, Please refer it for understanding the package.
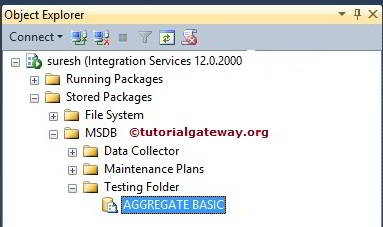
From the below screenshot you can see that, We already published the Aggregate Transformation in the MSDB Database.
You can see from below screenshot, [Aggregate Transformation Basic Mode] table is empty. If not, Please truncate the table using T-SQL or add Execute SQL Task.
Drag and drop the Execute Package Task from toolbox to Control Flow Region.
Double click on the Execute Package Task to configure the package. In the General Tab we can change the name and provide useful description. As of now, we changes the Name as Execute Package Task from SQL Server and left the description as it is.

Click on the package tab to configure the package location and connection string
In this example, We are executing the package located in the SQL Server so, Please change the ReferenceType from Project Reference to External reference. Please refer SSIS Execute Package Task Project Reference article for calling packages inside the same project and Execute Packages in File System using SSIS Execute Package Task for calling packages in File System
Here let us select the SQL Server as package source
Click on the New Connection to configure or select the Server settings. If you already created the connection before then, it will display the list as shown in the below screenshot. You can select the required connection. For now click on the <New Connection…>

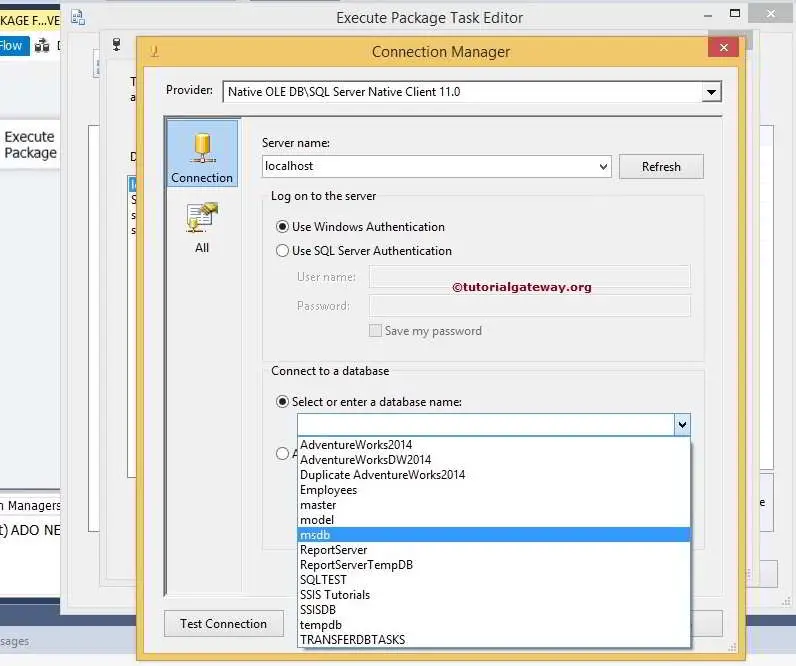
Once you click on the <New Connection…>, it will open the Connection Manager Editor to select the Provider Name, Server Name and Database Name.
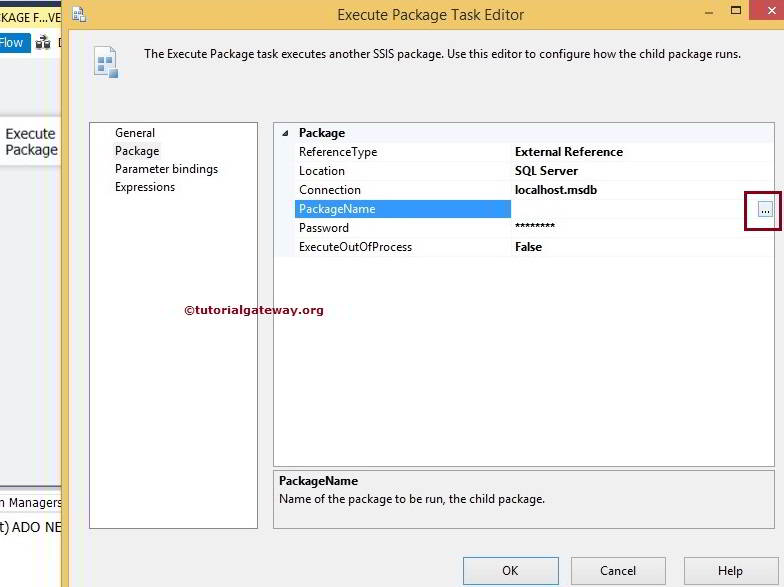
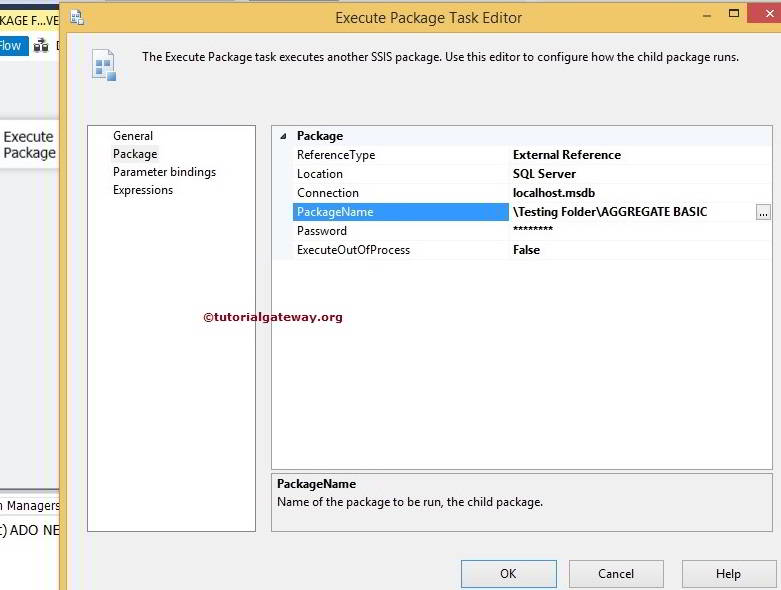
Click ok to finish selecting the Database. Now we have to select the package we want to execute. So, click on the Browse button (…) beside the PackageName option
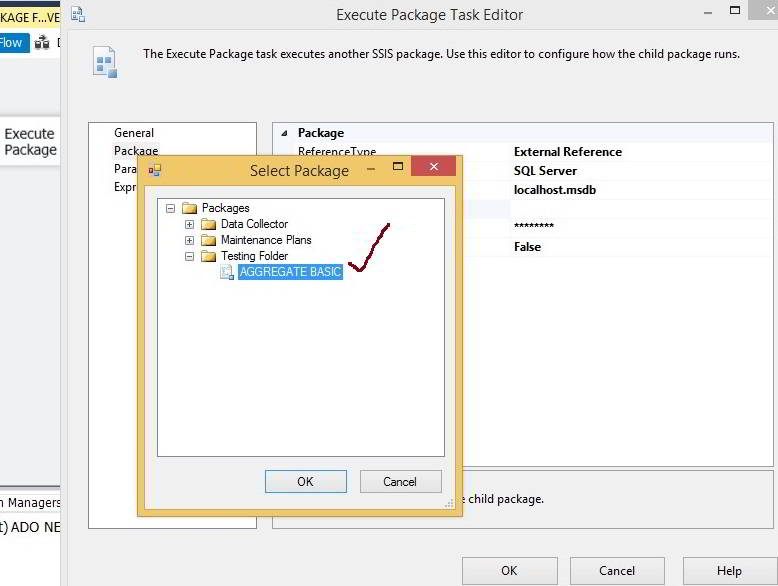
It will open the Select Package window to select the required package. From the below screenshot you can observe, we are selecting AGGREGATE BASIC from the list. We have only one package at the moment so it is displaying one but in real-time it may be more.
Click ok to select the package. If the Aggregate Transformation package is secured with password (In general Yes) then provide appropriate password.
Click ok to finish configuring the Execute Package Task. Let us Run the Package and see whether we successfully called the package present in the SQL Server using Execute Package Task or not.
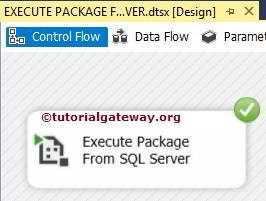
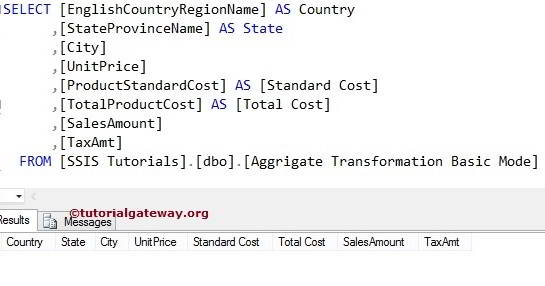
It seems our Execute Package Task is not thrown any errors. Let us open the SQL Server Management Studio and check the result.

Well, we successfully called the package present in the SQL Server using SSIS Execute Package Task.
Thank You for Visiting Our Blog
SSIS Execute Package Task Project Reference
The Execute Package Task allows us to call other packages present in SQL Server, File System and Packages present in the same project as a part of its execution. In this article we are going to show you, How to Execute Packages present in the Same Project using SSIS Execute Package Task Project Reference.
In this example we are going to execute, Inner Join Package present in the same project using Execute Package Task. We already explained about this package in our previous article so, Please refer Performing Inner Join Using Merge Join Transformation article for understanding the package.
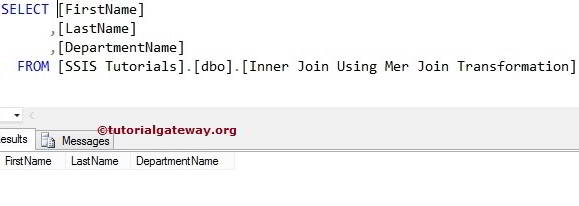
You can see from below screenshot, [Inner Join Using Merge Join Transformation] table is empty. If not, Please truncate the table using T-SQL or add Execute SQL Task.
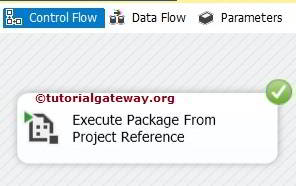
Drag and drop the Execute Package Task from toolbox to Control Flow Region.
Double click on the Execute Package Task to configure the package. In the General Tab we can change the name and provide useful description. As of now, we changes the Name as Execute Package Task from Project Reference and left the description as it is.
Click on the package tab to configure the package location and connection string
In this example, We are executing the package present in the same project. so, Please Keep the ReferenceType as Project Reference. Please refer Execute Packages in SQL Server using SSIS Execute Package Task article for calling packages in SQL Server and Execute Packages in File System using SSIS Execute Package Task for calling packages in File System
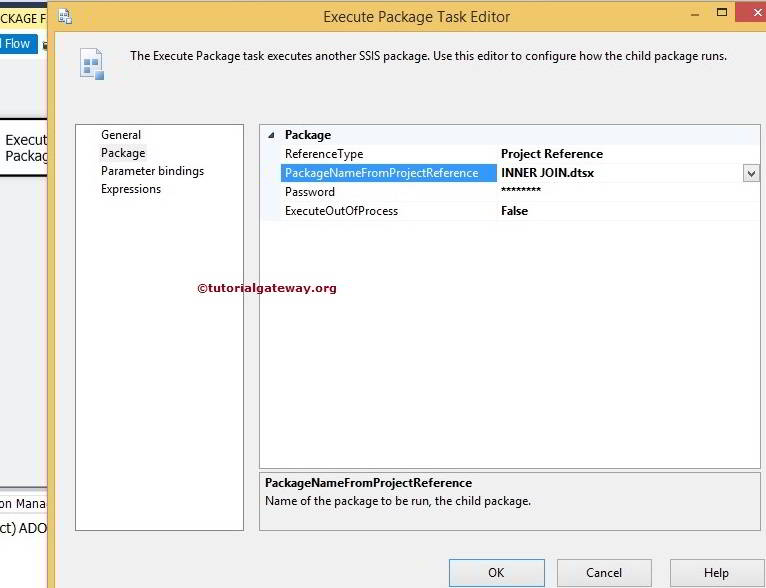
Now we have to select the dtsx package from the project so, select thePackageNameFromProjectReference option. It will show you all the packages available in the current project. From the below screenshot you can observe, we are selecting INNER JOIN package from the list.
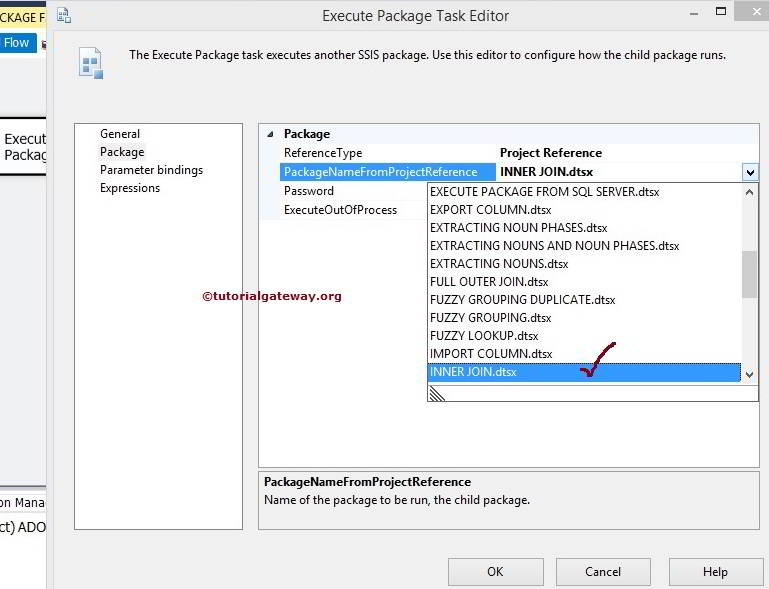
Click on it to select the package. If the Inner Join package is secured with password (In general Yes) then provide appropriate password.
Click ok to finish configuring the Execute Package Task. Let us Run the Package and see whether we successfully called the package present in the same project using SSIS Execute Package Task or not.
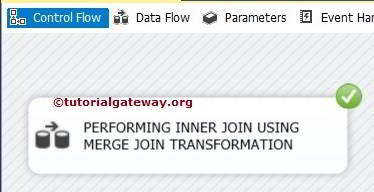
From the above you can observe that, our Execute Package Task is calling Inner Join Package. After this Transformation is successful then Execute Package Task will execute.
It seems our Execute Package Task is not thrown any errors. Let us open the SQL Server Management Studio and check the result.
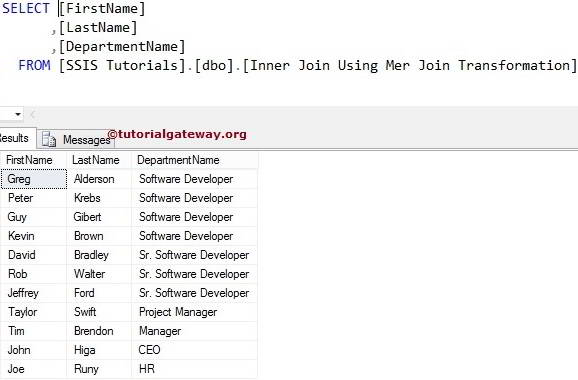
Well, we successfully called the package present in the same project using SSIS Execute Package Task Project Reference.
Thank You for Visiting Our Blog