Deploy SSRS Report Server Project
To deploy Report Server Project, please go through below steps:
1. Go to Report Service Configuration Manager then click on the Report Manager URL tab in order to get Report Server URL.

2. Now click on the Report Manager URL. We will get a empty screen as below:

3. Let us query catalog table of ReportServer Database.
SELECT * FROM CATALOG
It will show below output:

When we design a report, Report Definition Language File (.rdl) is generated whcih is basically a XML file which contains all the information about our report. So when we deploy the report, the .rdl file gets inserted into the our Report Server Database.
4. . Now come back to our SSRS Project. Right Click the Project and click onproperties.

Alternatively we can also go from Project Menu.

5. In both case we will be directed to Project’s Properties Page where we are going to insert our Target Server URL Which is our Report Server Web Service URL.
In my case it is like
http://bhushan-pc:8080/ReportServer

6. After click on OK, right click the Project and select Deploy from the context menu.

7. If all fine we will receive Success Message.

8. If here we query our Catalog table of Report Server database we will get results like following.
SELECT * FROM CATALOG

Here we can see the entries of Our Project and Report.In above result Type 1 means Project and 2 means Report.
If you want to see the XML content, execute following query:
SELECT
[REPORT NAME] = NAME,
[RDL CONTENT] = CAST(CAST(CONTENT AS VARBINARY(MAX)) AS XML)
FROM CATALOG
WHERE TYPE = 2
[REPORT NAME] = NAME,
[RDL CONTENT] = CAST(CAST(CONTENT AS VARBINARY(MAX)) AS XML)
FROM CATALOG
WHERE TYPE = 2
You will get results like following:

9. Now let us see our report from the browser.Go to Report Manager URL and you will get a screen like below:

10. Now click on StartSSRS and it will show the list of report.In our case it will show only 1 report which is PersonAddresDetails.

11. Now Click on PersonAddresDetails Report and you will get following screen:

Congratulations! Our First SSRS Project is successfully deployed.


1. Background
This article describes how to deploy the reports in different ways using SQL Server Reporting Services: Following are the different ways in which we can deploy the report:
- Report Deployment from BIDS/Report Builder/SQL Server Data Tools.
- Report Deployment from Report Manager.
- RS command prompt utility
- Backup and Restore of Report Server DB.
2. Prerequisite
- Reporting services should be configured in the instance.
- SQL Server Reporting services should run.
- Reports that need to deploy should run in the BIDS/ Report Builder/ SQL Data Tools without any issue.
- Report Server and Report Manager URL should work.
3. Steps to deploy the report:
a) Report Deployment from BIDS/Report Builder/SQL Server Data Tools.
Below is the sample report named “EmployeeReport” with shared dataset and data source in BIDS. Report is working fine in BIDS. Below is the screenshot.

I. Right click on the project top node named “MyProjectSolution” and click on Build:

Build succeeded :

II. Right click on project top node named “MyProjectSolution” and select Property:

III. It will open the property window. Here we can set the deployment property for the report. Below are the property need to set for report deployment:
- TargetDataSourceFolder : MyDataSource
- TargetDatasetFolder : MyDataSets
- TargetReportFolder : MyReports
- TargetReportPartFolder : MyReportPartFolder
- TargetServerURL : http://vishal-pc/reportserver
- TargetServerVersion : SQL Server 2008 R2 or later
- OverwriteDatasources : Based on your requirement
- OverwriteDatasets : Based on your requirement
Below is the screenshot showing deployment configuration settings:

Click ok to save the settings.
IV. Go to the report server URL to check whether Report server URL is working fine or not: http://vishal-pc/reportserver :
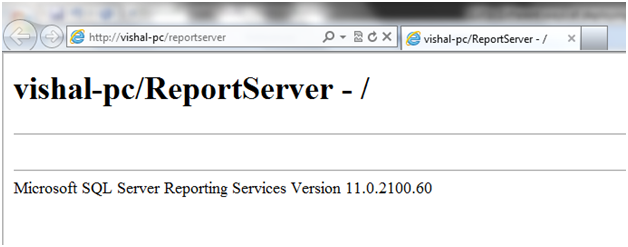
Report server url is working fine and there are no reports available.
V. Now go to Reporting solution, right click on project top node and click on deploy:

So Report has been deployed successfully. See the below screenshot from BIDS:
VI. To verify whether report deployed successfully or not. Go to Report server URL and run the report.
Here we are able to see the deployed objects:

VII. Go to My Reports folder and run the report:

Report is working fine. See the below screenshot:
Note : Deployment steps for Report builder/ SQL Data Tools is same as BIDS.
b) Report Deployment from Report Manager
Report deployment from Report Manager means uploading the Reports, Data Sources and Datasets from file system to Report Server DB by using Report Manager.
I. Below are the report items that we will deploy by using Report Manager:
II. Go to Report Manager URL e.g (http://servername/reports) and check whether these report items are there or not:

There are no report items in the Report Manager.
III. Create the folder for Datasource, Dataset and Report in report manager. For creating folder click on new folder:

Provide the folder name and description and click ok.

It will create the folder for Datasource. Create the folder for Dataset and Report also.
IV. Below is the screenshot of all the folders created in Report Manager:

V. Go to DataSource folder and click on New Data Source:

It will open the page for creating data souce. Provide the Data source name, connection string and credential type and click Ok.:

Now we can see data source has been created.

VI. Now go to DataSet folder and click on Upload File:

Provide the path of Dataset and clcik Ok:

It will create the dataset. Below is the screenshot:

VII. Repeat the VI for Report folder and upload the rdl file. Below screehsot showing datasource, dataset and report both uploaded successfully.

VIII. Now go to the report folder, click on drop button on report and click on Manage to see whether report is mapped to correct dataset or not:

It will open the property for the report. Click on “Shared Dataset” and select the correct dataset for report.

Click Ok. It will map the “Reseller” dataset to the report.
IX. Go to DataSets folder and select the Dataset “Reseller” and click on Drop button and select Manage:

X. It will open the Dataset property. Click on DataSource and select the dataset for the dataset:

Click Ok. It will map the dataset to datasource.
XI. Go to the report folder and run the report.

Report is working successfully.
c) Backup and Restore of Report Server DB: It is one of the simplest way of deploying all the reports from one environment to another environment. This way is useful when we are deploying report first time in any environment in which there are no existing reports.
I. Below is source environment where all the reports are available(http://vishal-pc/reports)::

Below is the report that is available in this environment :

II. Below is the target environment where no report items are available(http://sqlcircuit/reports):

III. Take the Backup of ReportServer DB from the source system:

IV. So we have taken the backup of source Report server DB in G:\ReportDeployment folder. Now restore it to the target SQL server instance.
Note: SQL Server Reporting Services should configured properly in the target instance

V. Now go to Report Manager URL and check whether all the report items came or not. (http://sqlcircuit/reports)

VI. Run the report and see whether you are able to run the report or not:

Report is working fine.
d) Report Deployment using RS utility
RS.exe is a command prompt utility that Processes script you provide in an input file (.rss). We use this utility to automate report server deployment and administration tasks.
RSS file: The .rss file contain the code to read the report item file from the local system, upload the file to report server and set data source. We can write .rss file using Visual Basi.net.
Below is the syntax for RS.exe
rs –i c:\ReportDepolyment\RSDeploy.rss -s http://localhost/reportserver
4. Conclusion
By using the above steps, we can deploy the SSRS reports
----------------------------------------------------End of Document---------------------------------------------------


Deploying Reports in SSRS 2014
by suresh
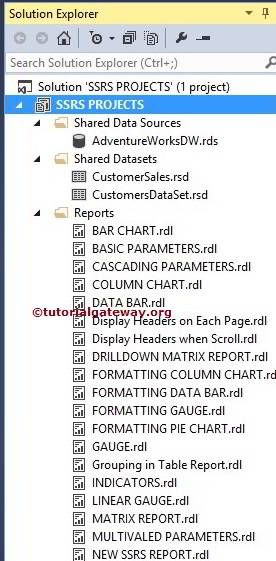
In this article we will show you, How to Deploy SSRS Projects in SQL Server Reporting Services 2014 with example. Below screenshot shows you the Shared Datasets, Shared Data Sources and SSRS Report present in this project.
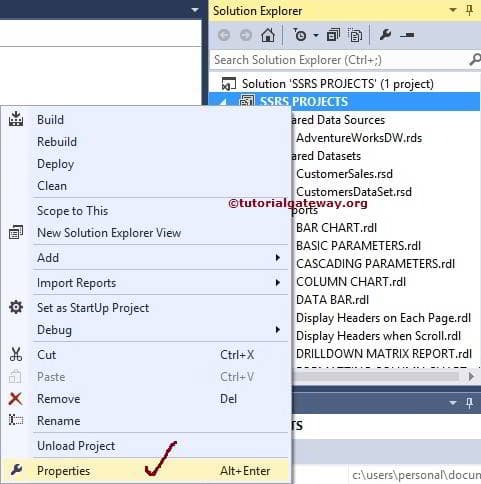
Before we start deploying the Project, we have to configure the Reporting Server properties so, Right click on the project name (here, SSRS Projects) and select Properties as shown below
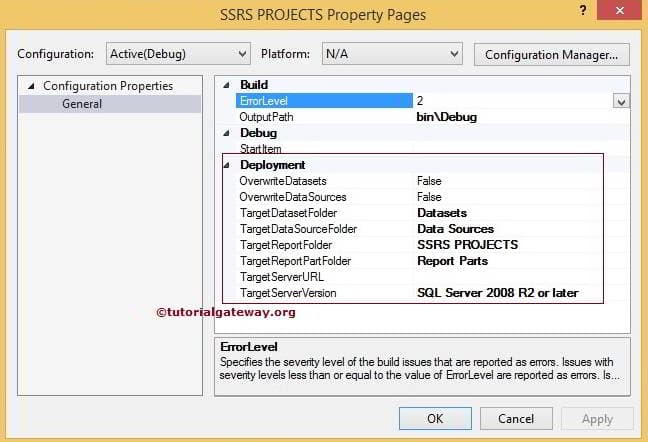
Once you click on the Properties option, a new window called SSRS Projects Property Pagewill be opened to configure the settings. Following are the some of the properties in Deployment section:
- TargetDatasetFolder: Please specify the folder name where you want to deploy theShared Datasets present in this project. By Default, Datasets is the name but you can change as per your requirement.
- TargetDataSourceFolder: Please specify the folder name where you want to deploy theShared Data Sources present in this project. By Default, Data Sources is the name but you can change as per your requirement.
- TargetReportFolder: Please specify the folder name where you want to deploy the SSRS Reports we created in this project. By Default, Project name will be assigned to this but you can change as per your requirement.
- TargetReportPartFolder: Please specify the folder name where you want to deploy the Report Parts present in this project (If any). By Default, Report parts is the name but you can change as per your requirement.
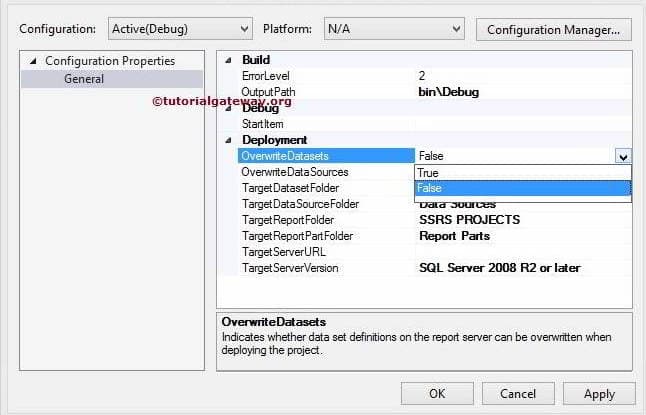
OverwriteDatasets: This property hold two options TRUE and FALSE. If the current project and Reporting Server has the same Shared Dataset name then:
- If you set this option to TRUE, Report Server will overwrite the Destination dataset with current project Dataset
- If you set this option to FALSE (Default value), Report Server will keep the Destination Dataset
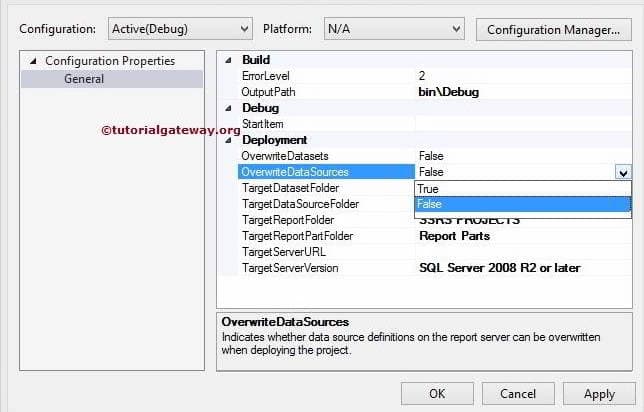
OverwriteDatasources: This property hold two options TRUE and FALSE. If the current project and Reporting Server has the same Shared Data Source name then:
- If you set this option to TRUE, Report Server will overwrite the Destination data source with current project data source
- If you set this option to FALSE (Default value), Report Server will keep the Destination data source.
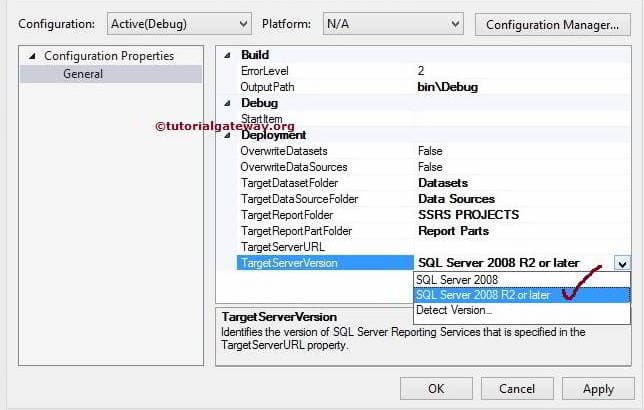
TargetServerVersion: Please specify the version of the Report Server you are using. This property has three options: SQL Server 2008, SQL Server 2008 R2 or later and Detect Version. We are using SQL Server 2014 so, we selected the SQL Server 2008 R2 or later option.
TargetServerURL: This property is used to provide the Target URL where we want to deploy the project. For instance, If you want to deploy to a report server installed in share point then provide the site URL. In this example, we are deploying to the default web server of a report server native mode so, we are placing the URL of that web server
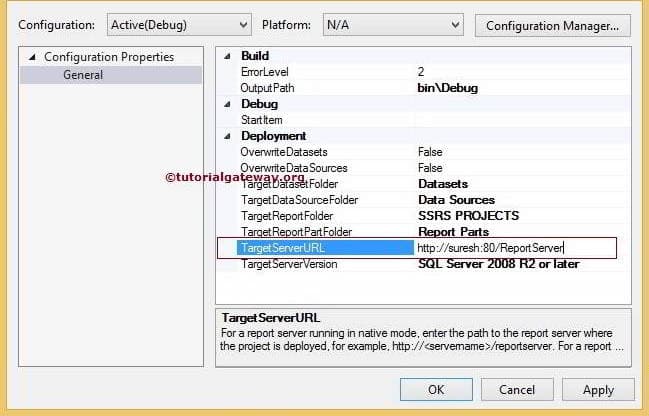
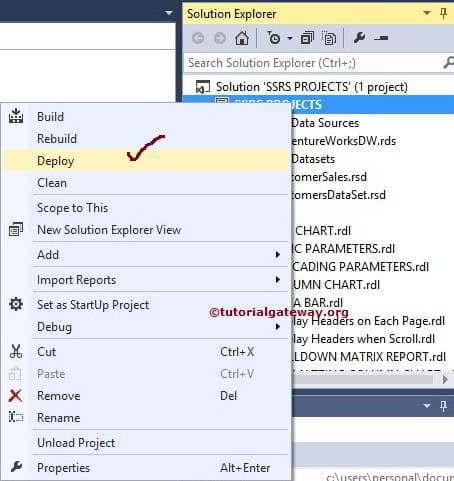
Click on Apply button to finish modifying the project properties. Next, goto solution explorer and right-click on the project name to open the context menu. From the context menu, please select the Deploy option as shown in below screenshot
TIP: Please Run the BIDS as Administrator, If you don’t have the privileges.
You can see the output window to check for deployed reports
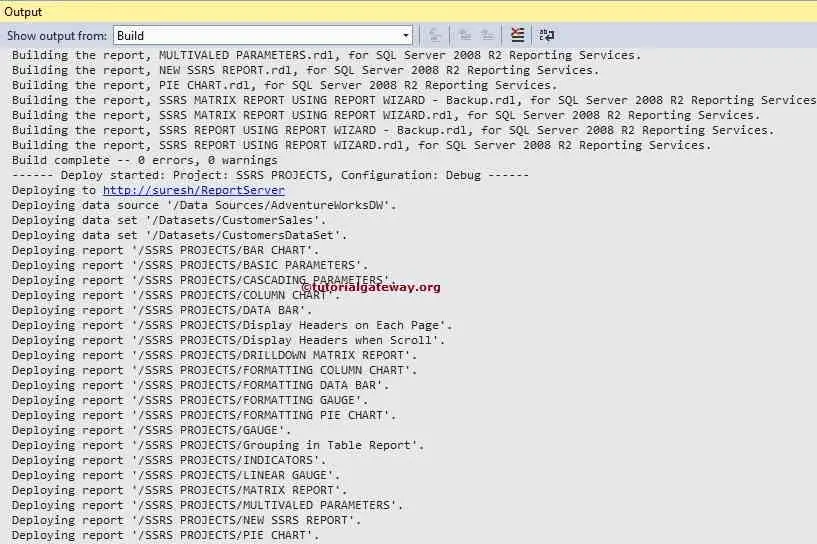
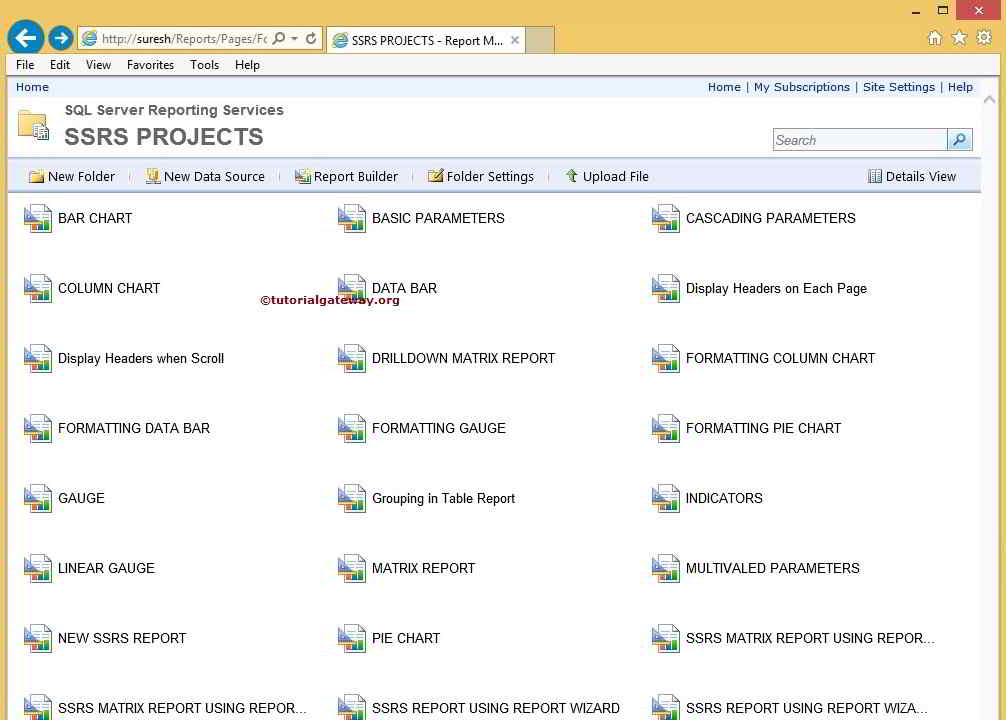
Next, Open the Report Manager in Internet Explorer to check the project.
TIP: Please Run the Browser as Administrator, If you don’t have the privileges.
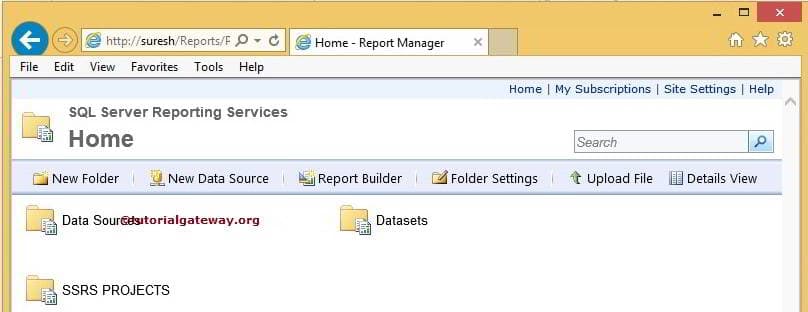
Double click on the Data Source folder to check the shared data sources in the project
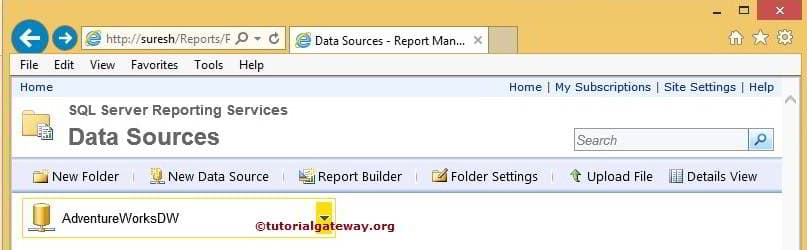
Double click on the Dataset folder to check the shared datasets in the project

Double click on the SSRS Projects folder to check the SSRS Reports present in the project
Thank You for Visiting Our Blog