A shared data source is a set of data source connection properties that can be referenced by multiple reports, models, and data-driven subscriptions that run on a Reporting Services report server. It provide an easy way to manage data source properties in our Report Project.
When we create a Data Source we can specify it as shared. In general rule you probably want to create Shared Data Sources. If a Data Source isn’t shared it just means that its definition is stored inside the report and it cannot be shared with another report and if Data Source is Shared it means that its definition is stored outside the report.
In this section we will create a Shared Data Source.
1. After Creating Sql Server Report Project, Right-click on Shared Data Sources folder in your project and Click on Add New Data Source.

2. A new window Shared Data Sources Properties pop-up as shown below. Give a name to your shared data source.
As our database is AdventureWorks, I am giving a name sdsAdventureWorks.

As our database is AdventureWorks, I am giving a name sdsAdventureWorks.

3. Then select type of DataSource. Here we are going to Connect Sql Server database so we select Microsoft Sql Server. If you want to connect any other database then select that database from Drop Down List.

4. Then click on Edit button to the right. A new window Connection Propertiespops-up.In this window give your sql server name, sql server credentials and select AdventureWorks Database.

5. Connection Properties Window will be different based upon your data source.Here you can also test your database connection. To check connection click on Test Connection Button in left bottom corner. If succeed than it will give below message.

Then click on OK button of Test Results Window. After than click on OK button of Connection Properties Window.
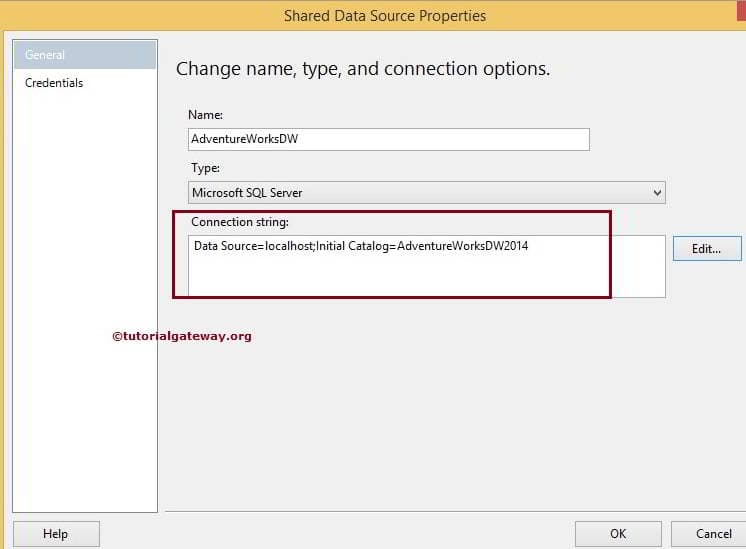
6. So now you can see the connection string in your Shared Data Source Properties Window.

Now click on Ok button.
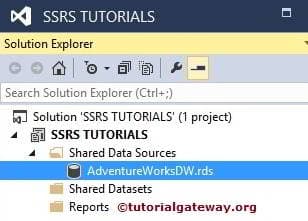
7. So your new shared data source will be created under Shared Data Source folder in your project. You can create multiple shared data source in your project.

Congratulations! Our Shared Data Source is created.


Shared Data Source in SSRS 2014
by suresh
In SQL Server Reporting Services, Data Source (DS) is a connection settings which is used to connect with underlying Databases or Data Warehouses. Data source is a combination of Provider name, Server instance Name, Database Name and Database credentials.
SQL Server Reporting Services supports two types of data sources: Shared Data Source andEmbedded Data Sources. In this article we will show you, Steps involved in creating Shared Data Source in SSRS 2014
Shared Data Source: If you want to share the same data source to multiple reports, report models and subscriptions then we have to create shared data source. Following are the few uses of shared data source:
- It can be created once and used in multiple reports.
- If you want to change the data source, you can do it at once place and it will be reflected in all the supporting reports.
Creating Shared Data Source in SSRS
After creating the New SQL Reporting Services project (SSRS project), the solution explorer looks like below

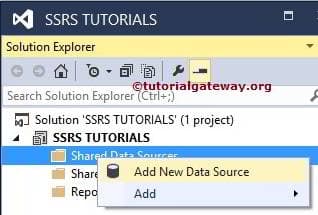
To create data source, Right click on the Shared Data Sources folder present in the solution explorer and select the Add New Data Source option from the context menu
Or you can choose Add option and then select New Item option from the context menu. This will open New window and from that window you can select the New Data Source option

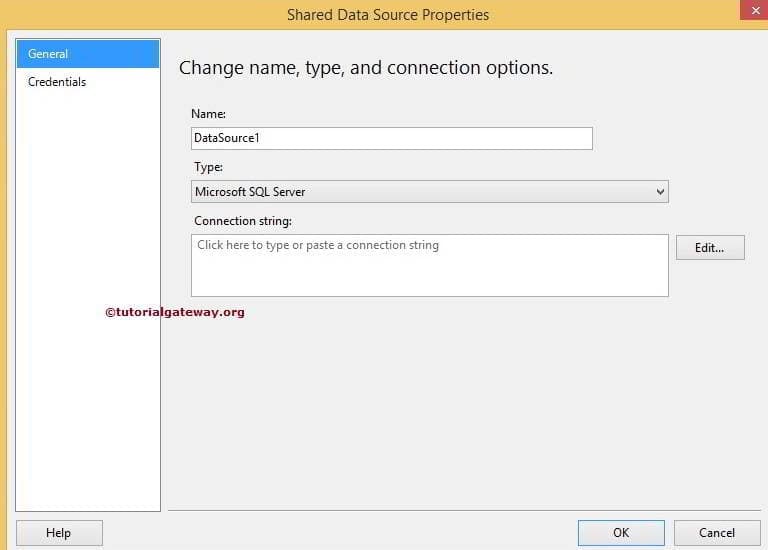
In this example, We selected the Add New Data Source option from the context menu. Once you click on that option, it will open Shared Data Source Properties window to configure the SSRS Data Source. Following are the properties inside the Shared Data Source Properties window
- Name: Please specify valid unique name for the data source you want to create.
- Type: Please select the connection type from the drop down list
- Connection Strings: If you know, How to write the connection string then write down here. If not, click on the Edit button to specify the Data Source (Provider), Server Instance Name, Login credentials and Database Name.
Following screenshot will show you the supporting types. For instance, if your data source is SQL Server then select Microsoft SQL Server or OLE DB. If your data source is SQL Server Analysis Service then select Microsoft SQL Server Analysis Services.

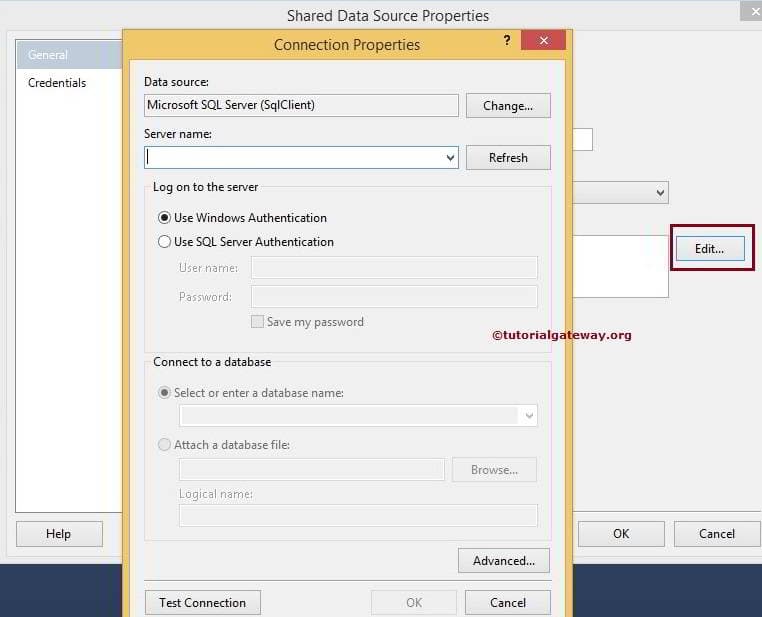
Click on the Edit button from the above screenshot will open another window to configure the Connection Properties. Here we have to specify the Data Source (Provider), Server Name (or Instance Name), Login credentials and Database Name.
In this example,
- Data Source: We are retrieving data from SQL Server so, We selected the Microsoft SQL Server (SqlClient). You can change this option as per your requirement.
- Server name: Please specify the SQL Server name. For now, we are using our local host name.
- Log on to the Server: Please specify, How you want to log into SQL Server. For now, we are using windows authentication.
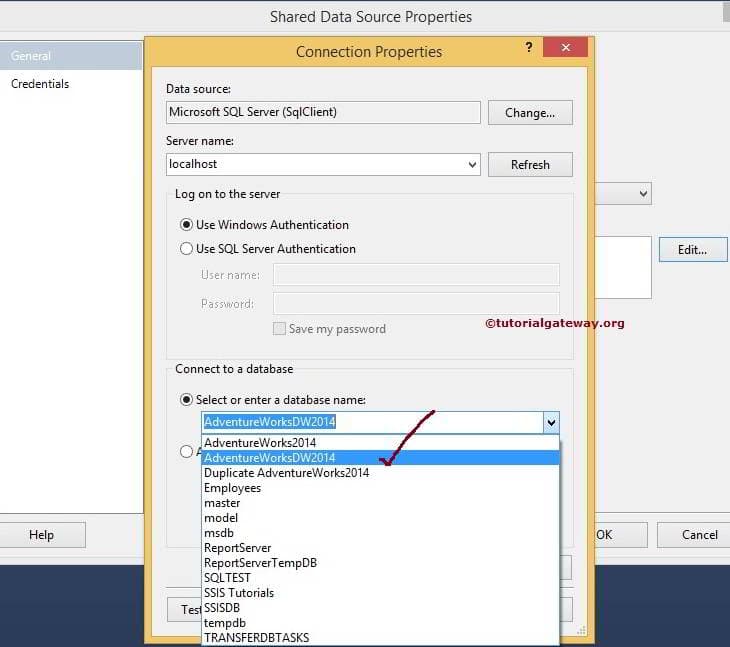
From the above screenshot, you can observe that we are using selecting the [AdventureWorksDW2014] database from the list.
NOTE: Here we are working with local database so we are using windows credentials but in real-time, you have to select the SQL Server authentication and provide the credentials given by the database admin people or your team leader.
Click on the Test Connection button provided below to check whether the connection is successful or not.

Click Ok to finish configuring the connection properties.
Credentials Tab:
- Use Windows Authentication: It will use the current user windows credentials to connect to the data source. For now, We are using this option
- Use this User name and Password: Please specify the user name and password to log into data source. Report will use this user name and password to connect to the data source
- Prompt for credentials: When the report is connection to data source, it will prompt the given text (asking for credentials).
- Do not use credentials: Report will not use any credentials to connect with data source.

Click ok to finish creating the shared Data Source. Let us see in the solution explorer
Thank You for Visiting our Blog


Create Shared Data Source in SSRS Report Manager
by suresh
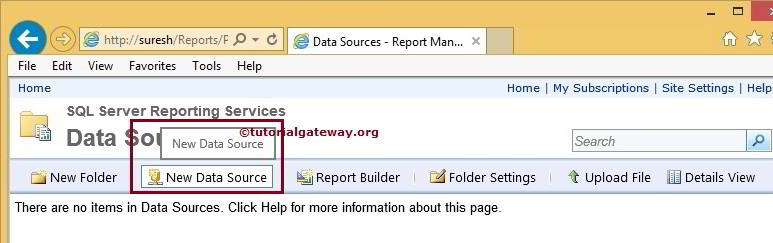
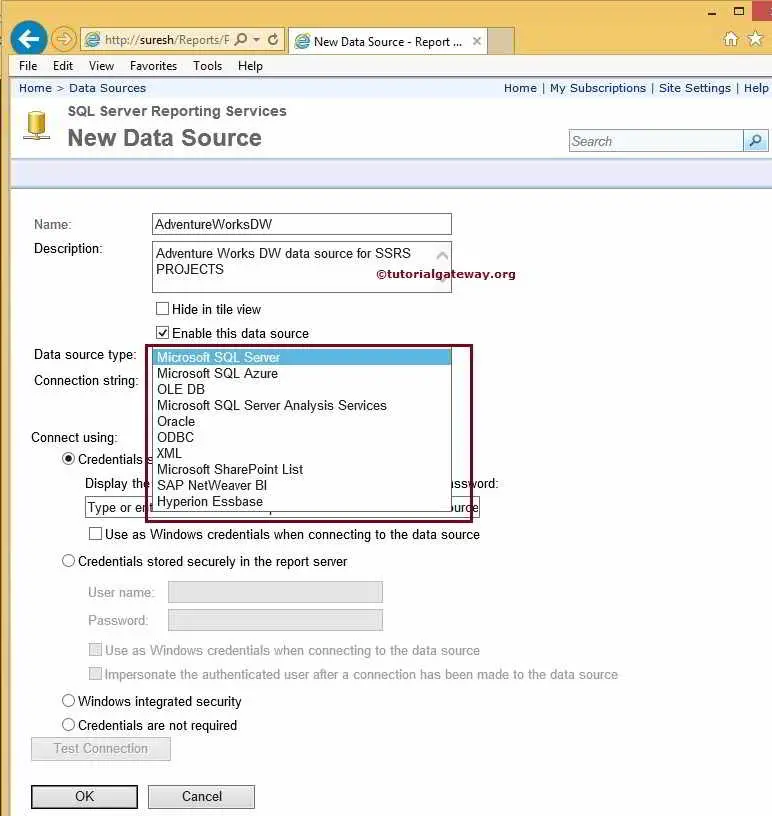
In this article we will show you, How to create Shared Data Source in SSRS Report Manager. To do this, Please open your report manager and click on the New Data Source button as shown in below screenshot
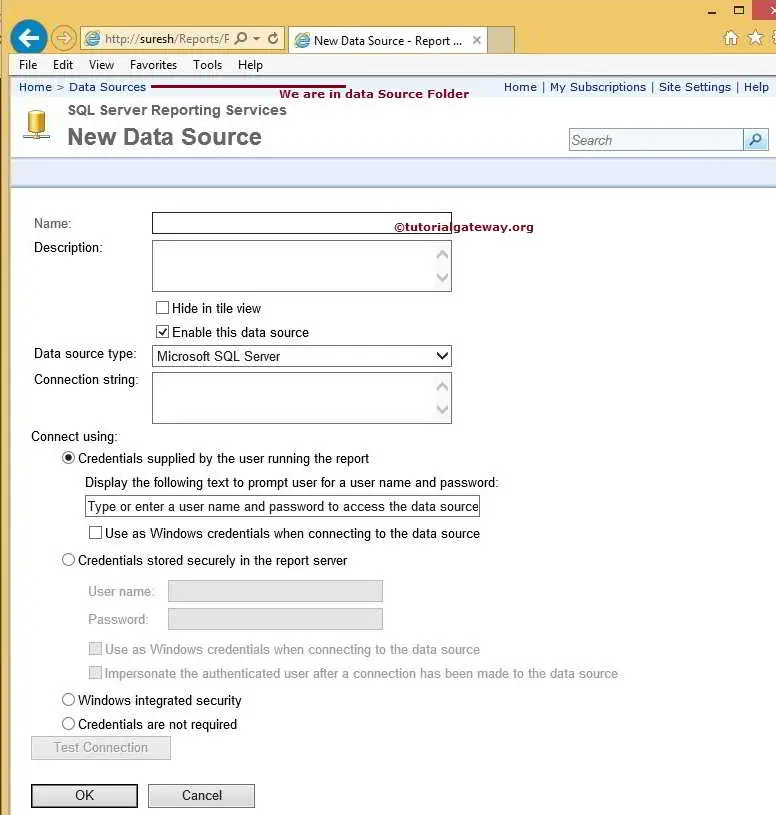
Once you click on the New Data Source button, below screenshot will be displayed. Please refer SSRS Shared Data Source article to understand the below properties:
Below screenshot will show you the Data Source Types supported by the Report manager. For instance, if your data source is SQL Server then select Microsoft SQL Server or OLE DB. If your data source is SQL Server Analysis Service then select Microsoft SQL Server Analysis Services.
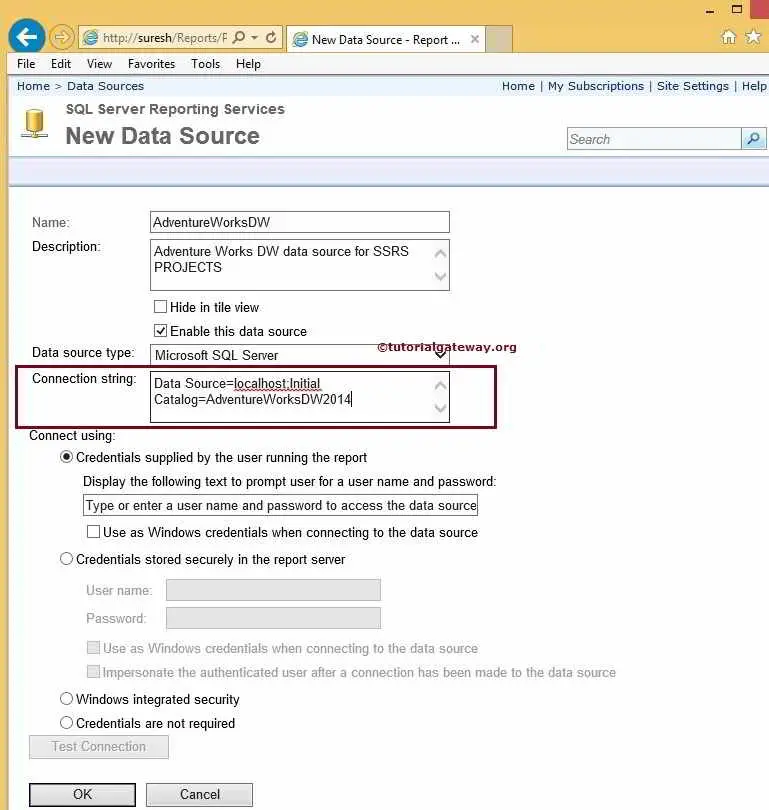
Connection Properties: Here we have to specify the Data Source (Provider), Server Name (or Instance Name), Login credentials and Database Name.
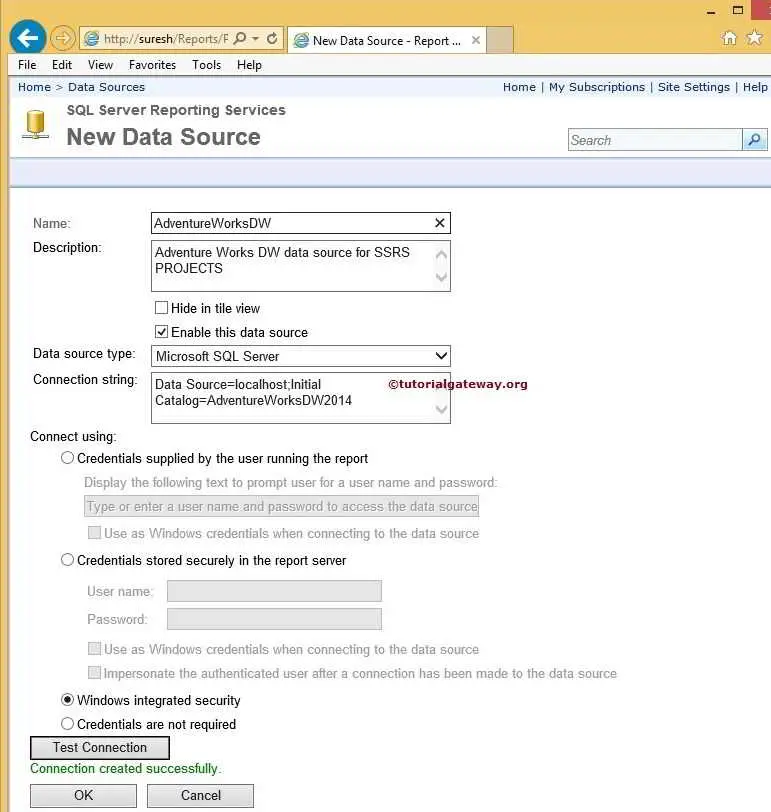
Connect Using: Here we have to mention the Credentials required to connect the Reports with selected Database
- Credentials supplied by the user running the report: When the report is connecting to data source, it will prompt the given text (Type or enter a user name and password to access the data source). If you check mark, Use as Windows credentials when connecting to the data source option then reporting server will pass the current user windows credentials to external server instead of prompting otherwise, it will prompt for credentials.
- Credentials stored securely in the report server: If you select this option, Please specify the user name and password to log into data source and these credentials will be stored inside the report. This option is very important for Report Subscriptions.
- Windows Integrated Security: It will pass the current user windows credentials to external server for connect to the data source. For now, We are using this option
- Credentials are not required: Report will not use any credentials to connect with data source. For instance, If we are accessing file in local file system then we can select this option. However, try to avoid this option.
Once we finished configuring the Data Source, Click on Test Connection button to check whether the connection is valid or not.
Click Ok to finish creating Shared data Source in Report Manager. Now, Please navigate to Data Source Folder and check for the newly created data source

Thank You for Visiting Our Blog