Import Data from Excel to SQL Server Using SSIS Import and Export Data Wizard
In SQL Server 2014, We have SQL Server Import and Export Data Wizard, which is used to import or export data from various sources to different destination using Wizard. In this example, we have Import Data from Excel to SQL source.xls Excel file and we are going to import the data present in this Excel file to SQL data base table using SQL Server Import and Export Data Wizard.
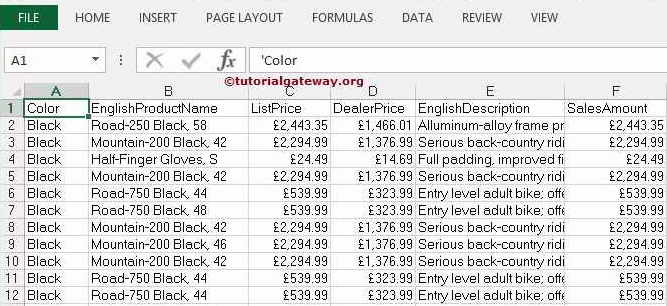
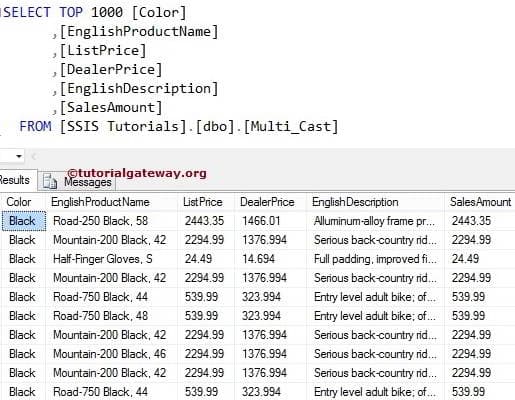
Below screenshot will show you the data present in the Import Data from Excel to SQL source.xls Excel file.
If you are running on Windows 7 then, you can find in start -> All Programs -> Microsoft SQL Server 2014 -> Import and Export Data Wizard).
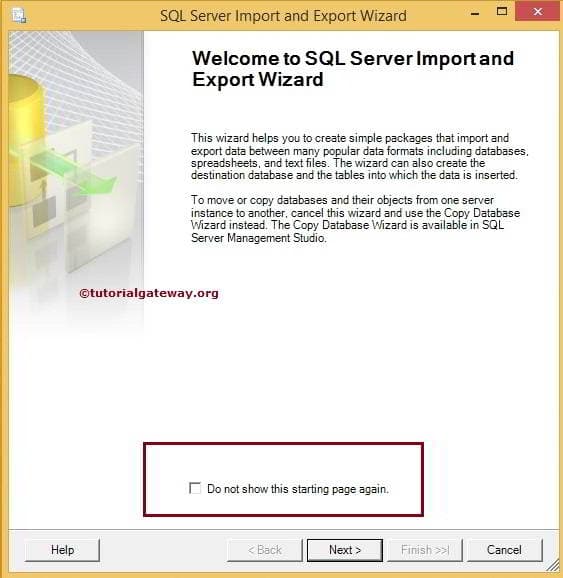
Double click on SQL Server Import and Export Data tool. It will open SQL Server Import and Export Wizard. First page is the welcome page.

If you don’t want see this page again then Please tick the check box “Do not show this starting page again”. For now click Next
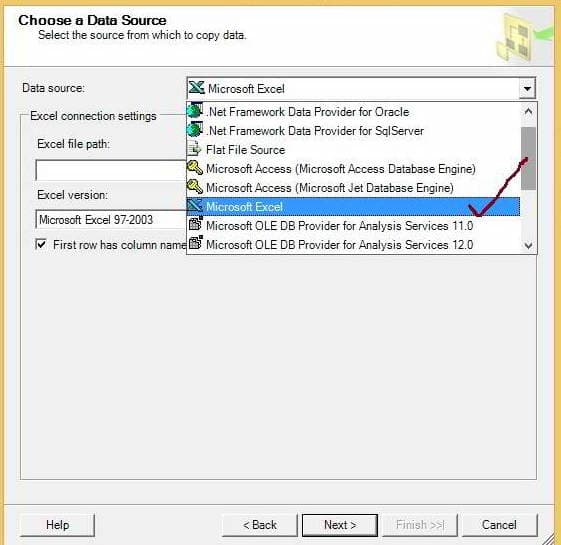
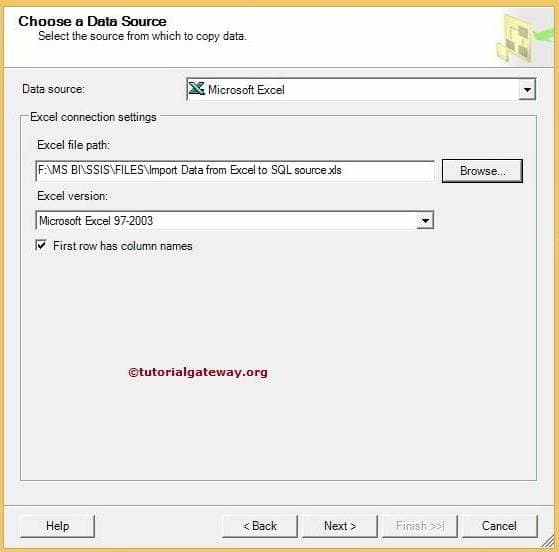
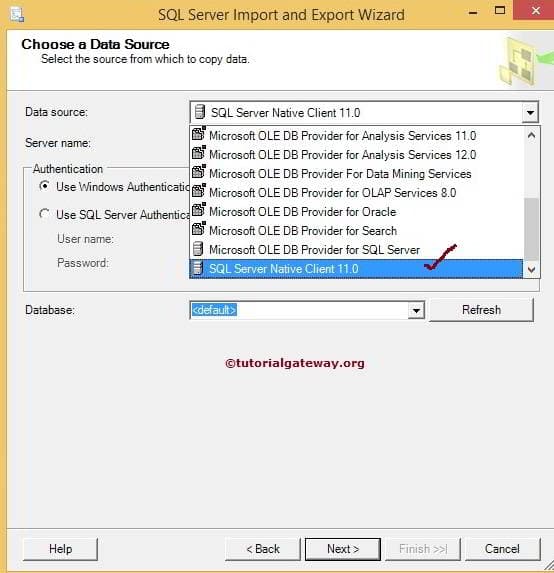
Choose a Data Source Page: This page is used to configure the source information. Our source is Excel file so we are selecting Microsoft Excel as our Data Source
Then we have to select the text file from our local drive
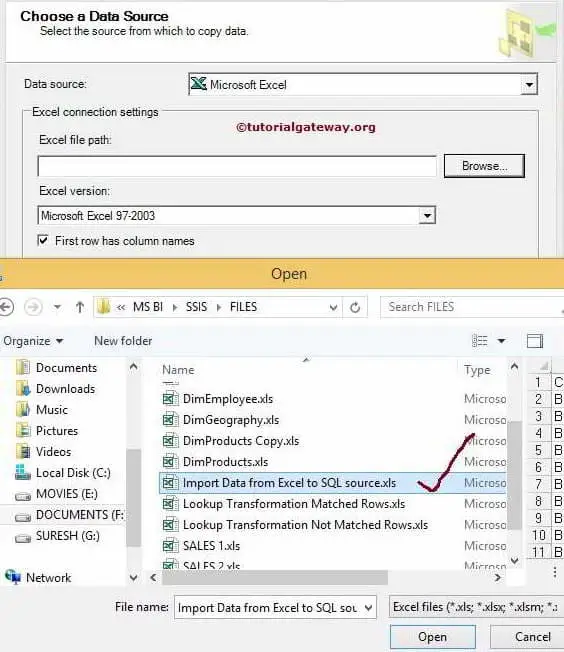
From the above you can observe that we selected the Excel file.
If your Excel file include column name in the first row then, tick the check box ‘Column name in the first data row’. If not, uncheck it.
Click on the Next button.
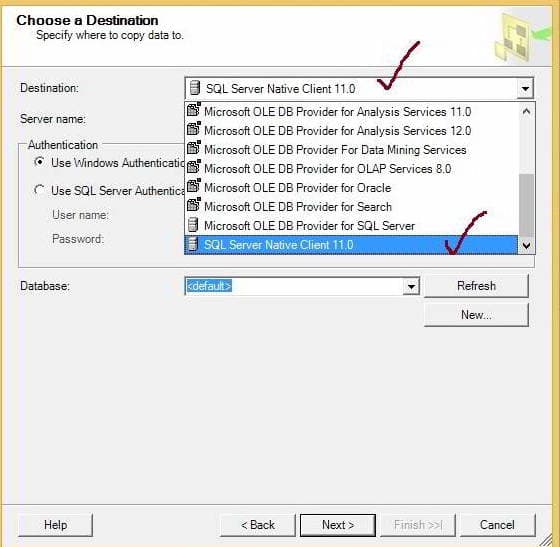
Choose a Destination Page: This page is used to configure the Destination information. Our target is SQL data base so we are selecting SQL Server Native Client as our Destination and we are using our own instance as sever name.
Select the destination database from the list, let us select the SSIS Tutorials here.
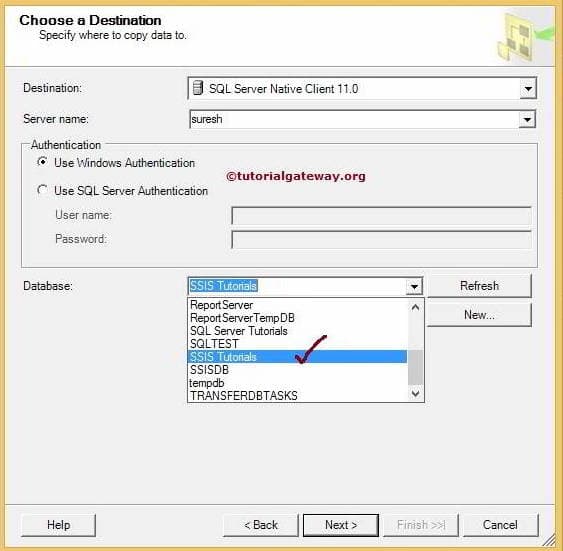
Authentication: Here we are using windows authentication but in real-time, your organization or company will provide the authentication credentials to access the database. In that case, you have to change the radio button to SQL authentication and provide the user name and password.
Click Next button
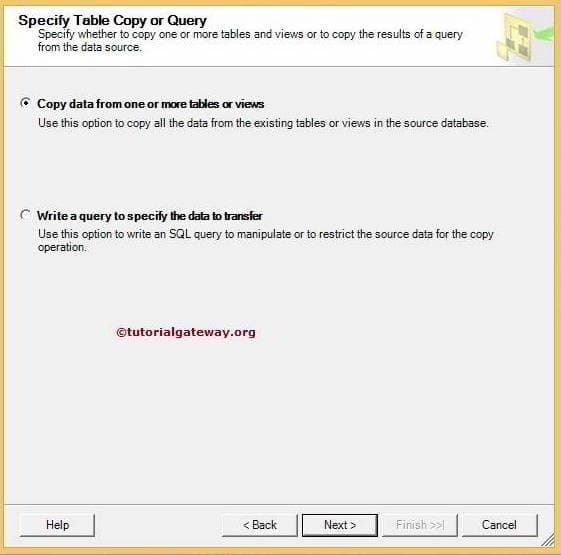
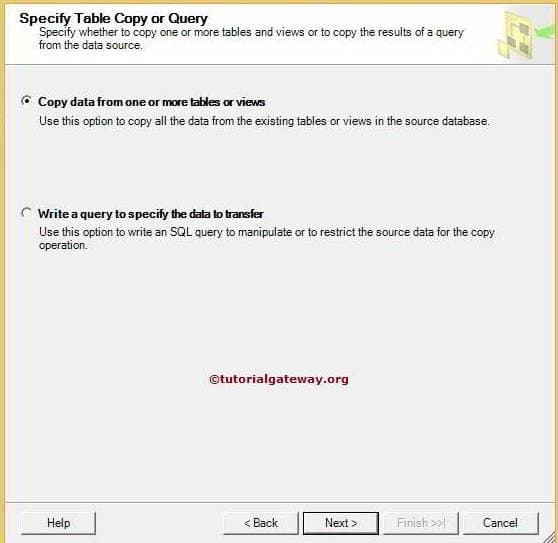
Specify Table Copy or Query: Here we have two options
Copy data from one or more tables or views: Use this option to select from existing tables or view (All the columns data)
Write a query to specify file data to transfer options: This is the option we normally use because there will be unnecessary columns in every table so it is better to avoid them or selecting data with condition.
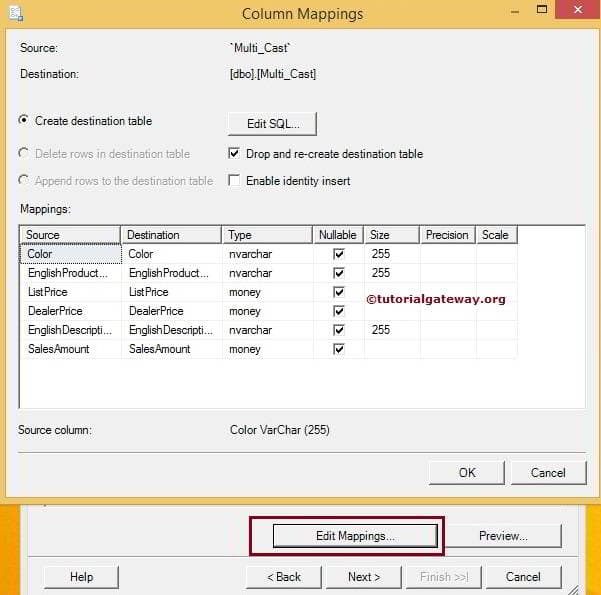
Select Source Tables and Views: This page is used to select the destination table from SQL data base if you have already created. If not click on Edit Mappings button will open the window like below to create table and also Edit SQL button to customize
Click on Edit Mappings button
Click ok
From the above screenshot you can observe that,
Here we can create new table or we can customize already existing table by clicking Edit SQL button.
We can drop the existing table and recreate it by selecting Drop and re-create destination table
Enable identity insert option will help you to insert values into identity column

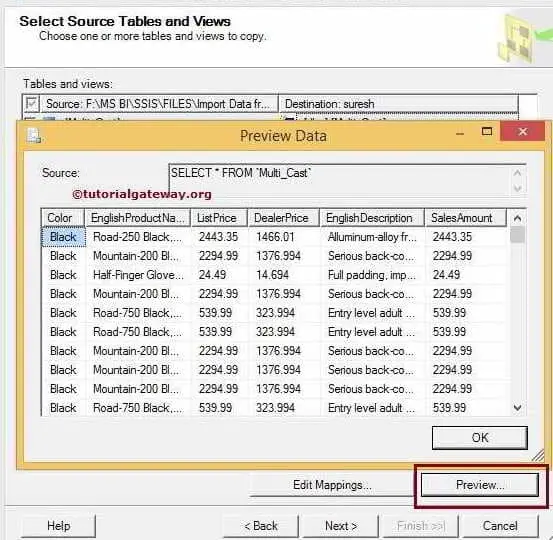
Preview button is used to see the column data.
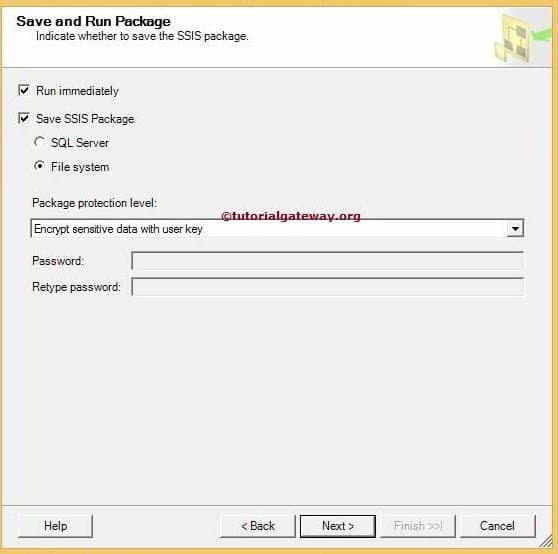
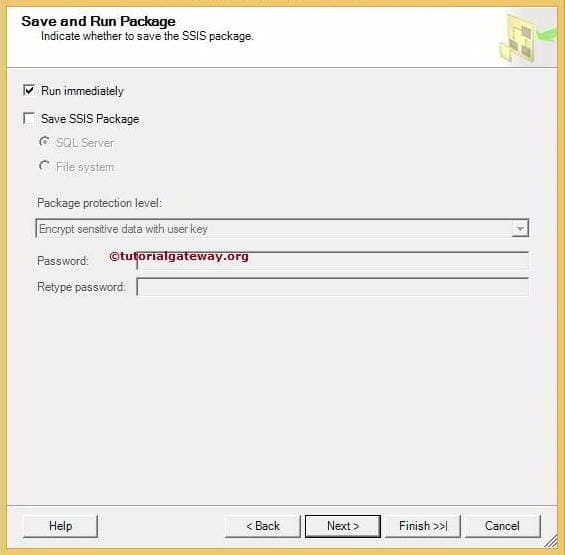
Save and Run Package: This page gives us the option to save the package in either SQL server or File system. For the time being we are selecting file system
Click Next button
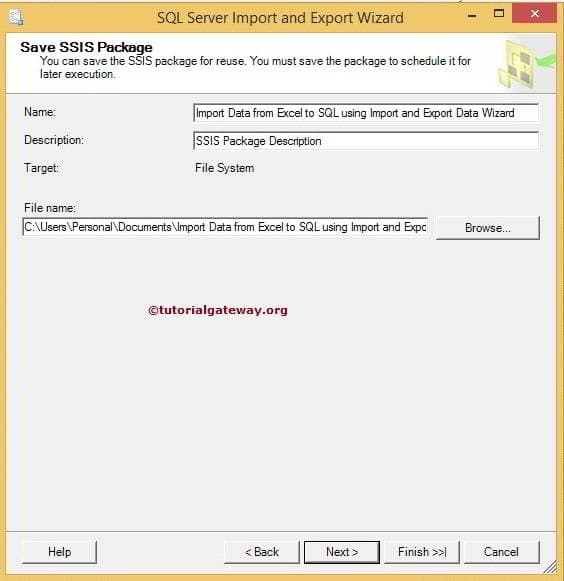
Name: Change the package name as you wish
Description: Write your own description
File Name: Select the file name and file location by clicking on the Browse button and navigate to the appropriate location. (This is the place, where the package is going to save).
Click Next
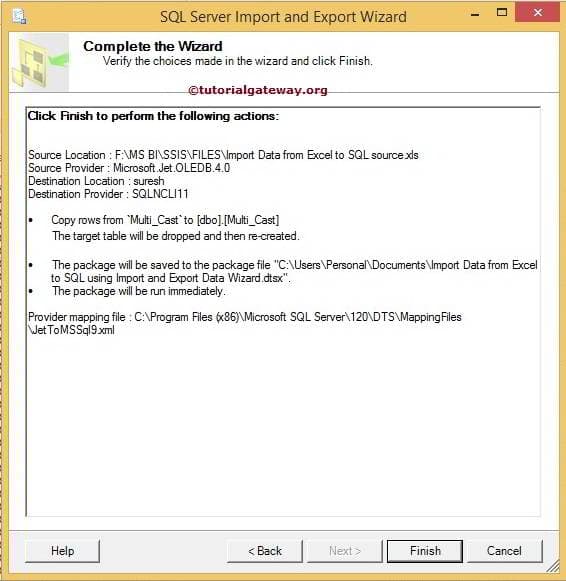
Click finish button to complete the Wizard. Let’s open the SSMS and check the output data
Export Data from SQL Server To Excel Using SSIS Import And Export Wizard
In SQL Server 2014, We have SQL Server Import and Export Wizard, which can help to import or export data from various sources to different destination using Wizard. In this example, we are going to export [Sales 2] table data present in the [SSIS Tutorials] Database to Excel file present in the local hard drive using SQL 2014 Import And Export Data Wizard.
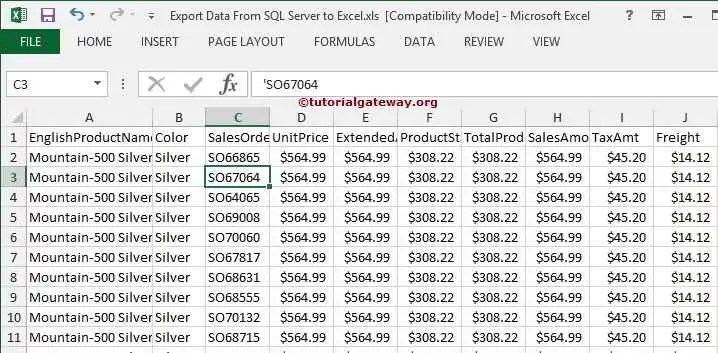
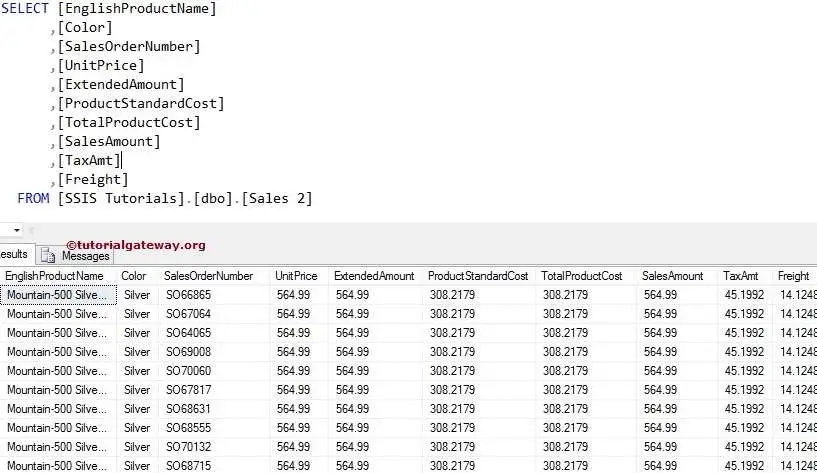
Below screenshot shows you the data present in the [Sales 2] Table
Double click on SQL Server Import and Export Wizard tool (you can find in start -> All Programs -> Microsoft SQL Server 2014 -> SQL 2014 Import and Export Data Wizard). It will open SQL Server Import and Export Data Wizard. First page is the welcome page
If you don’t want see this page again then Please tick the check box “Do not show this starting page again”. For now click Next
Choose a Data Source Page: This page is used to configure the source information. Our source is SQL data base so we are selecting SQL Server Native Client as our source and we are using our own instance as sever name.
Select the source data base from the list, let us select the [SSIS Tutorials] here.
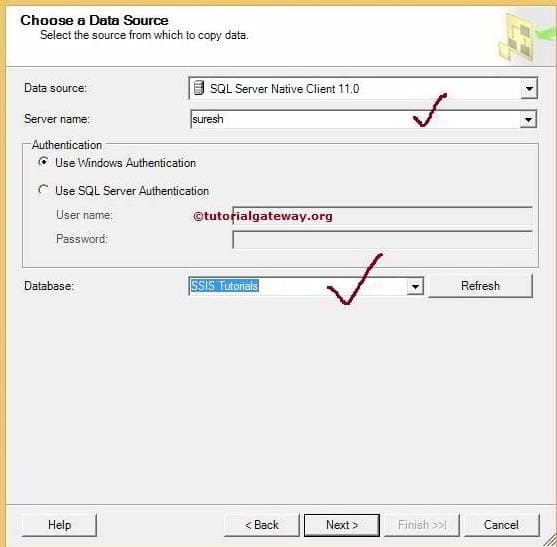
Authentication: Here we are using windows authentication but in real-time, your organization or company will provide the authentication credentials to access the database. In that case, you have to change the radio button to SQL authentication and provide the user name and password.
Choose a Destination: This page is used to configure the destination information. Our target is to save the data into Excel file so we are selecting Microsoft Excel as our Destination

Then we have to select the existing Excel file from our local drive
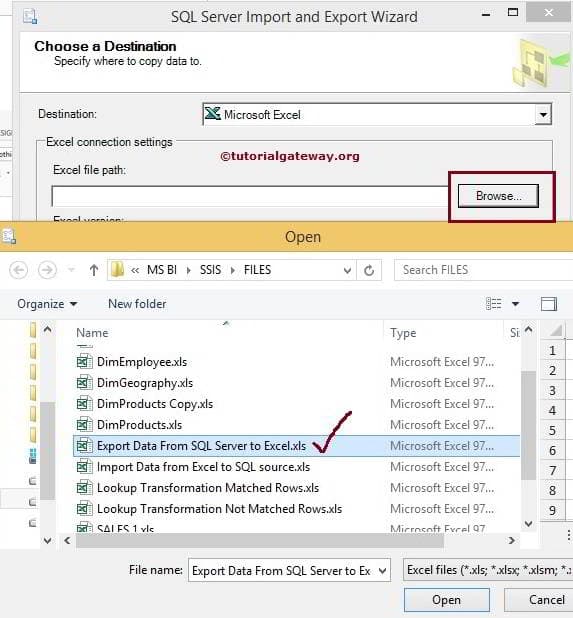
From the above screenshot you can observe that, We are selecting the Export Data from SQL Server to Excel file. Click Open button to select it
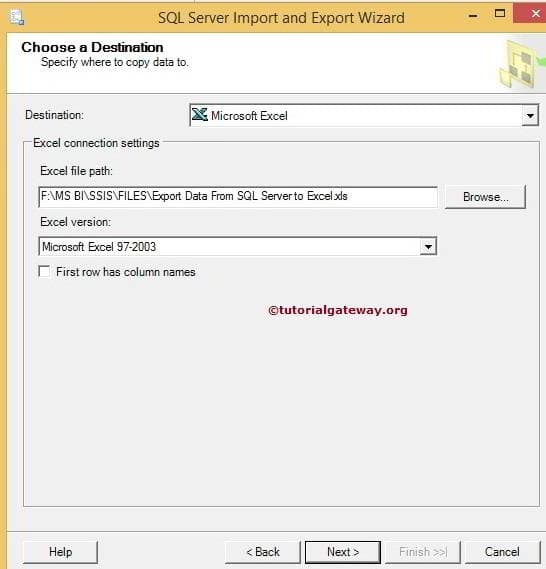
If your Excel file includes the column names in the first row then check mark the check box “Column name in the first data row”. If not, uncheck it.
Click Next button
Specify Table Copy or Query: Here we have two options
Copy data from one or more tables or views: Use this option to select from existing tables or view (All the columns data)
Write a query to specify file data to transfer options: This is the option we normally use because there will be unnecessary columns in every table so it is better to avoid them or selecting data with condition.
For the time being we are selecting every row so we selected the first option. Click Next button
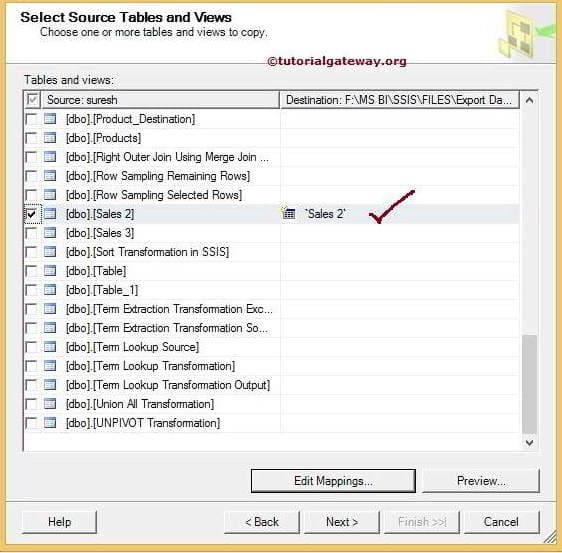
This page is used to select the source table from SQL data base you want to use as source. Here we are selecting [Sales 2] table. If your Excel file already contains the table to hold the output then select the appropriate Excel table from the destination list otherwise, SQL Server Import and Export Wizard will generate the table name as shown in below screenshot. Click on preview button to check the incoming data flow
Click on Edit mappings button to change the Data types and size of each column. You can also edit the table creation using Edit SQL button
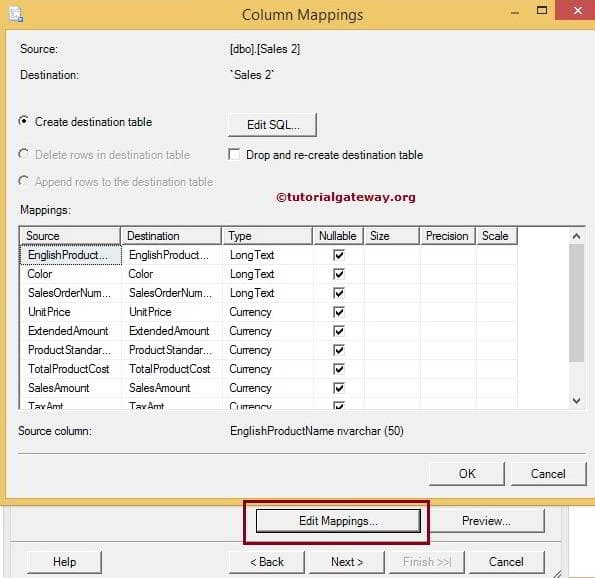
From the above screenshot you can observe that, English Product Name, Color and Sales Order Number columns are of type LongText which is not compatible with the source data in SQL Server. So, let us change the data types.
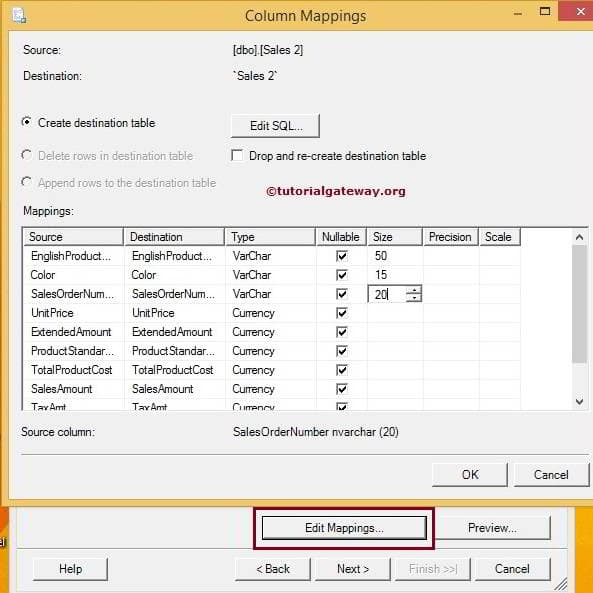
We changed the above mentioned columns to VarChar and assigned the required sizes as well. If you forgot to change the Size of a column then data will be truncated so please change the size of the each column to match with source columns.
Save and Run Package: This page gives us the option to save the package in either SQL server or File system. For the time being we are not saving the package
Click finish button to complete the Wizard
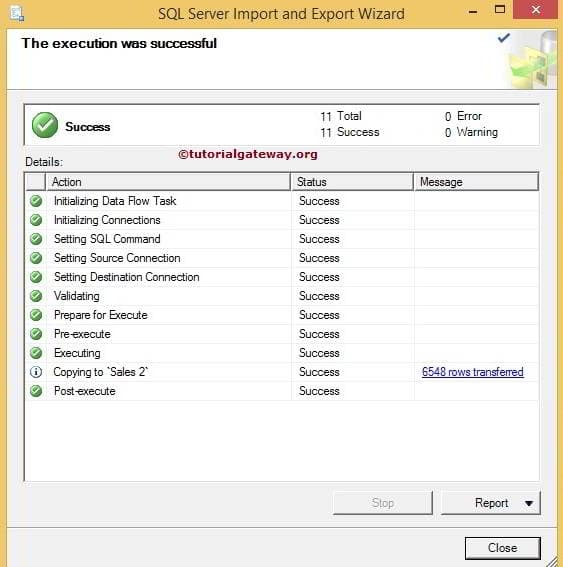
From the above you can observe the status: Success and Message.
Let’s navigate to file system address we provides and check for the file name Export Data from SQL Server to Excel. Double click on Excel file to check the result